Follow this for SMPH users (on MSAD) to setup set up a network printer on Mac
| Info |
|---|
| Make sure user is on WIRED NETWORK OR GlobalProtect -VPN |
- Download Driver
Download the canon printer drivers from one of these two locations:
...
*Note: these will take you to the same download (get the latest one for latest OS)
Copy Zip file from Apps volume to desktop. Extract and run the installer.
...
Install the Printer (
...
by Server using Advanced Widget)–Preferred Method
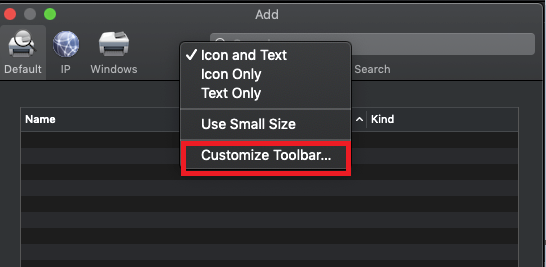
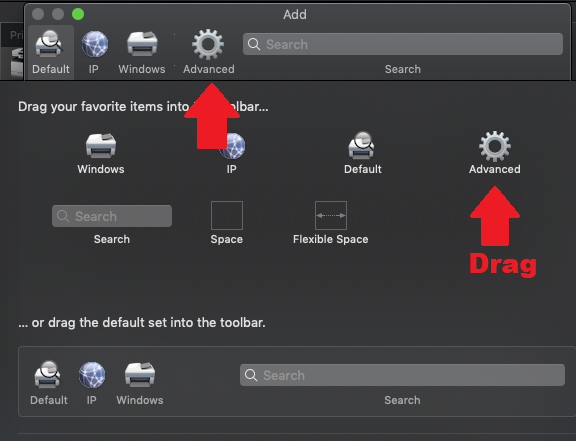
Add “Advanced” widget to server menu if it isn’t displayed by selecting “Customize Toolbar” and dragging the “Advanced” widget into an empty space and click Done.
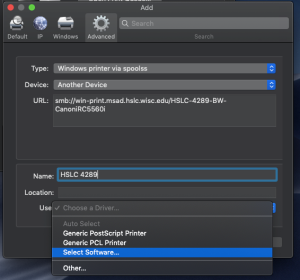
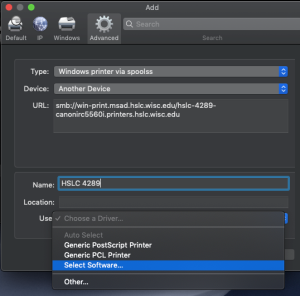
- Type: Windows printer via spoolss
- Device: Leave Blank
- URL: smb://win-print.msad.hslc.wisc.edu/PRINTERNAME (where PRINTERNAME = printer share name from Printer Inventory)
- Name: Enter the desired name (HSLC 4289)
- Driver: Select Software (Canon)
...
After the installation is complete click Apple Menu - System Preferences then choose Printers & Scanners icon, click the + symbol to Add one or more of the following printers under the IP tab.
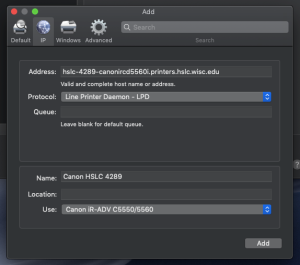
Address:
SMPH
- hslc-4150-canonirc5560i.printers.hslc.wisc.edu
- hslc-4159-canonirc5560i.printers.hslc.wisc.edu
- hslc-4289-canonirc5560i.printers.hslc.wisc.edu
ITCR
Protocol: Line Printer Daemon - LPD
Queue: Leave blank
Name: (corresponds to address)
- Canon HSLC 4150
- Canon HSLC 4159
- Canon HSLC 4289
Location: (corresponds to address)
- HSLC 4150
- HSLC 4159
- HSLC 4289
Use: Users on Wireless network
Choose Select Software…, search for 5560, select Canon iR-ADV C5550/5560, then click Add
Note 1: ICTR’s Canon is a 5535i use different corresponding driver.
Note 2: you might get an unable to verify on network message, click continue.
Install the Printer (by Server using Advanced Widget)
Add “Advanced” widget to server menu if it isn’t displayed by selecting “Customize Toolbar” and dragging the “Advanced” widget into an empty space and click Done.
- Type: Windows printer via spoolss
- Device: Leave Blank
- URL: smb://win-print.msad.hslc.wisc.edu/PRINTERNAME
- Name: Enter desired name (HSLC 4289)
- Driver: Select Software (Canon)
- Click on “Add”
- Check Box for Duplexer
- Print Test page:
- Non MSAD users will require authentication first time printing (SAVE CREDENTIALS)
...
Configure the Printer
Once the printer is added, make sure it’s selected in the System Preferences - Printers & Scanners window and click on Options & Supplies... under the Utility button click Open Printer Utility.
Under Options button, configure appropriate settings (see Image), then click OK.
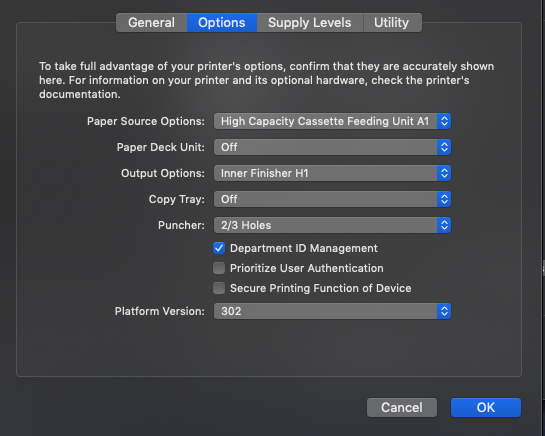
- Paper Source Options: High Capacity Cassette Feeding Unit A1
- Paper Deck Unit: Off
- Output Options: Inner Finisher H1
- Copy Tray: Off
- Puncher: 2/3 Holes (only for the HSLC-4289)
- Platform Version: 302
- Departmental ID Management*: TOGGLE on for those that require departmental ID
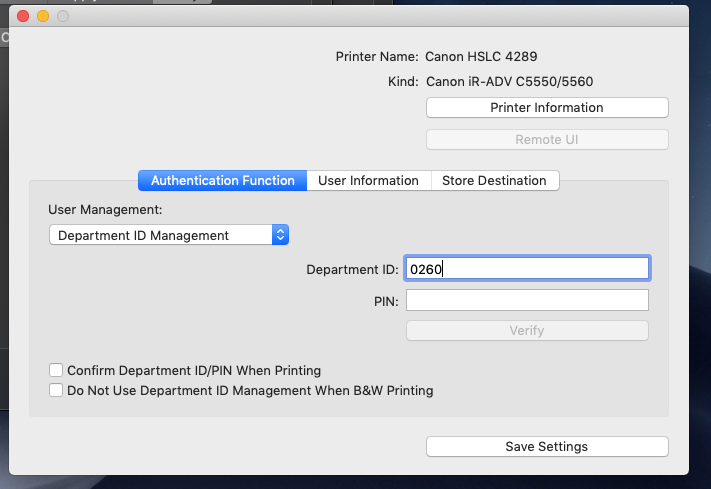
*Copiers with Departmental ID (HSLC-4289, HSLC-4159, HSLC-4150)
In the Authentication Function under User Management: change the drop menu to Department ID Management, then add the appropriate code* to the Department ID: field, leave PIN blank. Click “Save Settings” and close the window.
...
Click Save Settings, then close the Printer Utility window.
Under Options button, configure appropriate settings (see Image), then click OK.
...
...
Save B&W and Color presets
...