...
- From the Apple Menu select System Preferences..., then choose Printers & Scanners.
- Click the + symbol.
- A window will pop up, right click (Ctrl-Click) at the top area of the toolbar and click on Customize Toolbar..., click on Advanced and drag the gear symbol up into a blank area of the toolbar.


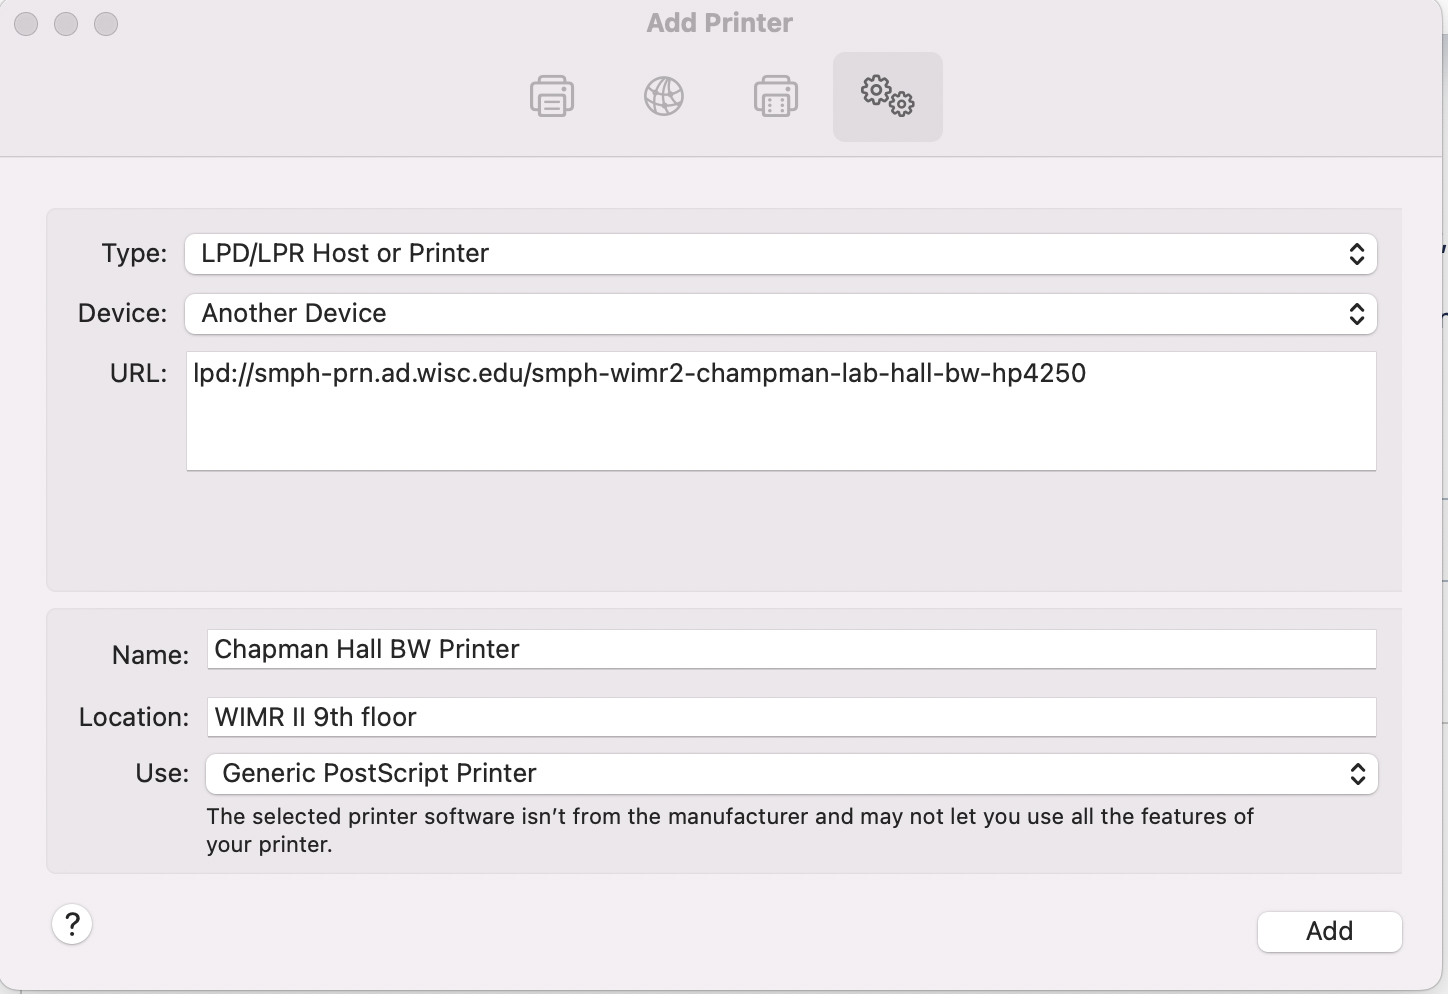
- Click on the newly added Advanced icon and enter (the URL needs to match the name of the printer exactly):
- For Type: Click the dropdown and select LPD/LPR Host or Printer
- For Device: Leave as "Another Device"
- For URL: You are going to use the format indicated in the screenshot below which will look like something like this: lpd://smph-prn.ad.wisc.edu/smph-wimr2-hall-color-HP-452dn where the lpd is the protocol, the "prn" portion is our IT print server, and the portion after the last slash is the name of YOUR lab printer (obtain from IT)
- For Name: Once the URL field is fully typed out, give the computer a minute and watch for the swirling icon on the bottom. When it looks like the window is no longer loading, type in a name for the printer that makes sense for you, such as "Johnson Lab Printer HP Color". This will be the display name of the printer when you go to print to it.
- For Location: Put in the physical location of the printer as best possible
- For Use: You can leave this as "Generic PostScript Printer". Note* some non-HP printers may require us to assist you with downloading a specific Driver for the printer but most should use this.
- Click add, and if the printer is duplex (can print double-sided), select this on the next screen when prompted. Can click OK after this.
- Now double-click on the printer on the left-hand side of the Printers & Scanners menu, Click on the "Printer" menu on the toolbar up above and select "Print Test Page". If the printer gets stuck after a few minutes on "ready to print" and does not ultimately advance, you may have made a typo when adding it. If this is the case, go back into the printer menu, select the printer, select the minus to delete it, and walk through the process again.
...