Follow this for SMPH users (on MSAD) to set up a network printer on Mac
| Make sure user is on WIRED NETWORK OR GlobalProtect -VPN |
Download the canon printer drivers from one of these two locations:
smb://files.hslc.wisc.edu/apps/PrintDrivers/CanonIR5560i/Mac Version/ UFRII_v10.16.00_Mac.zip
smb://files.hslc.wisc.edu/apps/PrintDrivers/CanonIRC5535i/Mac Version/ UFRII_v10.17.0_Mac.zip
*Note: these will take you to the same download (get the latest one for latest OS)
Copy Zip file from Apps volume to desktop. Extract and run the installer.
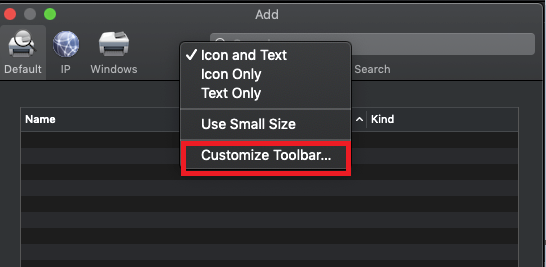
Add “Advanced” widget to server menu if it isn’t displayed by selecting “Customize Toolbar” and dragging the “Advanced” widget into an empty space and click Done.

Note 1: ICTR’s Canon is a 5535i use different corresponding driver. https://www.usa.canon.com/internet/portal/us/home/support/details/copiers-mfps-fax-machines/multifunction-copiers/imagerunner-advance-c5535i?tab=drivers_downloads
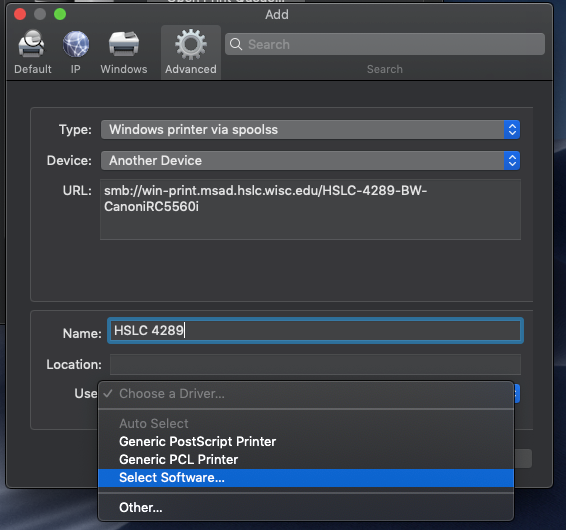
Note 2: you might get an unable to verify on network message, click continue.
Once the printer is added, make sure it’s selected in the System Preferences - Printers & Scanners window and click on Options & Supplies... under the Utility button click Open Printer Utility.
Under Options button, configure appropriate settings (see Image), then click OK.
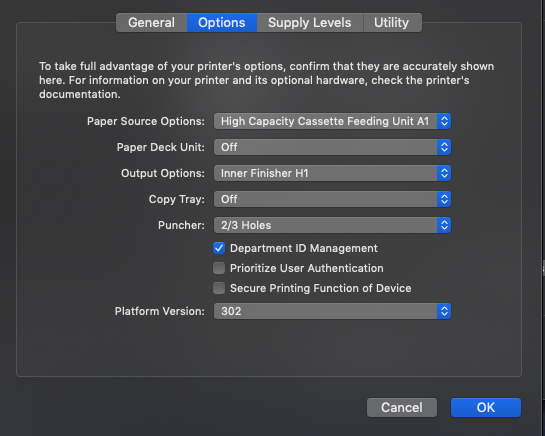
*Copiers with Departmental ID (HSLC-4289, HSLC-4159, HSLC-4150, HSLC-1161)
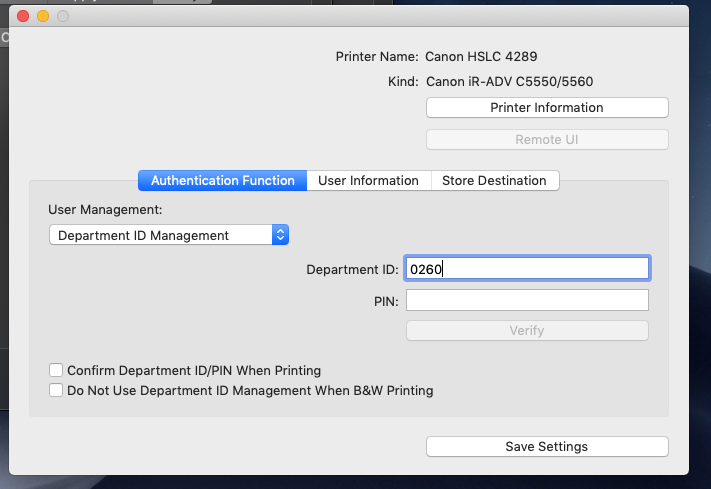
In the Authentication Function under User Management: change the drop menu to Department ID Management, then add the appropriate code* to the Department ID: field, leave PIN blank. Click “Save Settings” and close the window.
*Canon Copier Codes for Departments:
Optional: Clicking the Verify button should post the following message: “The entered authentication information is correct.”
Secure Printing:
In the User Information under Enter Name - Name: type in your name.
Under PIN for Secured Print: enter a PIN (of your choice) to be used for secure print jobs
Click Save Settings, then close the Printer Utility window.
Open a blank document in Word select File - Print, under Printer choose an appropriate printer (Ex. Canon HSLC 4289)
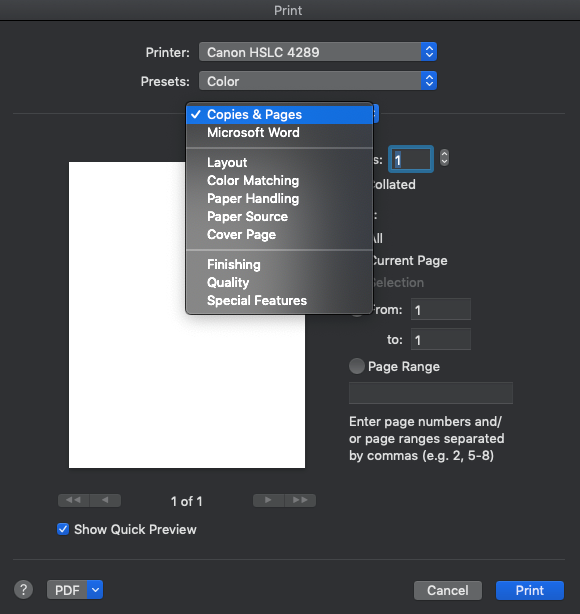
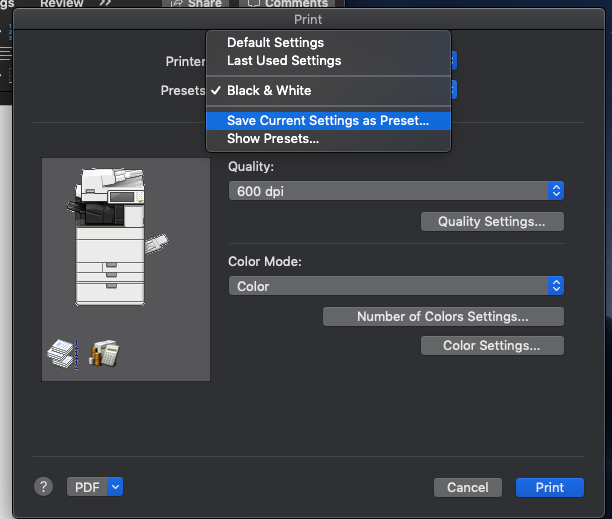
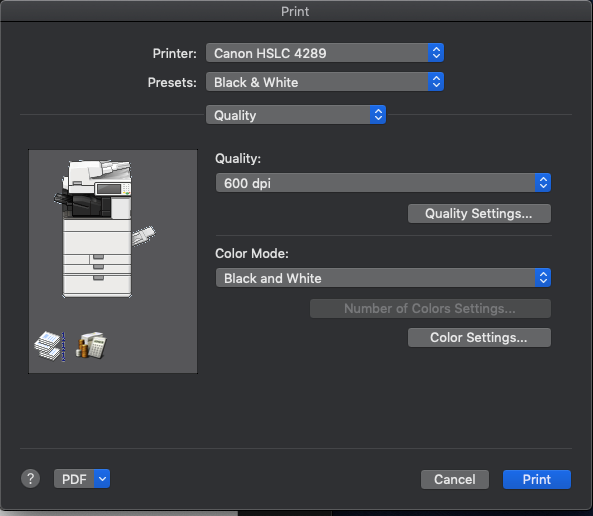
Change Copies & Pages to Quality, under Color Mode: choose Black and White then in Presets: choose Save Current Settings as Preset… under Preset Name: enter Canon 4289 B&W (Only this printer) then click OK.
Repeat this process to create a Canon 4289 Color preset and/or for single-sided printing if user requests.
