This is a compilation of tips, tricks, and workarounds sourced by the Qlik Developer Community for developing content in Qlik Sense. Content in this guide will expand as items are encountered.
Table of Contents

Functionality
How to Filter at the Object Level
Author: Melissa Chan
Last edited: 11/9/20
Need
By default, Qlik filters all objects on all sheets at the same time. There is no built-in functionality to filter just one object (graph/chart/table) and not all other data in the app. This provides a workaround for creating a filter on just one object by using the Variable Input Extension.
Options that Do Not Meet this Need:
- Filtering the Where clause of the script editor filters all sheets, not just one.
- A default bookmark filters all sheets, not just one. Plus, the user needs to create the bookmark and set it as their default in order for this option to work.
- Alternate States requires the user to make the selection. It is not pre-defined by the developer.
Solution Overview
Using Variable Input Control (a built-in Qlik extension) meets all the needs listed above. Variable Input Control is typically used to compare outcomes based on user-selected data. For example, a user can estimate how much sales (outcome) will increase by selecting varying levels of discounts (variable), where a 75% discount would generate more sales than a 5% discount. A variable can be a calculation itself or a predetermined value. A variable that is simply equal to a field (with no calculation applied) acts like a filter.
To meet our needs, we will use this extension in a slightly different manner than intended. A high level overview of the steps involved are as follows, where the Developer will:
- Create a variable
- Add and format the Variable Input Control extension
- Tie the Variable Input Control to the desired object
Step-by-Step Guide
Follow along in the Qlik app Filter at the Object Level using Variable Input Control. Make a copy and open it in your Workspace to practice. In this example I created a variable that allows the user to filter Region on some objects but not all. See Qlik's page on Variable Input Control for more details.
- Create a variable
Qlik's How to Create a Variable explains what a variable is and also provides instructions on how to create one. - In upper right, click Edit
- In lower left, click Variables

- Click Create New
- Give the variable a Name starting with the letter 'v' or 'var' to distinguish from fields and functions. See Qlik's How to Create a Variable for more naming conventions.
- Under Definition, click fx and input the Field you want to filter on.
- For example set the Definition as the field: Region
Be sure to click on the orange fx to enter a field. Do not simply type it in the box as Qlik may not register it.
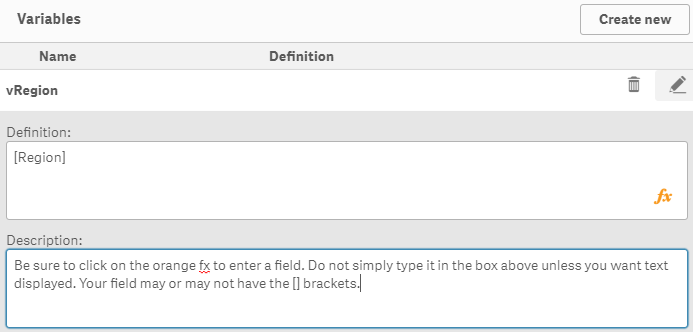
- If you want the input box to display instructions, simply type that text under Definition without clicking on fx. Example: Enter selection here
This displays in the box where the user can make selections.
- Description and tags are optional
- Click the pencil icon to save, then click Close.
- You've successfully created a variable!
Note: there are other ways of creating variables (such as in the script editor) and you can create multiple variables.
- Create the Variable Input Control. Read Qlik's How to Create a Variable Input Control for more details.
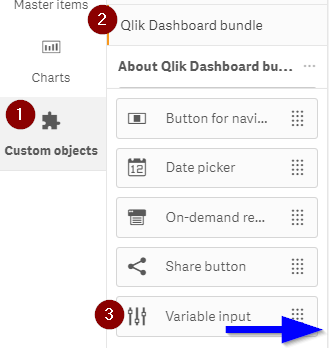
- With the sheet still in Edit mode, Go to Custom Objects > Qlik Dashboard bundle and drag Variable Input onto the sheet.
- Under General, type in a Title or select to not display the title.
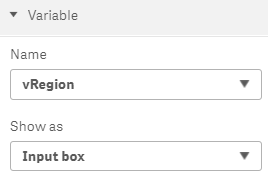
- Under Variable > Name, select the variable you created (in this case vRegion)
Keep it set to 'Input box' for now. I've found that order of operations matters and this works best when starting with the Input Box design. You can change it later.
- You've successfully created a Variable Input Control!
Note: At this point, your Variable Input box is simply that - a box. It currently has no impact on the app because it does not contain any values and is not tied to any object.
We will fix that in the next steps.
- Add a value to the Variable Input box. These must match existing values for the underlying field.
- In upper right, click Done to exit edit mode.
- In the input box, erase the existing text and type in a value that belongs to the field you want to filter on. It must match an existing value for that field. Example: Spain
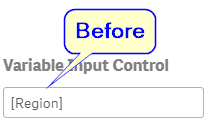
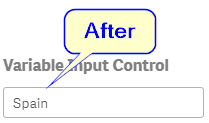
- You've successfully added 1 or more values to your Variable Input Control!
Note: The flow works most successfully by adding just one value to complete the set up. Once those steps are done, we will go back in to add add additional values.
- Tie the Variable Input to the desired object(s)
- In the upper right click Edit, then select the object you want to apply the Variable to.
- Edit a dimension to display only if the value that the user selects matches that same value of the field. For example:
Before: Region
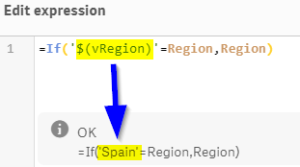
After: =If('$(vRegion)'=Region,Region)
The $ indicates the users selection. Since Region is a text field, the apostrophes changes the users value to text to match the field.
In this case, we entered Spain as the value. Therefore, only the Sum of Sales for Spain will now display.
Tip: Notice that the value you input appears in the footer of the Expression Editor.
If the formula isn't working, troubleshoot by removing apostrophes, changing the input value, and adding back the apostrophes until it works.
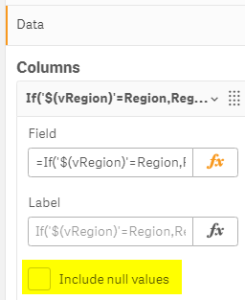
- Uncheck the box if you want to hide null values
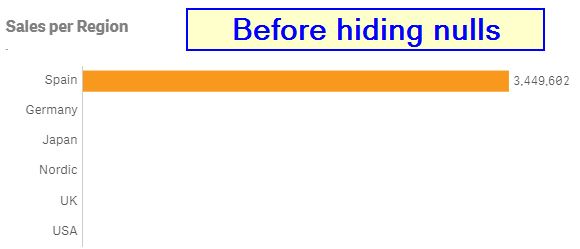
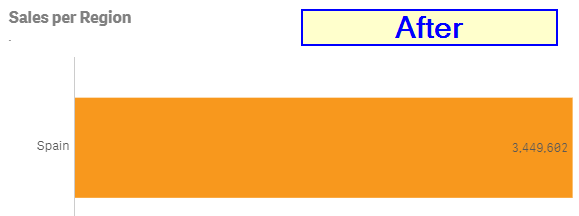
- Check that the amount matches the control group in the top half of the sheet.
- Repeat for any other desired objects
- Optional: Change the input style
We intentionally used the Text Input box to start because I encountered errors when starting with, say, the Drop Down. Now that the Variable Input extension is working, we can switch styles if desired.- In the upper right click Edit
- Select the Variable Input box to activate it
- On the right, click on Appearance > Variable
- Under Show as, select the desired option
- For Dropdown:
- For the Fixed dropdown
- Select Fixed values to type in each desired dropdown option
- Click Add Alternative
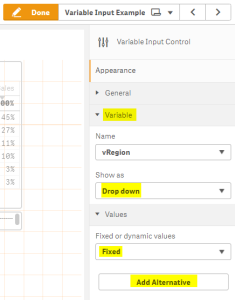
- Type one of the values both in the Value box and Label box. Be sure it is spelled exactly as one of the field's existing values.
- Repeat until all your desired values are included. Values appear in the order in which you add them.
- For the Dynamic dropdown
- Use a formula like the following to get all values to appear without manually entering them
=Concat(Distinct Region,'|')
Note: I have not found a way to rearrange the order the values are displayed with Dynamic dropdown. This formula does not support including Desc and using Order By after the Resident Table in the Script Editor does not work either.
- The Button option works similarly to Dropdown.
- Note: the Slider only works for numerical values
Congratulations! You learned how to create a Variable Input Control that acts as a filter at the object level. Try practicing this yourself using the 2nd sheet of this example app:
Filter at the Object Level using Variable Input Control
Related Links:
| You may also want to use visual panels to communicate related information, tips or things users need to be aware of. |


