Click in the link above if you are not automatically redirected in 10 seconds.
Accessing your SMPH Windows desktop when you are away from the office from a Mac
Staff computers should already have the GlobalProtect VPN software installed.
If you need to install it on your Mac computer. See the following Knowledge Base page for instructions:
WiscVPN - Installing and Connecting the GlobalProtect Client (Mac) - https://kb.wisc.edu/73116
You will also need the Microsoft Remote Desktop Client on your Mac.
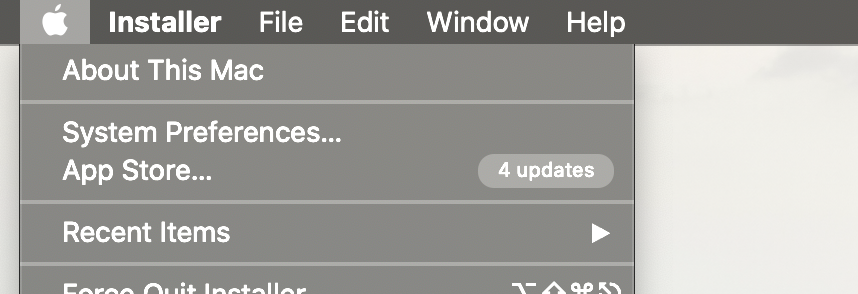
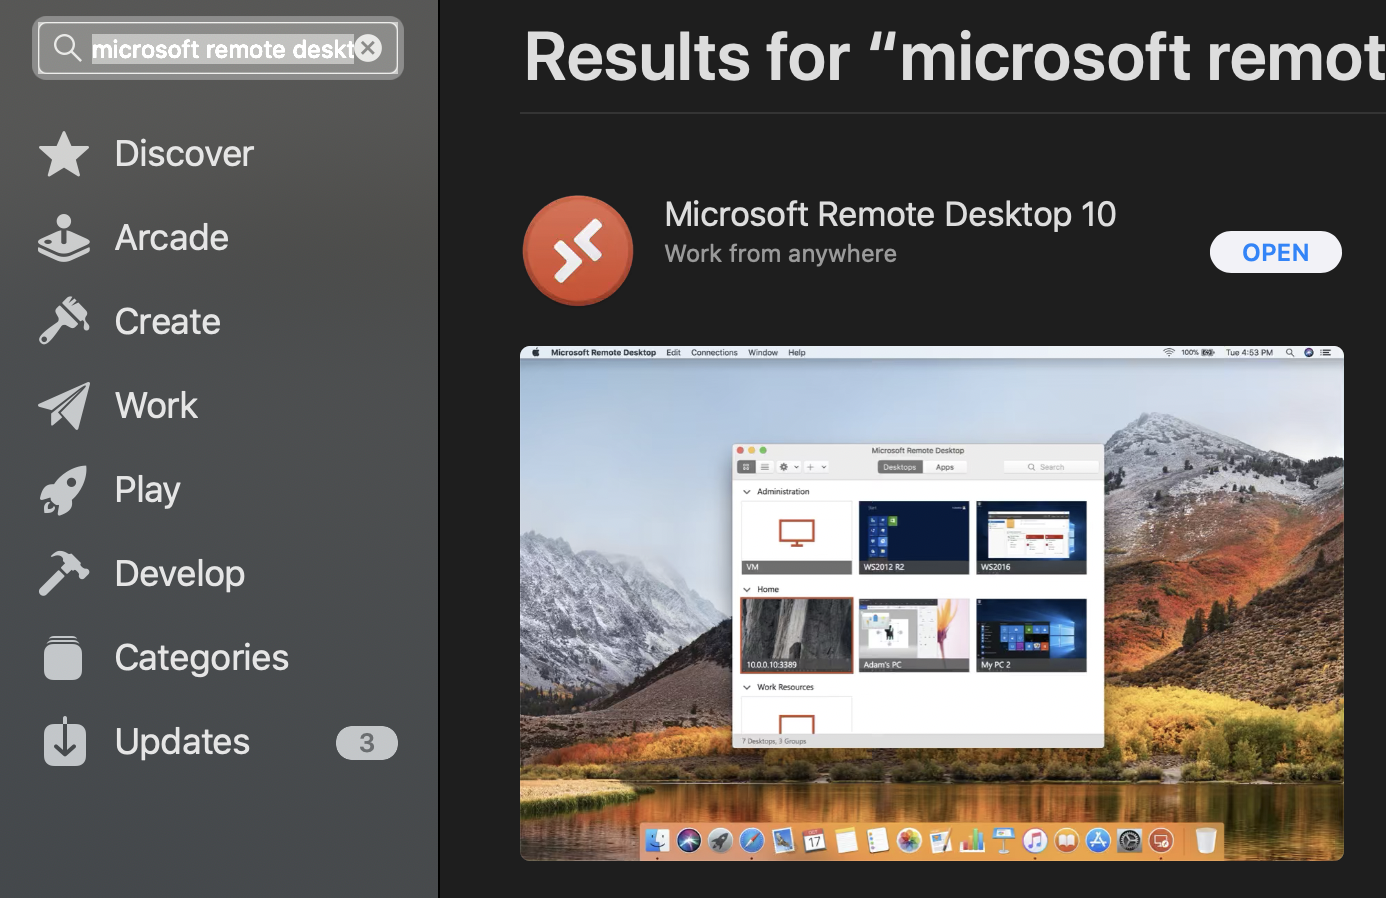
If you do not have this installed, press the Apple Menu > and then press "App Store...". Search for "Microsoft Remote Desktop" and when the result comes up, click the install option. Then proceed with the instructions below to get connected to your work PC.
Connecting from a MAC COMPUTER
- Connect to GlobalProtect VPN
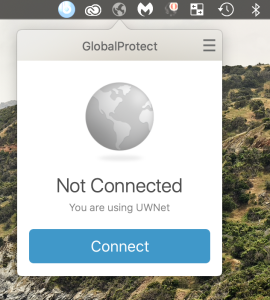
- Open the GlobalProtect icon on your Mac Toolbar (top right, looks like a globe) and click Connect.
- If GlobalProtect is not present, and you are on a work computer, email Shared Services IT at desktop.support@med.wisc.edu to have GlobalProtect installed. GlobalProtect is installed on all SMPH IT managed computers as standard software.
- If GlobalProtect is not shown, and you are on a personal computer, see https://kb.wisc.edu/73116 for download and installation instructions.
- Open the GlobalProtect icon on your Mac Toolbar (top right, looks like a globe) and click Connect.
b. If you are asked for a portal address, enter smph.vpn.wisc.edu
c. Press Connect
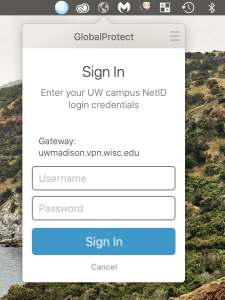
Verify portal address, enter your NetID and Password, then press Sign In
d. You should see a Connecting message and then GlobalProtect with disappear
e. If the connection was successful, you will see a shield symbol directly over the globe
2. Launch Microsoft Remote Desktop from your Applications menu or Dock and connect to Work Computer
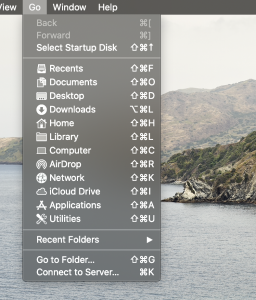
- Press the Go menu and click Applications. Double-Click on Microsoft Remote Desktop (orange icon).
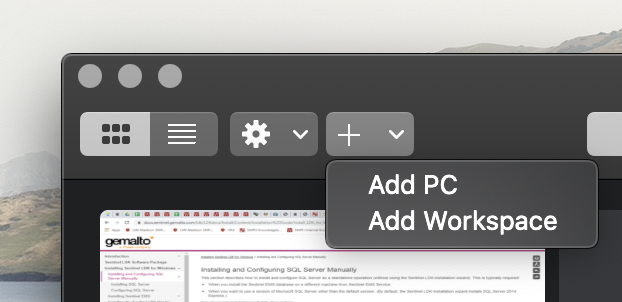
b. Press the arrow next to the plus button and press "Add PC"
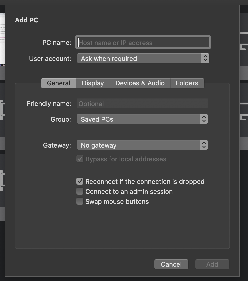
c. Enter your work computer name under "PC Name:" and press "Add". Then double-click on the new square thumbnail picture of your computer.
*** If you do not know your work computer name ***
Open a browser and go to the following address (NetID Login Required)
https://itutils.med.wisc.edu/ad/computerlookup.php **(note, you may have to copy this link, and paste it into internet address bar of your browser)
The above website should list most recently logged into computers.
Note: You need the full host name of the computer you are connecting to for the PC Name: entry.
Example: SMPHAD-BADGERB1.ad.wisc.edu (if an AD user) or SMPHAD-BADGERB1.msad.hslc.wisc.edu (if an MSAD users)
Note: Most research labs, PHS, PHI, etc. should be AD users, most administrative staff (HSLC) should be MSAD users.
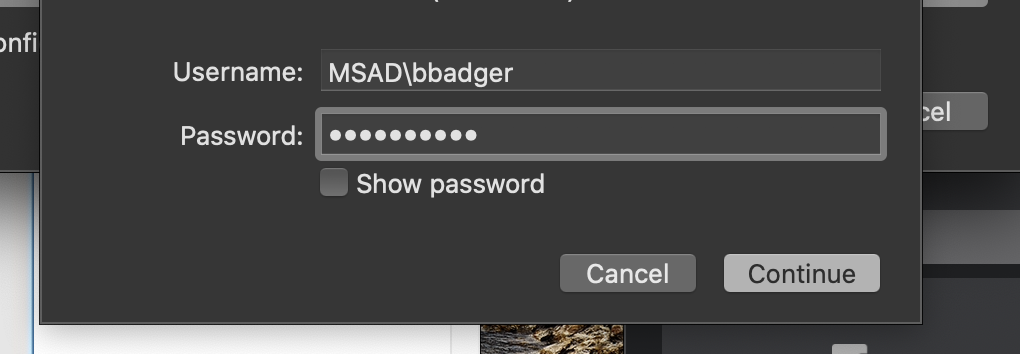
- Enter your credentials
- For Username, type in the same credentials you use to login to your work computer, with the exception of adding MSAD\ or AD\ before your name.
- Enter MSAD\Username if your computer name ends in msad.hslc.wisc.edu and enter AD\ if your computer name ends in ad.wisc.edu.
- Please reference "If you do not know your work computer name" above for full computer name.
- Enter MSAD\Username if your computer name ends in msad.hslc.wisc.edu and enter AD\ if your computer name ends in ad.wisc.edu.
- For Username, type in the same credentials you use to login to your work computer, with the exception of adding MSAD\ or AD\ before your name.
Example: MSAD\bbadger or AD\bbadger
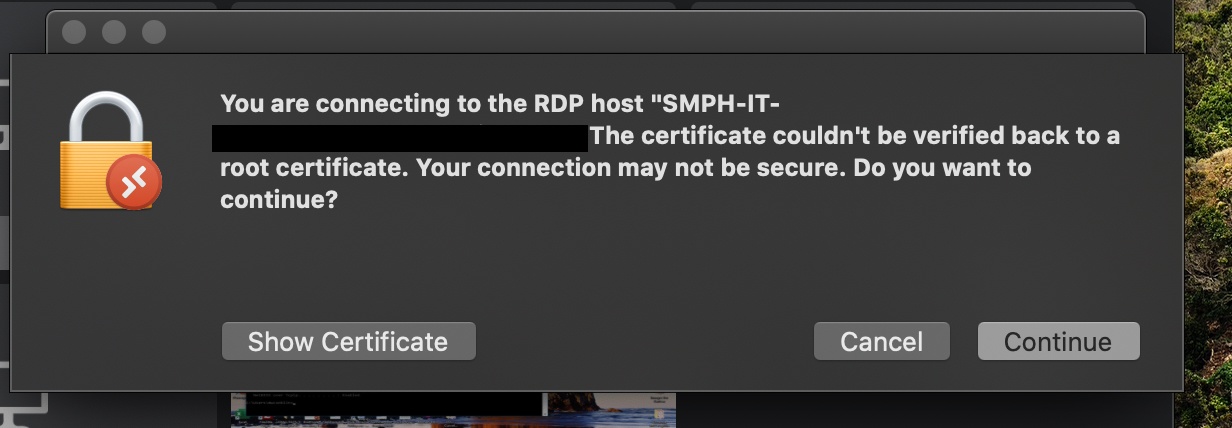
If prompted that the "The certificate could not be verified", and that your connection may not be secure, click "Continue". The VPN already provides a secure tunnel.
