To print from personally owned computers, you must be first connected to the VPN and run the lab drives script.3
This page was moved to kb.wisc.edu/134323
Click in the link above if you are not automatically redirected in 10 seconds.
Click in the link above if you are not automatically redirected in 10 seconds.
This process is the same for a personal Mac or a lab/group owned Mac. Once you have connected with the VPN and Lab Drives script, follow the steps below
- From the Apple Menu select System Preferences..., then choose Printers & Scanners.
- Click the lock symbol and unlock to make changes - login with administrator credentials.
- Click the + symbol.
- A window will pop up, right click (Ctrl-Click) at the top area of the toolbar and click on Customize Toolbar..., click on Advanced and drag the gear symbol into the toolbar.


- Click on the newly added Advanced icon, select LPD/LPR Host or Printer in the first dropdown, and add in the IP Address for YOUR printer similar to the screenshot below:
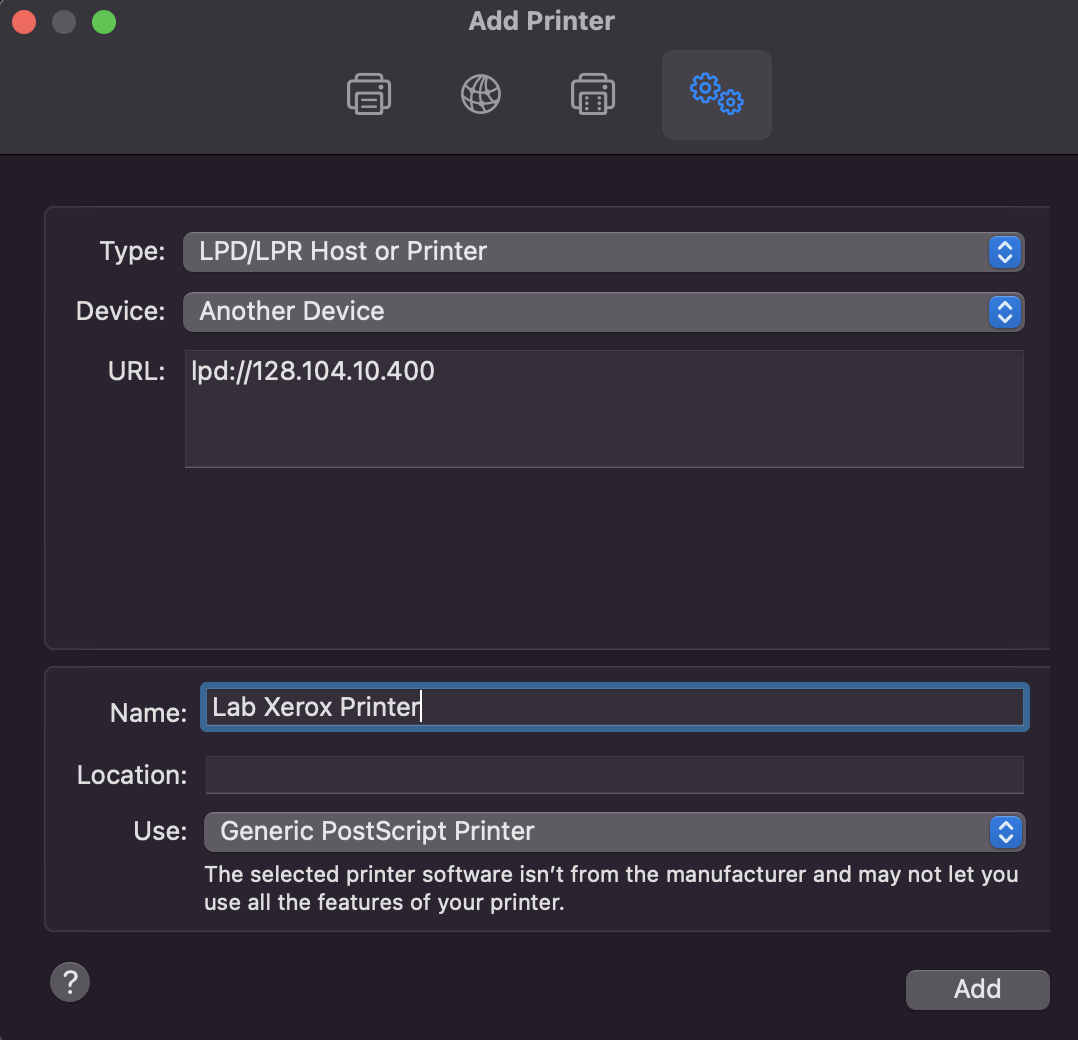
The driver can stay at the Generic PostScript Printer or if you see the specific driver for the printer, you can use that. The name can be whatever you would like to call the printer. - Click Add, select configuration specifics if there are any specifics (duplex printing, multiple trays, etc.) and click OK.
- The printer should be in the list and can be chosen to print.
On a personal computer, the drive mapping script MUST be run first.
Related articles
Content by label
There is no content with the specified labels