There are different phases of requirement cycle: requirement set, notification sent, documents uploaded and document downloaded/replaced.
Requirement setup
Creating the Requirement(s)
There are different ways to create a requirement:One way is to create from scratch and manually link other information to it. This is not the recommended way as it requires more manual work than batch requirement setting.
Dashboard > New > Requirement
It will bring up a full module for requirement setup that looks like the following screen:
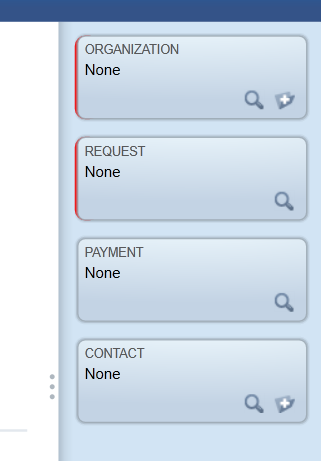
This way, make sure to set up all the required connections in the right hand side panel(Organization, Request, Payment, Contact):
The preferred way is to use the batch function which can be used for one or more requests at the same time.
This way, the user runs a search for the target request(s). Select the ones you need the requirement on and create a new requirement by navigating through:
Ribbon Menu > Actions > Create New Requirement
This will trigger a smaller screen to pop up:
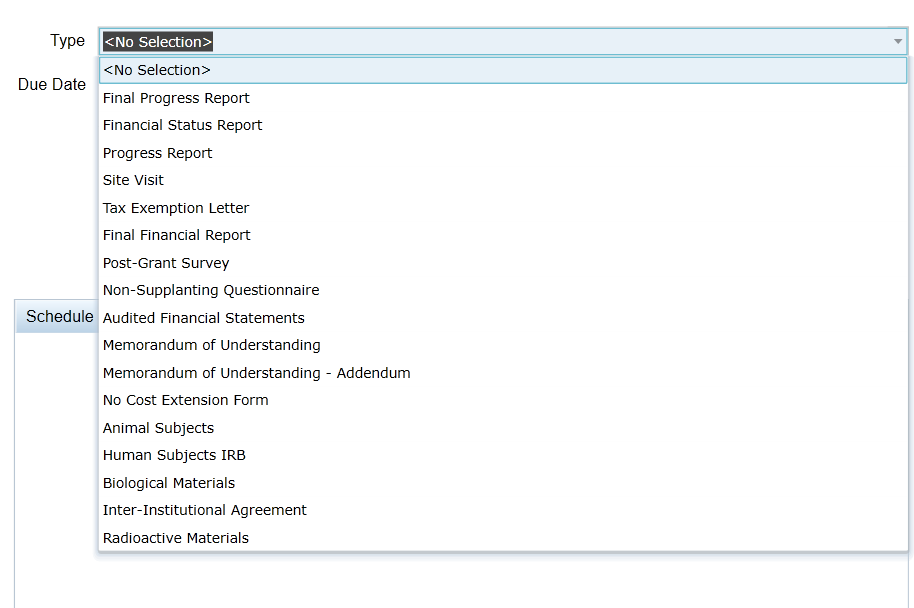
The type drop down designates the type of requirement we are trying to create which is at the moment of this writing the following list:
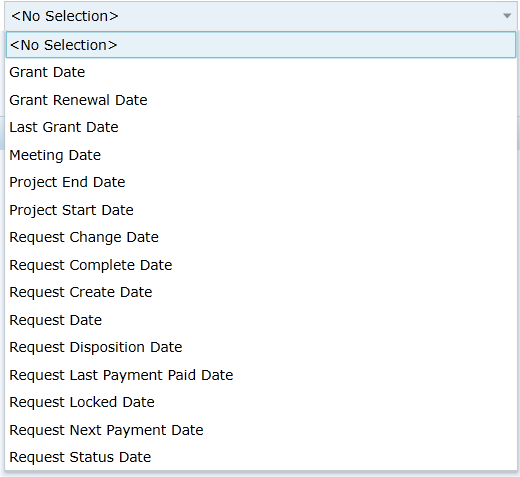
Also, the due date can be either chosen static with specific real date in it, or the second option will be choosing a date around one of the following dynamic deadlines:
And after that, hit the 'Add to Schedule' button to add it. You can add as many as needed to the schedule and then create them at the same time by clicking the OK button.
Click yes on the following popup:
And it will create the requirements.
Publishing the Requirement to the Web
Creating the requirement does not necessarily mean that they are available to the grantee. We need to publish it to the web for them to access it.
Search for all the requirements you need to be published and select the ones you want, then from:
Ribbon menu > Actions > Publish to the Web
This will asask you for the following information to e entered:
The online Requirement Form which has been created by an admin through Application Manager Extension App and the Grantee's email if a correspondence is necessary.
NOTE: If the checkbox for "Publish to request's owner" is checked the system will disable the "Grantee's E-mail Address" field. To enable that, you need to un-check that checkbox.
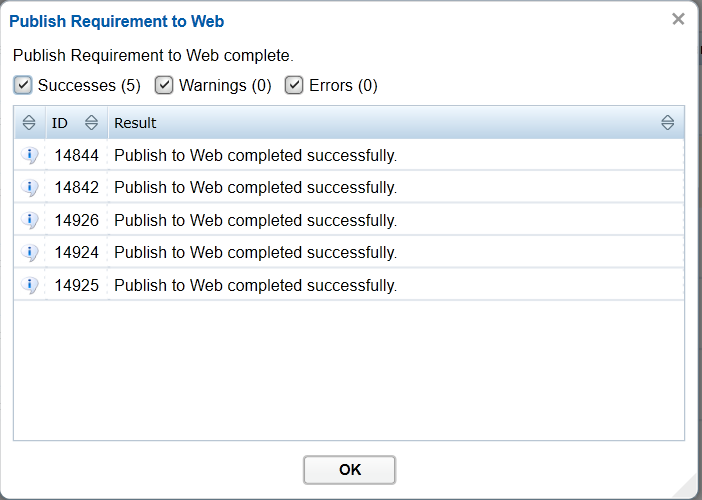
And if all goes well, you will see a success confirmation message popup:
Grantee uploads
Grantee needs to login to their portal:
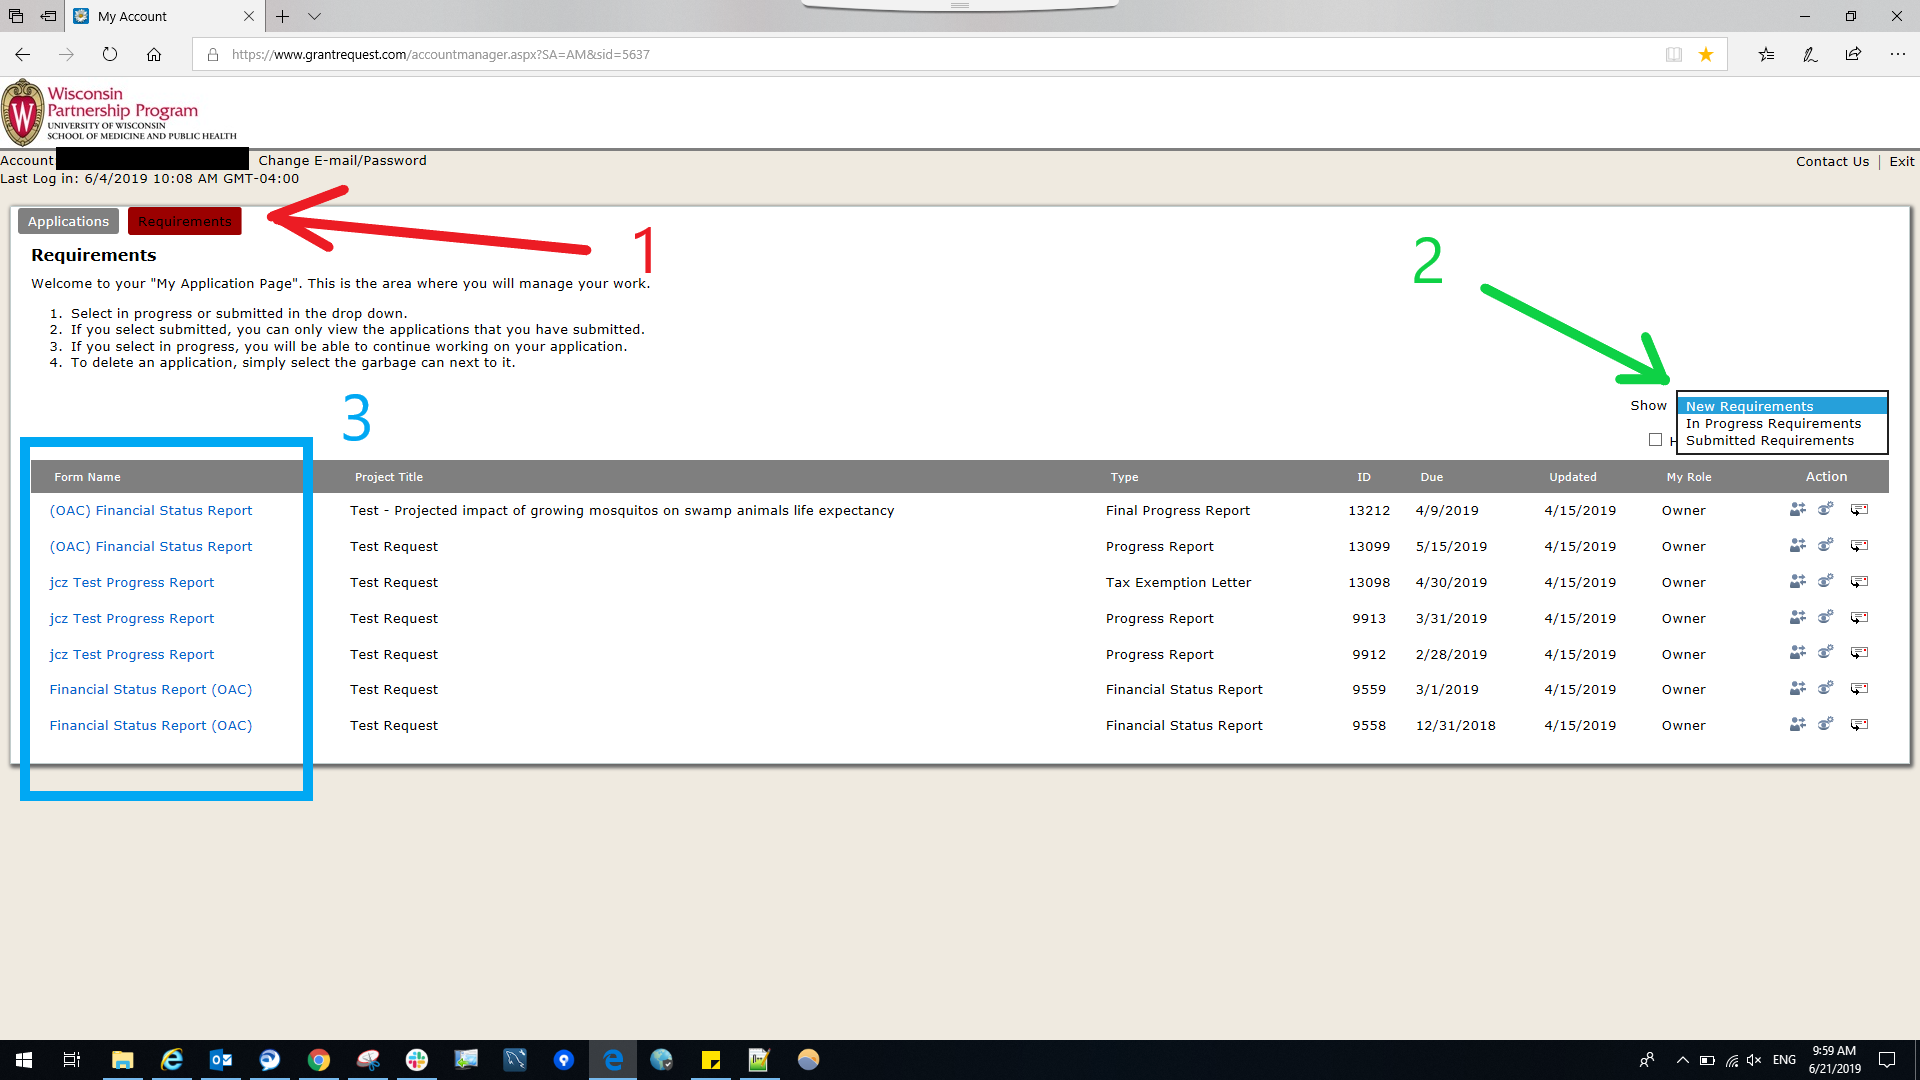
They need to click on the "Requirements" button on the top left hand side of the screen shown in the image above with the red arrow (1). And if they don't see their requirement, they need to use the dropdown from the left hand side (green arrow number 2) and go through the options until they see it. Any requirement submission request can be opened by clicking on their link shown in the blue box number 3 above.
Most requirements onlu need a document upload:
When the upload is done and saved and reviewed to be submitted.
Once they are submitted, they can be viewed, but not modified:
Retrieving requirements
After the requirement is submitted, Blackbaud get notified to retrieve them.
After retrieving them, the requirement will have a received date stamped (purple arrow number 1 in the image below):
When a requirement is reviewed and accepted and done, we click the "Done" button from Ribbons Menu > Actions > Done.
Viewing/Downloading documents
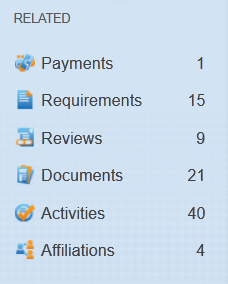
The document can be reviewed either from this screen (green box number 2), or from the request module on the left hand side under the "Documents" items:
Clicking on this item will bring up the list of the documents for that record type (Requirement, Request):
Usually, for the Requirement, there is only one Document, but you will see a lot more under Requests. Make sure either way you choose the correct document and open it by double clicking on it:
On the "Document" module, you can see a hyperlink for the document or from the ribbon menu (Actions > View Document) which is shown with the red arrows (1) in the image above.
Clicking on it will trigger the options to save or open the document (shown in the dark red box number 2 below the screen in the image above). If you don't see this, then you may have to disable the popup blocker on your browser.
After you reviewed and accepted, please make sure to go back to the requirement and enter the "Approved Date" and also click "Done" from the ribbon menu.
Uploading/Replacing/Modifying a Document
In the case an internal staff needs to upload a replacement for an already uploaded file, they can click on the "Upload Replacement" item from the Actions ribbon menu (red box number 1) on the top right hand corner of the document module shown with the green arrow number 2 below:
This will add a new field shown in the pink box number 3 below the previously uploaded file with a "Browse" button shown with the blue arrow number 4. When you click save, it will replace the old document with the new one.
Important Notes on modifying requirements
- In order to have the grantee to submit documents through an already submitted requirement, it has to go through “Requirement Publish Resubmission”. This will pop up a window allowing staff to modify the email text before the email is sent to grantee. You cannot opt out of sending the email to grantee.
- We can always add documents to requirements manually ourselves.
- If a requirement is submitted, we cannot change the form they were published with.
- If a requirement is not submitted yet (even if it is saved for later), it can be taken off the web. This will remove everything from the requirement that was saved( but not published) on the requirement.
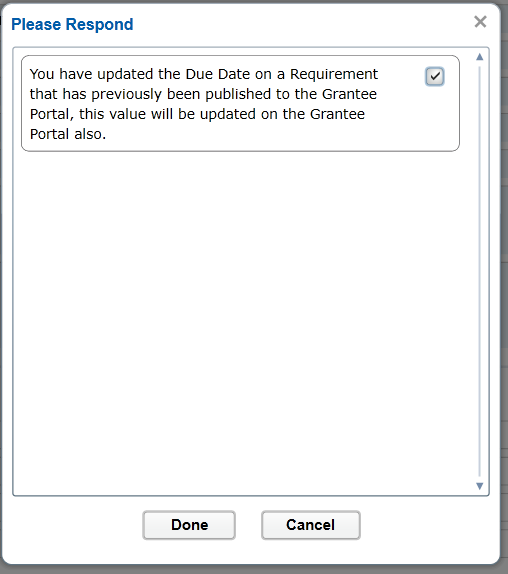
- If a requirement is not submitted, but it is published, if we change the type, it will not reflect on grantee's portal. If we are changing the due date, it will. If our change is going to show up in grantee's portal, we should get the following note which we need to check the checkbox and hit Done:
- The requirement type, if changed, will not reflect on the grantee's portal.
- If we need to have a form change or type change to be applied to grantee's portal, we can this by "removing from web" and re-publishing to the web; this can only be done on not-yet-submitted requirements.
- If documents are submitted to the wrong requirement A, we can ask the grantee to submit them to the correct one B. Then we need to re-open the first requirement A for them for later.
- Do not delete requirements that have been published. First remove it from the web, then delete it if needed. If you delete a published requirement, it may stay on grantee's portal. If they submit a requirement that is deleted, you will see the following error. The only wy to resolve it, is to contact Blackbaud customer support:
Editing requirements
Any edit on requirement after published to the web is not going to show up in grantee's portal except for the due date.
Do not delete a requirement from the web unless you are sure that the grantee has not started it yet. If they have saved documents in it, then when we delete it from their account, it deletes all their saved stuff for the same requirement as well.
The only way to change it is to delete from the web first, modify it, published to the web.
We can open a submitted requirement for resubmission. Just a note that in this case, we will not be able to change the requirement form.
