Checklist
1- Make sure you can get into the session easily
2- Check your audio to make sure it is working
3- Get the dial in number and pin immediately after signing in
Signing into the room
Follow the link provided to you.
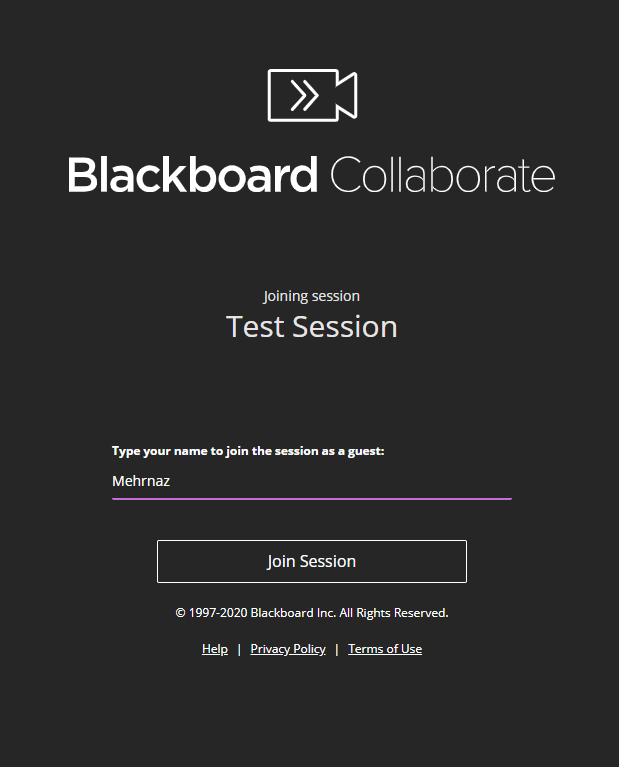
Enter your name and click "Join Session" button:
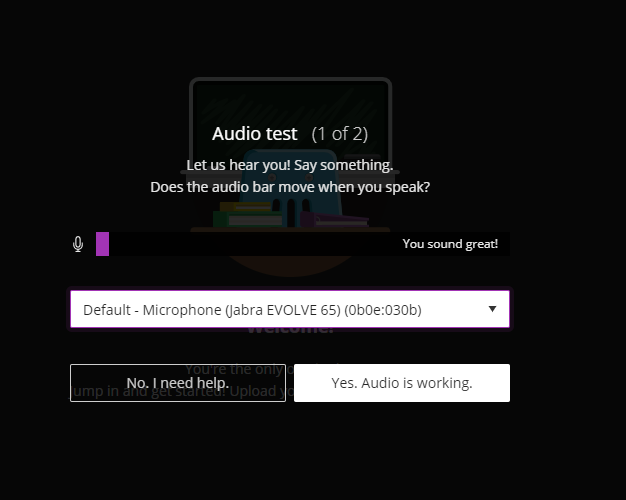
Then you will be taken to the next screen which will test your audio. You can either test it or click "Skip". We highly recommend testing your audio :
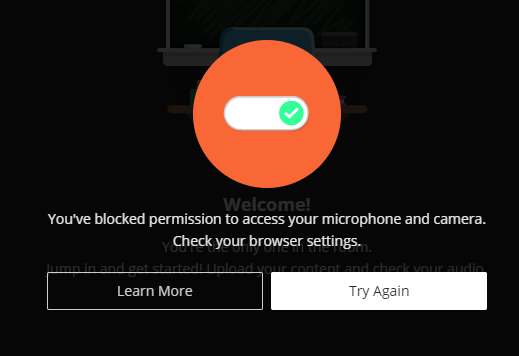
If the audio doesn't work or you see the following
For the above error, please check the "Enable browser settings" section further down in this document.
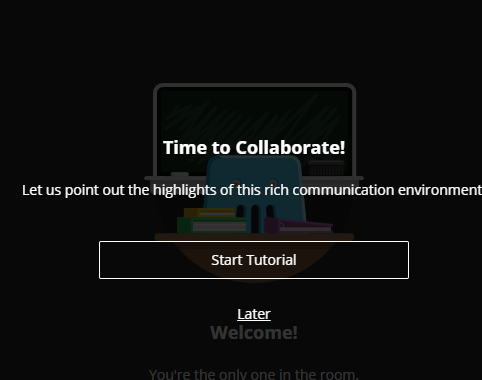
After testing your microphone and camera, you will be asked to either go through a tutorial or "Later":
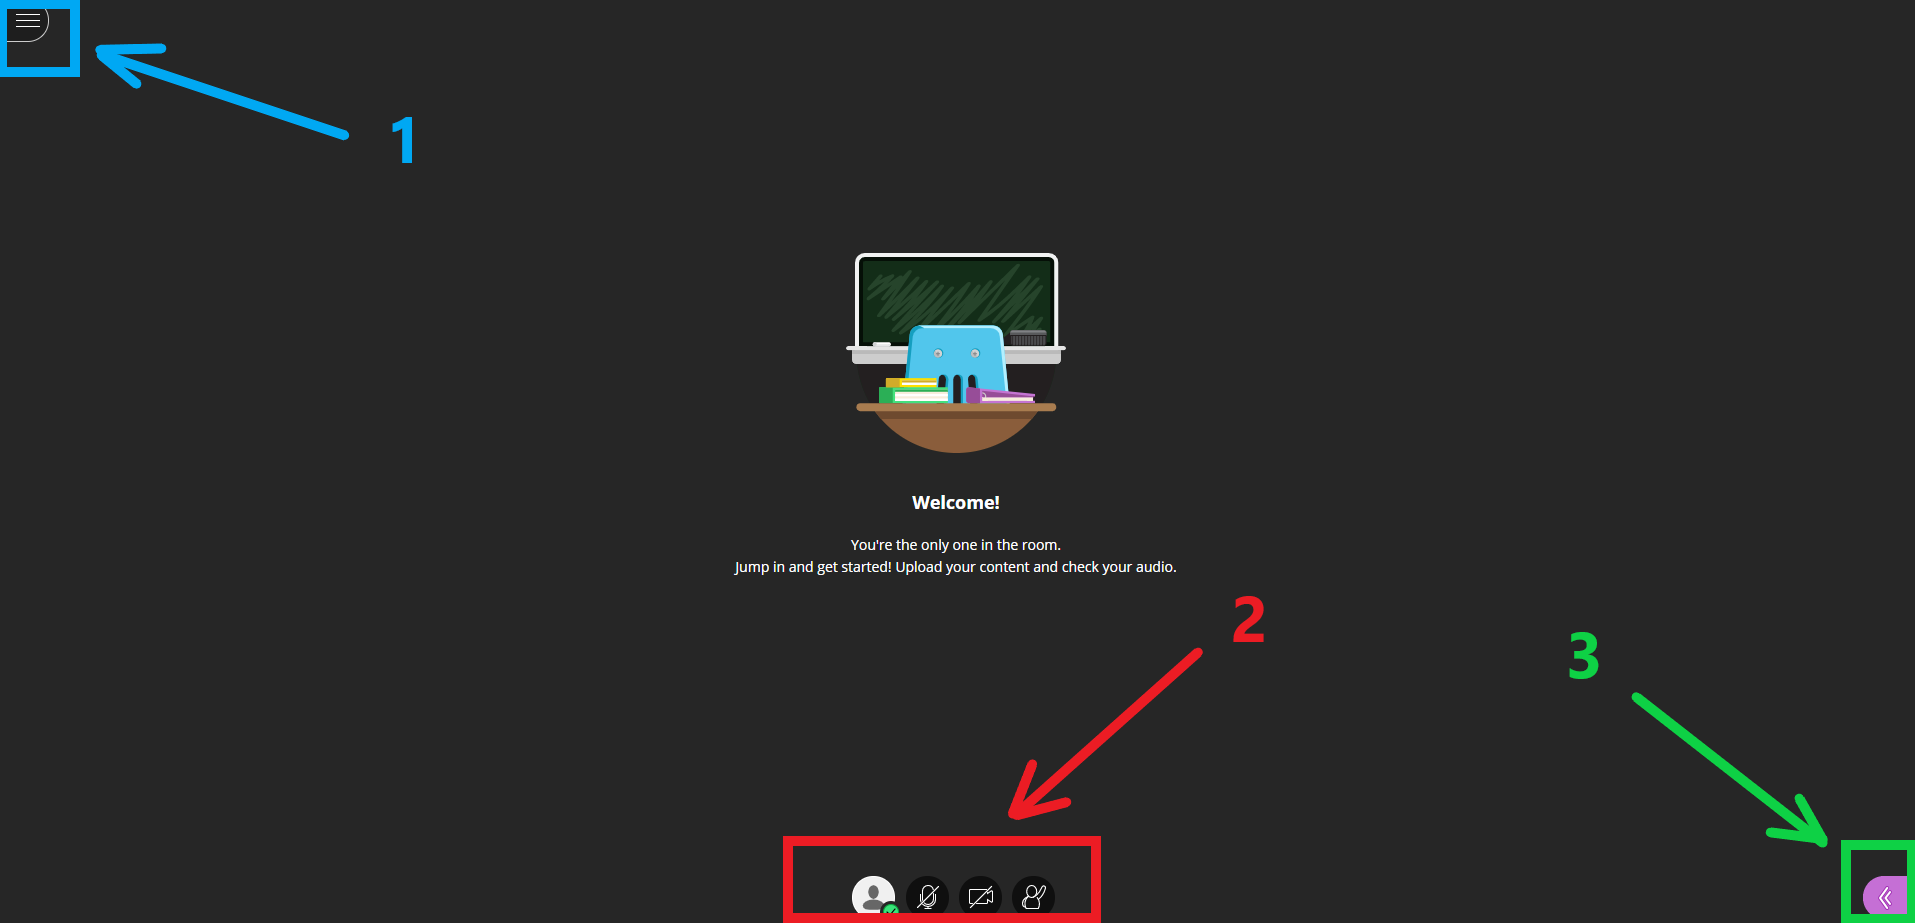
After this screen, you will be taken to the main room which looks like this:
There are three very important parts on this screen:
1- Hamburger menu at the top left hand side
2- The session tools icons at the bottom
3- The collaborate panel with more options
The above three parts are being explained in details through the following sections.
Hamburger menu
This menu is very important. When you arrive in the room, first thing to do is to click the hamburger menu icon at the top left corner of the screen to open the menu:
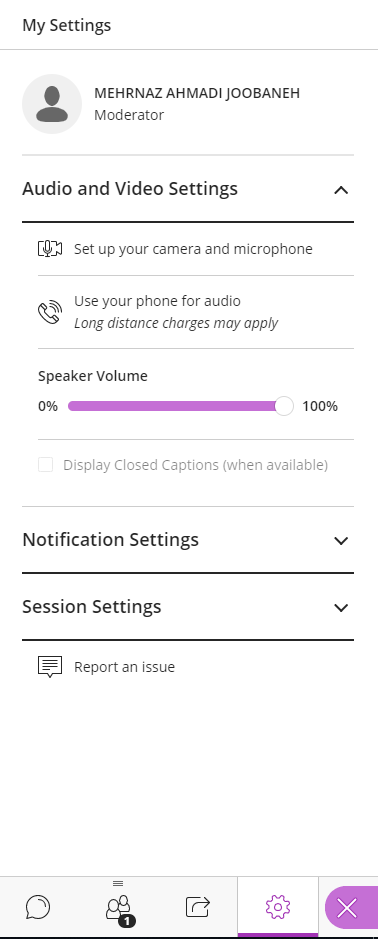
When the menu opens, take a note of the followings:
1- click the menu item " Use your phone for audio". It will give you a number and a pin and the menu item itself changes to something similar (but not the same) like this:
Keep your number and pin somewhere safe. In case of loosing internet connection or for any reason, if you need to dial back in, you need these information to be able to dial in using your phone.
2- If you need to leave the session, you can click the "Leave session" button at the bottom of this menu.
3- To get out of the menu back into the room, you need to click the icon at the top left corner which has changed into an "X".
Session tools icons
At the bottom of the main presentation area, you will see a few icons like these:
From left to right:
Status icon:
When you click the status icon, a menu will appear:
You can change your status if you wish.
Microphone and Camera
By default, when you enter the room, you are muted and your microphone looks like this with a line crossing it:
When enabled, it will look like this:
The same with camera:
vs
Raise hand
You can raise hand by clicking this button:
When hand raise, it will be colorful:
Note: you may not see a number, just a color change.
You can lower your hand by clicking on it again.
The collaborate panel
At the bottom right hand corner of the screen, there is an icon with chevrons in it that looks like this:
When clicked, your collaborate panel will open up.
Here you will be able to send a chat:
or change your setting (this applies only to you):
More info
You can find more information on navigating a session here:
https://help.blackboard.com/Collaborate/Ultra/Moderator/Get_Started/Navigation
Enable the browser settings
The best browser to use with Blackboard is Chrome. These are instructions for Chrome browser.
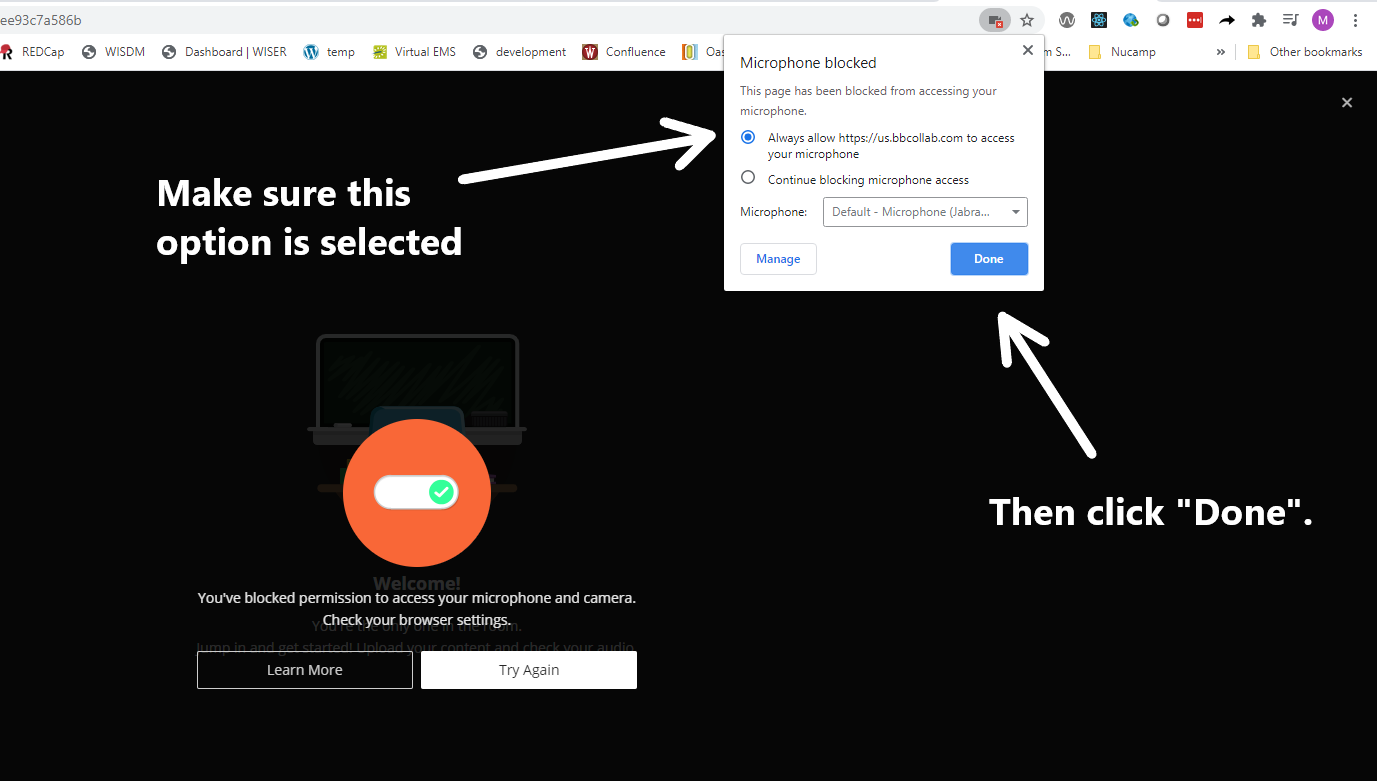
If you receive an error indicating that the browser has blocked your microphone/camera, here is what you will need to do.
If you look at the address bar (where the link of the page you are in appears at the top of the page), you might see a camera icon with an x on it like this:
In this case, click on the icon and choose "Always allow access" and click "Done":
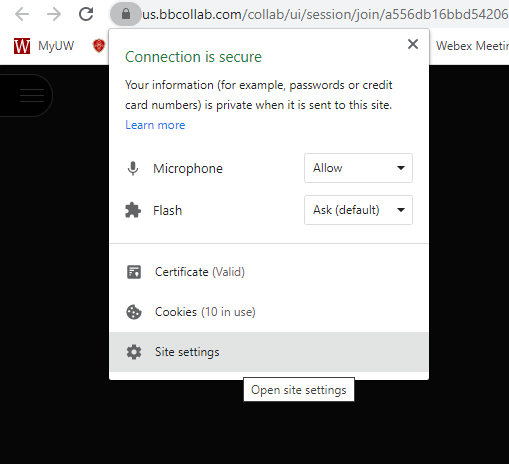
If you still have issues,then on the address bar, at the left of the link where you see a lock icon.
Click it and from the menu choose "Site settings"
You will be taken to the Chrome's settings where you can under privacy and security:
You can change your microphone and camera settings to either "Ask" or "Allow":
Then go back to the page and it should prompt you to reload (if not, just reload the page):
