...
Once you've filled out all relevant fields on the form, click the "Save and Close" button in order to create the new organization record.
Linking Your New Organization to a User
...
Now that you've created the new organization record, you'll need to link it to a user in order for that organization to be able to come through on an application. To link your new organization to a user, you'll first have to pull up a user record.
...
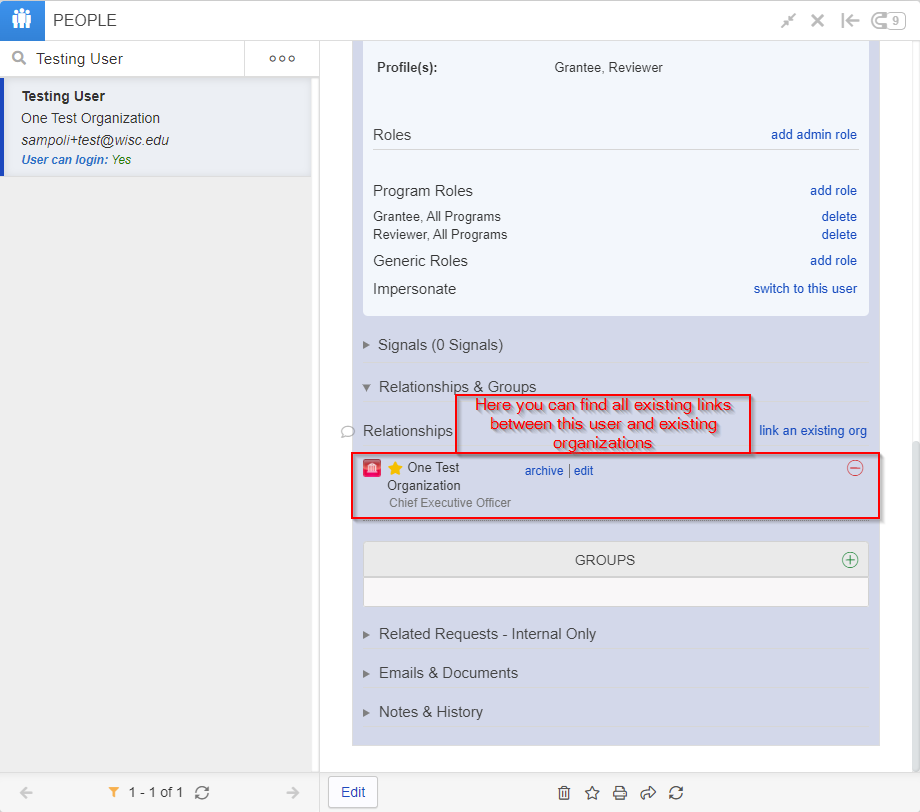
To validate that the user was correctly linked to the organization, you can re-open the "Relationships & Groups" section and look underneath the "Relationships" header; below it, you'll find the list of Organizations currently linked to this user. See also the screenshot, below.
Setting a User as the "Primary Contact" for an Organization
Now that the user is linked to the organization, we can set the user as the "Primary Contact" on the organization record. Note: If NO users are linked to an organization, you won't be able to set a primary contact; at least 1 user must be linked to an organization for that organization to have a primary contact.
Before we begin, what is a "Primary Contact" for an organization?
- From a technical standpoint, the "Primary Contact" does not change any functionality. For example, even if a user isn't the "Primary Contact," they can still start a Grant Application for that organization and can be listed as the "Primary Contact" (Principal Investigator) for that specific application.
- Instead, the "Primary Contact" is more for our staff's usage; the listed "Primary Contact" in general should be the person with whom staff members will interact most frequently regarding that organization and its applications/grants.
- It is worth noting that Fluxx is flexible enough to track several contacts for one application or grant, so that the system can email everyone associated with a proposal and NOT just the primary contact.
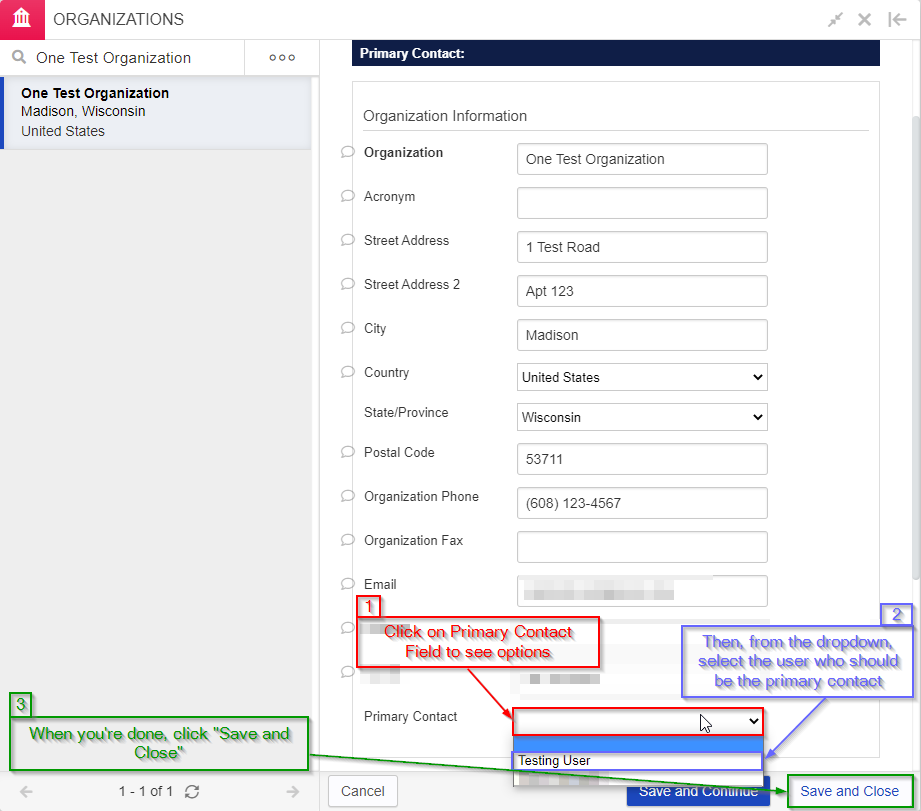
To set the primary contact, navigate back to the organization record you created. From the header, you can quickly see whether or not the Organization already has a primary contact (in the screenshot below, the organization does not). In order to add a primary contact or change the existing one, navigate to the "Edit" button at the bottom of the Organizations Card (see also the screenshot below).

When you click the edit button, all the fields will open up for editing. Scroll down on the form until you see the "Primary Contact" field (the last field before the Internal section). In order to change/add a primary contact, click on the field (# 1 in the screenshot below) – this will cause a dropdown menu to display with all of the users that are linked to this organization. From the dropdown menu, click on the user who you want to be the Primary Contact (#2 in the screenshot below). After you've done so, you can click "Save and Close" button to save the change and exit from editing mode (# 3 in the screenshot below).
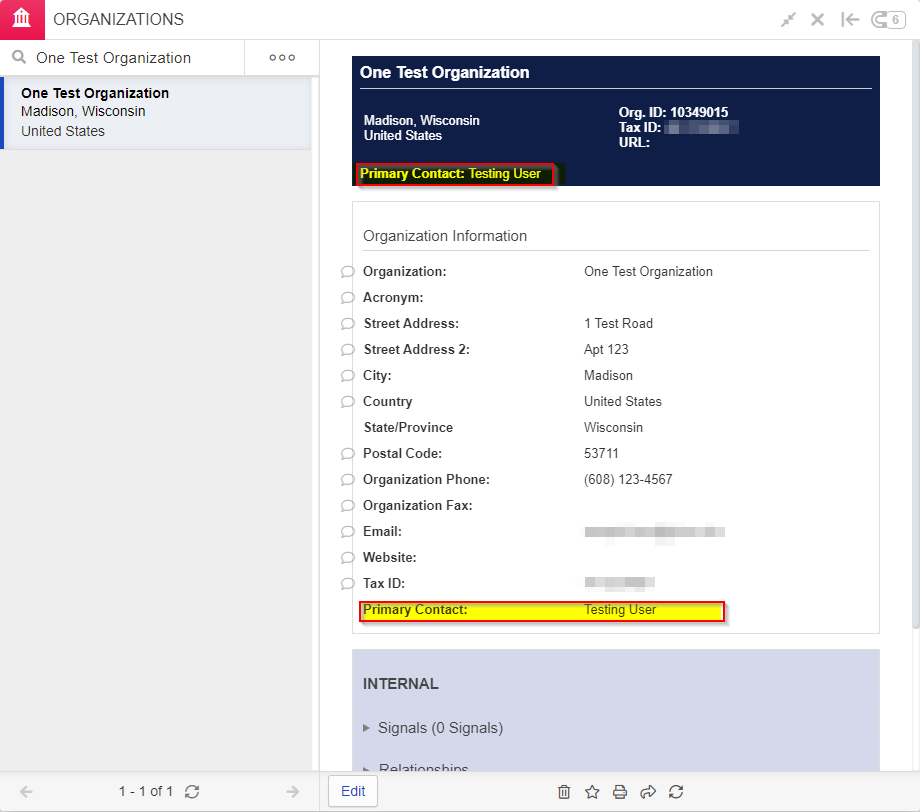
After you click "Save and Close," you'll be able to validate that the new primary contact saved to the record correctly. As in the screenshot below, the Primary Contact should now display in the Organization Header and as the last field on the form.
Registering as a New User
...