The Card Documents Menu of the Admin Panel contains options to control several things within the system including system letters, system emails, the documents available per each Record Type, and API Alerts.
Letters
Letters are documents that can contain dynamic information pulls (i.e. pulling in the Grantee Principal Investigator's name and email address, etc.) and can be generated either manually or automatically based off of the record moving to a certain status.
Fluxx has a good article about letters that can be found here: https://fluxxdev.atlassian.net/servicedesk/customer/portal/1/article/1796081221?src=-976765691
The screenshot below highlights some important items from the Letters screen. See beneath the screenshot for descriptions of those highlighted items.
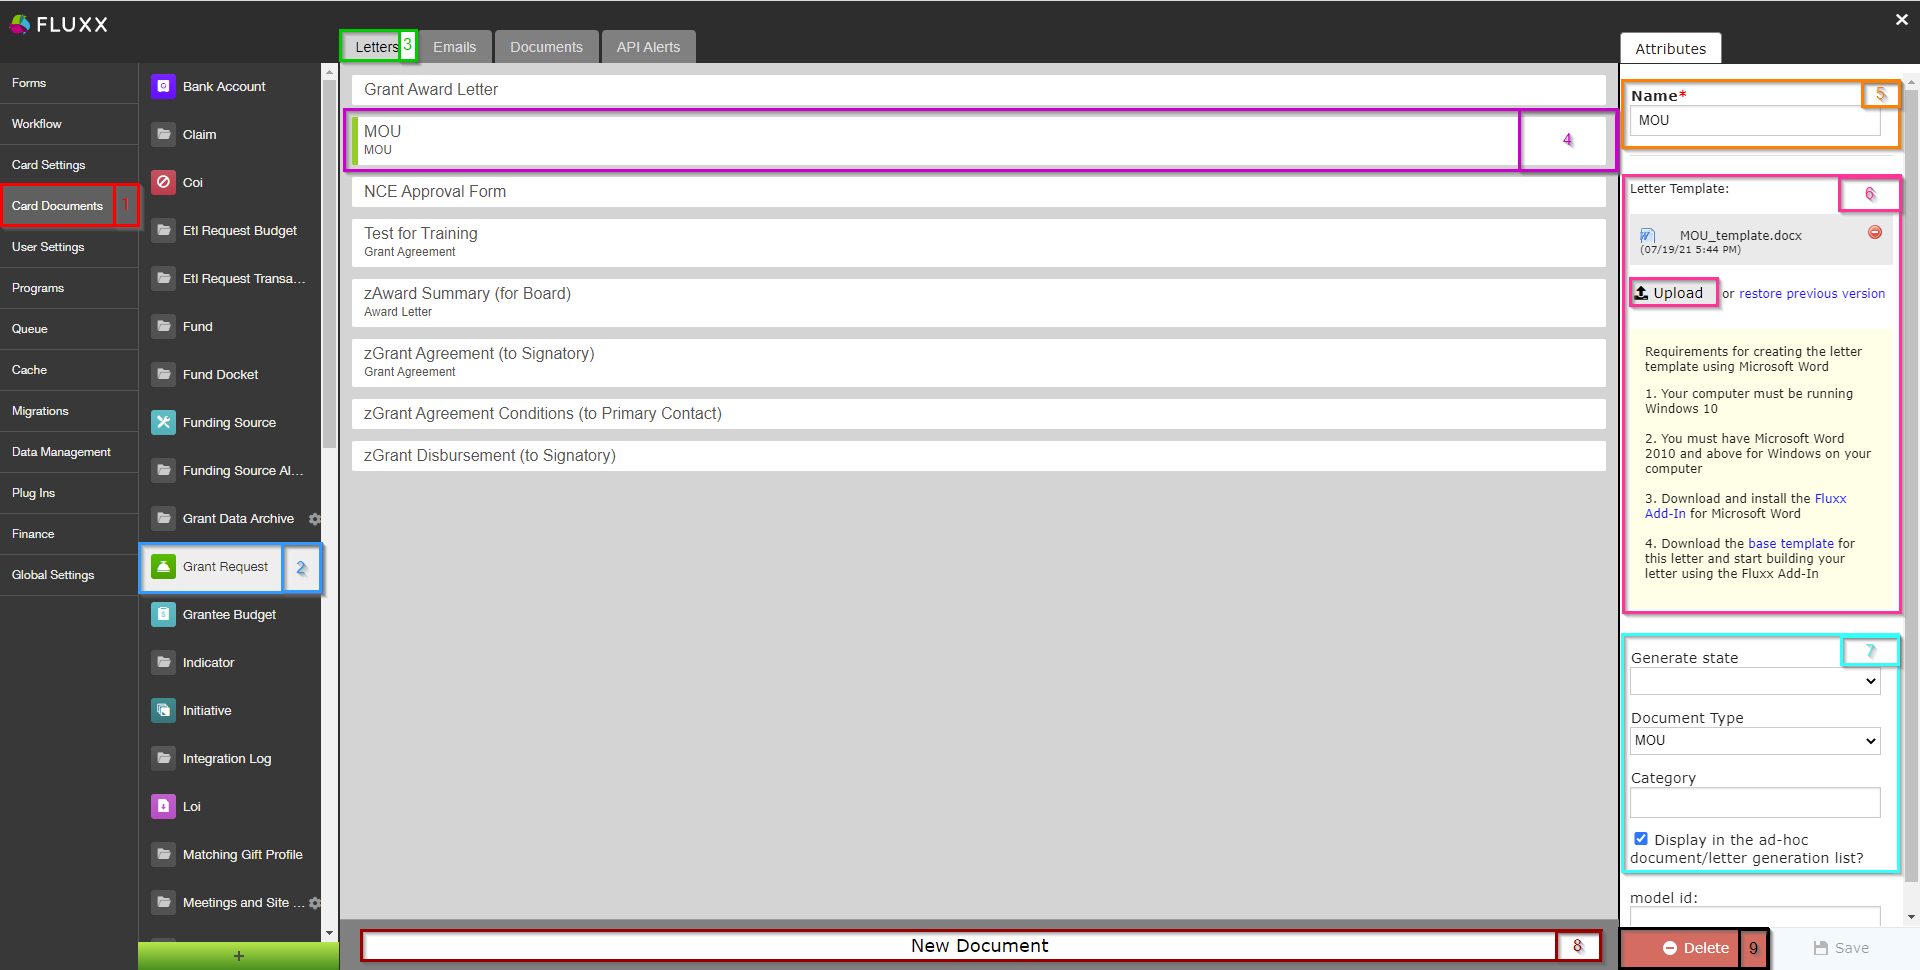
- Box # 1: Shows the Card Documents menu selected from the main Admin Panel Menu.
- Box # 2: Shows the Record Type currently selected; in this screenshot, we're looking at the Grant Request Record Type.
- Box # 3: Shows the Letters tab currently selected.
- Box # 4: Shows the Letter that you currently have selected. You can tell which Letter is currently selected NOT ONLY based off of the name (match name of Letter with "Name" from box # 5), BUT ALSO from the slim green line that appears to the LEFT of the Letter name.
- Box # 5: Shows the name of the Letter currently selected. This can be edited here without causing system issues.
- Box # 6: Shows the Letter Template currently applied to this letter; this section also allows you to restore a previous version or upload a new version of this Letter Template.
- Box # 7: Shows four different settings related to the letter:
- Generate State: If you want your letter to generate automatically at a specific status, select that status here.
- Document Type: To ensure proper visibility of your letter template, you must specify a document type you have previously configured.
- Category: Corresponds to the document category. This allows you to determine which 'document storage' box to use (i.e. a grantee-visible one or an employee-only one).
- Display in the ad-hoc document/letter generation list?: Check this box if you want this letter to appear as an option in the generated letters of the document component of your card.
- Box # 8: Shows where you can generate a New Letter if so desired.
- Box # 9: Shows where you can delete the currently selected Letter.
Emails
The emails tab of the Card Documents menu allows you to configure/edit/delete automatic system emails. It is therefore the most important tab used by the WPP of the Card Documents Admin Panel menu.
Before You Go On...
Fluxx has a great article discussing all of this that can be found here: https://fluxxdev.atlassian.net/servicedesk/customer/portal/1/article/1795951428?src=-1634618103
Emails Tab Overview
See the screenshot below to see the highlighted, most important items from the Emails tab and beneath the screenshot for descriptions of those highlighted items.
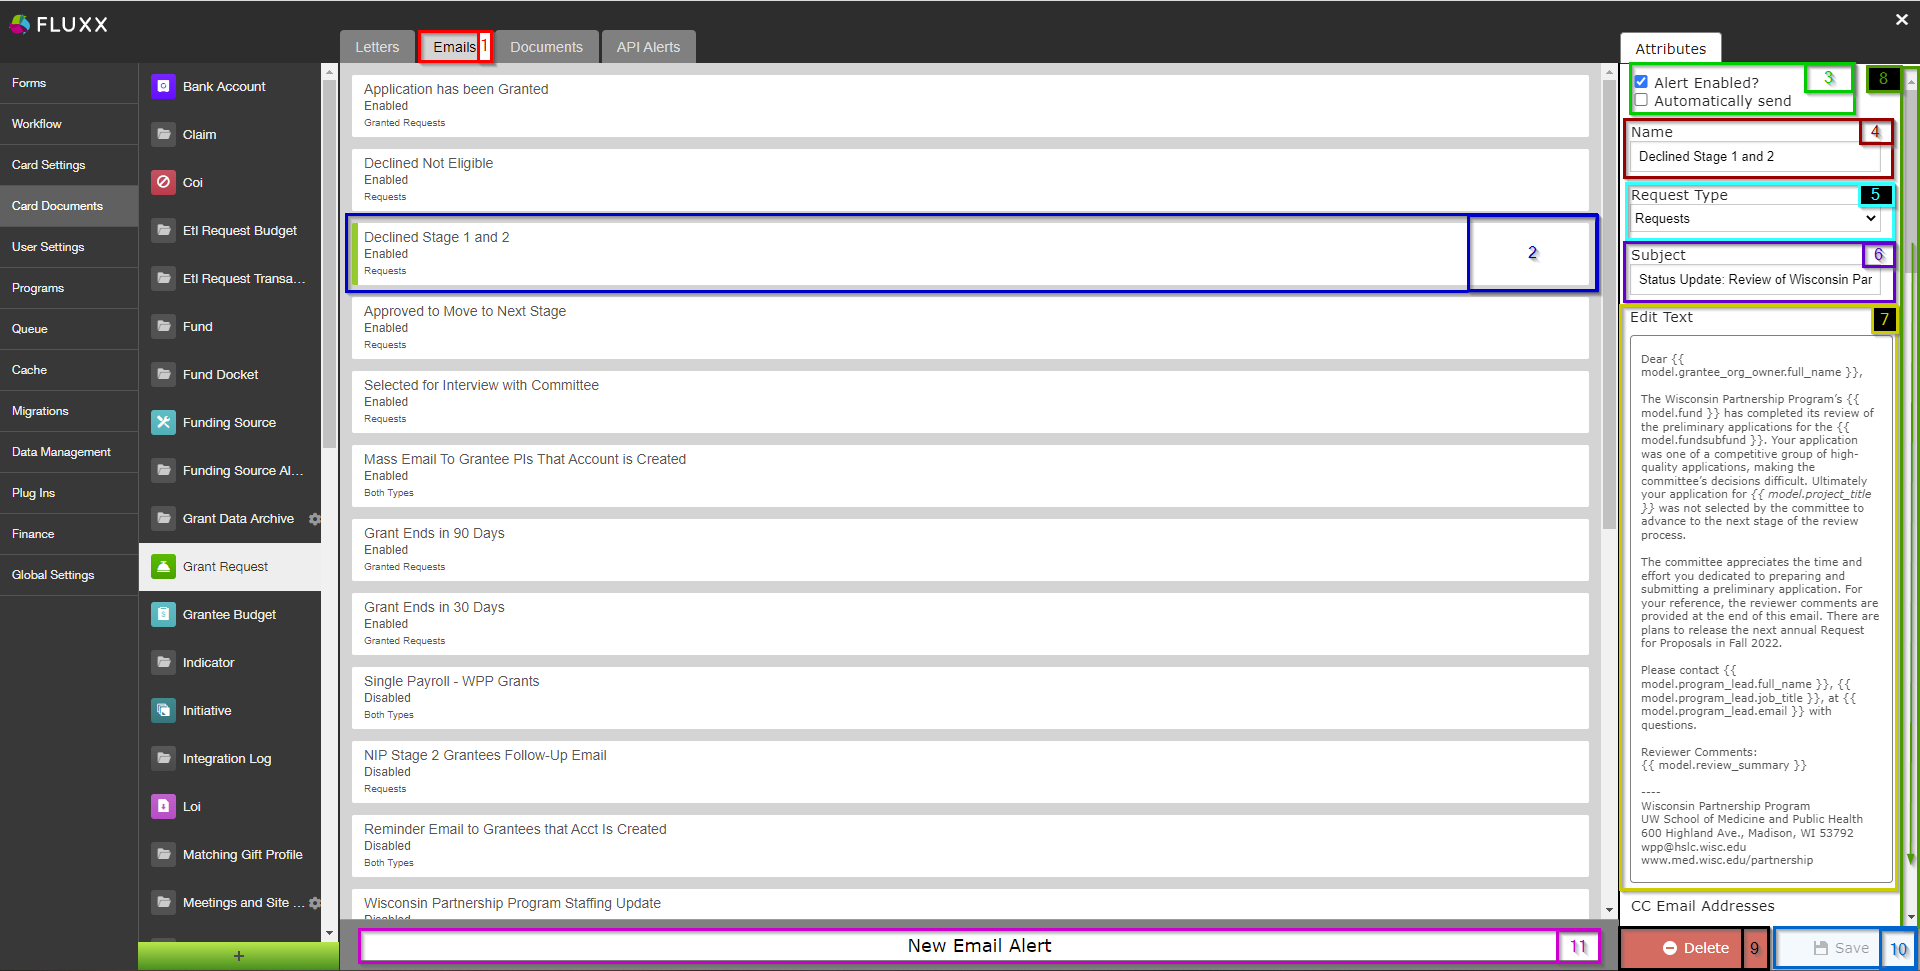
- Box # 1: Shows the Emails tab selected.
- Box # 2: Shows the Email that you currently have selected. You can tell which Email is currently selected NOT ONLY based off of the name (match name of Email with "Name" from box # 4), BUT ALSO from the slim green line that appears to the LEFT of the Email name.
- Box # 3: Shows two very important checkboxes that control whether or not (1) the email is active and (2) the email will send automatically and bypass the email queue.
- Alert Enabled Checkbox: Determines whether or not the Email alert is Enabled. If checked, the email is considered Enabled and can be sent. If NOT checked, then the email will not send even if the criteria are met.
- Automatically Send Checkbox: Determines whether or not the Email will go to the Email Queue when it 'triggers' (see the section below for email triggering). If NOT checked, when the email is triggered it will go to the Email Queue and will need to be manually pushed out of the queue by a user. If the checkbox IS checked, then, when triggered, the email will completely skip the email queue and be sent directly to the selected recipients.
- Box # 4: Shows the internal Name of the email alert. This can be changed at any time without breaking/impacting anything in the system (except for the name of this email alert as it appears in the list of email alerts for the selected Record Type).
- Box # 5: Shows the Request Type. This is only an option on the Grant Requests Record Type; it allows you to choose from Requests (Applications), Granted Requests (Awarded Grants), or Both (Applications and Fully Awarded Grants).
- Box # 6: Shows where you can edit the Subject Line of the email message. Note: This is the ONLY part of the email message where you CANNOT pull in dynamic information (i.e. Project Title from a Grant Application). Therefore, subject lines should be as generic as possible.
- Box # 7: Shows where the text for the Body of the Email is configured. To edit the text here, click on the button "Edit Text." Editing Email body text is the same as editing text in Forms. See "Editing Text" for more information.
- Box # 8: Shows the Scroll Bar that you can and should use to view more email settings. Scroll down in order to see the additional settings.