DocuSign has been configured at least for the pre-prod environment using the wpp@hslc.wisc.edu account. (If we get approval to go ahead with this workflow I'll update prod as well.) You'll need the following tools to set up and configure this feature:
- Access to the WPP DocuSign account. The password and security question have been saved to the email account, so get Tonya or Jon to grant you delegation/administrative rights to the email. Then, you'll be able to access the DocuSign account
- DocuSign Username: wpp@hslc.wisc.edu
- DocuSign Account ID: 40067062
- If for whatever reason you need to re-configure the DocuSign connection, such as to change the linked account, refer to this Fluxx support article.
The rest of this article focuses on how to enable forms for DocuSign and manage DocuSign documents in standard workflows. Much of this information (other than enabling DocuSign) is covered in Admin training 6: https://uwmadison.app.box.com/s/ygzb6ioewfij46l5k8a2aq0x2tmo55qp
Configure Fluxx
Enable DocuSign for a Documents Component
Full information can be found here: https://fluxxdev.atlassian.net/servicedesk/customer/portal/1/article/1795819664?src=1674484752 (starting at Step 4: Add DocuSign to forms)
- In the Admin Panel, go to Forms and open the template you want to enable.
- Go to the Document component to enable and select the Add Docusign.
Set Default Text and Contacts for a Template
Full article here: https://fluxxdev.atlassian.net/servicedesk/customer/portal/1/article/1796113756?src=1674484752
- In the Admin Panel, go to Card Documents > Documents and open the template you want to configure.
- Expand the DocuSign section (find it in the Attributes section on the right) and configure:
- Subject: Default email subject line (NOTE: you cannot customize this message using Fluid configuration)
- Body: Default email body content (NOTE: you cannot customize this message using Fluid configuration)
- Contacts: The following fields work in tandem to add recipients
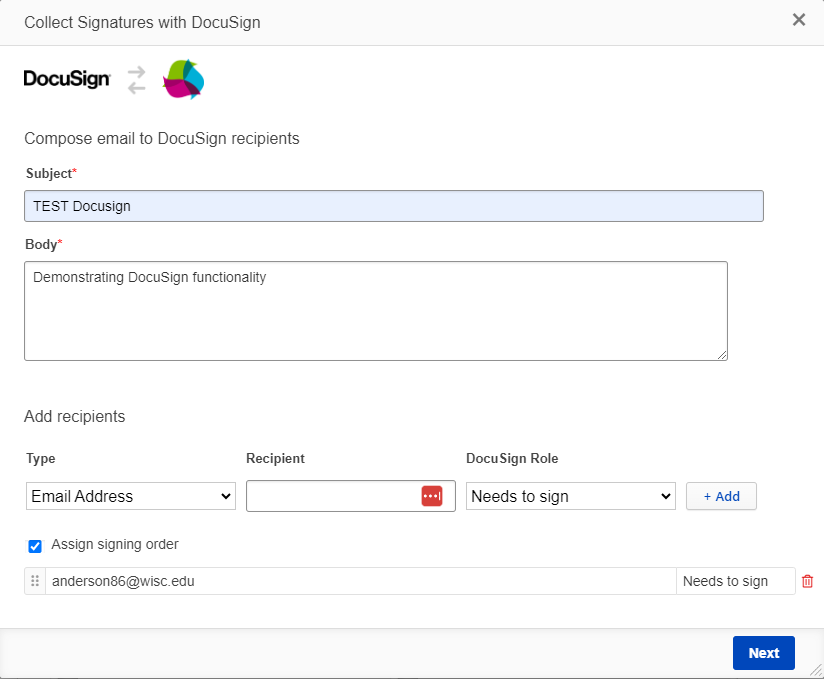
- Contact Type: Send to a specific Fluxx user (ex. Mary M), a specific person associated with the record (ex. Primary Contact), or an email (ex. anderson@wisc.edu)
- Recipient: How this appears depends on what you select as Contact Type. All Fluxx User records appear if you select Fluxx User, contacts similar to those shown in email configurations appear for Grant Contact, and a free text box appears for Email Address
- Docusign Role: Determine whether this person should sign or simply receive a copy of the signed document.
- After all settings have been configured, click +add.
No default contacts will be populated if you skip this step! - Repeat a-d as needed.
- Signature Order: Once you've added all users, you can determine the order in which each contact receives the document. This is also where you remove contacts.
Send DocuSign Documents to Grantees for Signature
Full information can be found here: https://fluxxdev.atlassian.net/wiki/spaces/FS/pages/1795819664/DocuSign?parentProduct=JSM-Portal&parentProductContentContainerId=10112&initialAllowedFeatures=disable-login-flow.disable-share&locale=en-US#How-to-Use
- In Fluxx, navigate to a record you enabled for DocuSign and go to the Document component section.
- As needed, add documents by pressing the green plus sign in the component header.
- Select the page symbol with a right-pointing arrow to send for DocuSign.
- Configure the message and recipients, or make edits, as needed in the pop-up window.
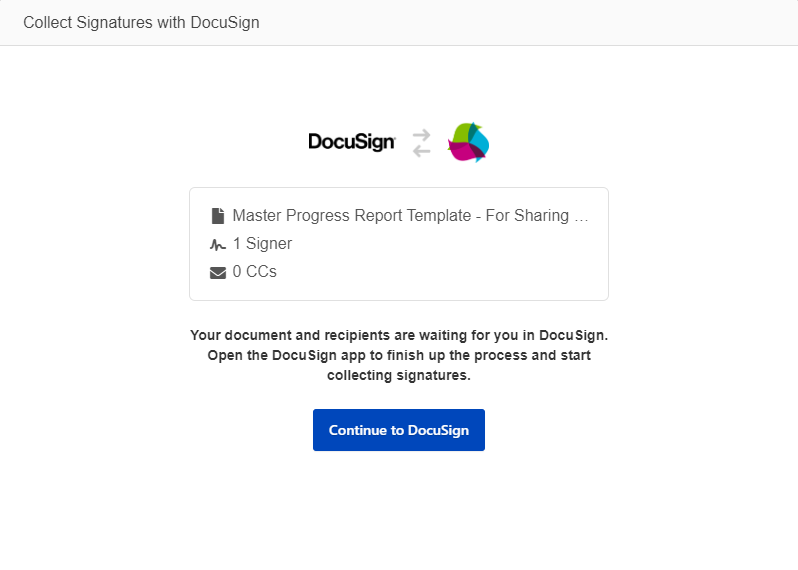
Remember to press +Add to confirm the contacts to send to - Click Next, and then click Continue to DocuSign.
- Drag and drop fields from the left onto the form as needed. If you have multiple recipients, there are two ways to set who needs to edit a given field:
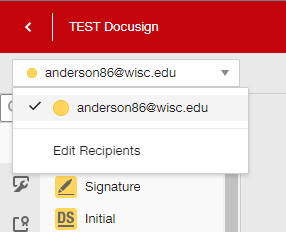
- Set the recipient using the drop-down field on the left above the Fields section. Then, drag and drop fields onto the form.
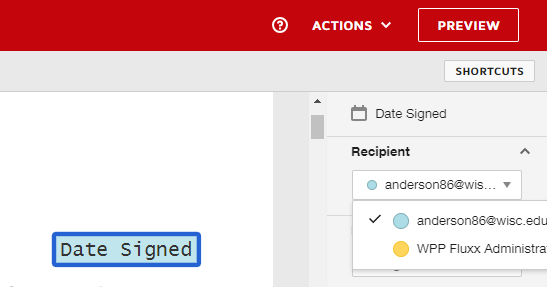
- Select a field on the form and change the recipient using the Recipient field on the panel to the right.
- Set the recipient using the drop-down field on the left above the Fields section. Then, drag and drop fields onto the form.
- After you've finished configuring fields, click Send (bottom right).
- Once the recipient signs, a PDF copy of the signed document will be uploaded to Fluxx.
Send DocuSign Documents to Grantees for Data Collection
XXXNote: If I get this working, I'll also need to add info about custom fields configured in DocuSign, templates, and all that.
Ooo it looks like DocuSign is smart enough to know that an uploaded document matches a template!! Meaning when the click Continue to DocuSign, they'll just get prompted to apply a matching template!


