The Plug Ins Menu of the Admin Panel allows an admin user to control a number of pieces of additional functionality provided by other software/web services NOT produced by Fluxx.
Before you go on...
Fluxx has an article that discusses many of their Plug Ins and links out to further articles discussing how the Plug Ins work. Please see that article, here: https://fluxxdev.atlassian.net/servicedesk/customer/portal/1/article/1796115202?src=251102428
Integrations Tab
In general, there aren't too many settings to be found on the Integrations tab screen; most are fairly straightforward. If you have specific questions about a specific Integration, please see the Fluxx article above that links out to many of the specific Integrations to provide more information on them. See the screenshot below for highlighted items from the Integrations tab and beneath the screenshot for descriptions of said items.

- Box # 1: Shows the Plug Ins Menu from the Admin Panel as currently selected.
- Box # 2: Shows the Integrations Tab as currently selected.
- Box # 3: Shows the Integration that is currently selected from this page. You can tell which Integration you currently have selected from the slim green line that appears to the LEFT of the Integration name.
- Box # 4: Shows the attributes for this integration. As you can see, these checkboxes control some of the functionality of this integration.
- GuideStar Charity Check: Represents the overall integration; if this is not checked, then GuideStart charity checks cannot be run.
- Enable Enhanced Charity Check: Checked by default if GuideStar Charity Check is turned on. Provides Revocation Code, Revocation Date and Reinstatement Date information as part of the data pulled from GuideStar.
- Include Legal Name Field: Will automatically update the cc_legal_name field every time charity check is run.
- Update Core legal_name field on Organization” will automatically update the data in the legal_name field whenever a Charity Check is run.
- AutoSave Charity Check PDF when Charity Check is run: This will save a copy of the Charity Check PDF in the Document Component on the record. This component cannot be configured and will only store the Charity Check PDFs.
- Box # 5: Shows the Cancel button. Clicking on this button will Discard any unsaved changes made to the selected integration's attributes.
- Box # 6: Shows the Save button. If you've made any changes, you must hit the save button in order for your changes to be effectuated. Otherwise, your changes will be discarded.
Add Ons
Before you go on...
Fluxx created a short webinar (17 minutes and 41 seconds long) discussing the Add Ons tab and what it controls. Please review that Webinar here: https://fluxxdev.atlassian.net/servicedesk/customer/portal/1/article/1795886137?src=-1497518199
The Add Ons Tab
The Add Ons tab contains configuration options for several additional features not found elsewhere in the Admin Panel. Some of these Add Ons are used by the WPP; others are not. Here below, we'll discuss the most used/useful Add Ons and why you might need to change/edit them. The first Add On is called the Landing Page.
Landing Page Add On
The Landing Page Add On controls functionality for the WPP's main Fluxx landing (or Home) page (i.e. https://wpp.fluxx.io/user_sessions/new). The settings here correspond to the text and functionality from the main page. Please see the screenshot below for highlighted, important items from the Landing Page Add On screen and beneath the screenshot for descriptions of said items.

- Box # 1: Shows the Add Ons tab as currently selected.
- Box # 2: Shows the Add On currently selected. In this screenshot, the Add On selected is, of course, Landing Page. You can tell which Add On you currently have selected from the slim green line that appears to the LEFT of the Add On name.
- Box # 3: Shows two pieces of functionality not in use by the WPP. The first is the checkbox Classic Non-Portal Login LAF, and the second is LOI signup information text (seen on create LOI page).
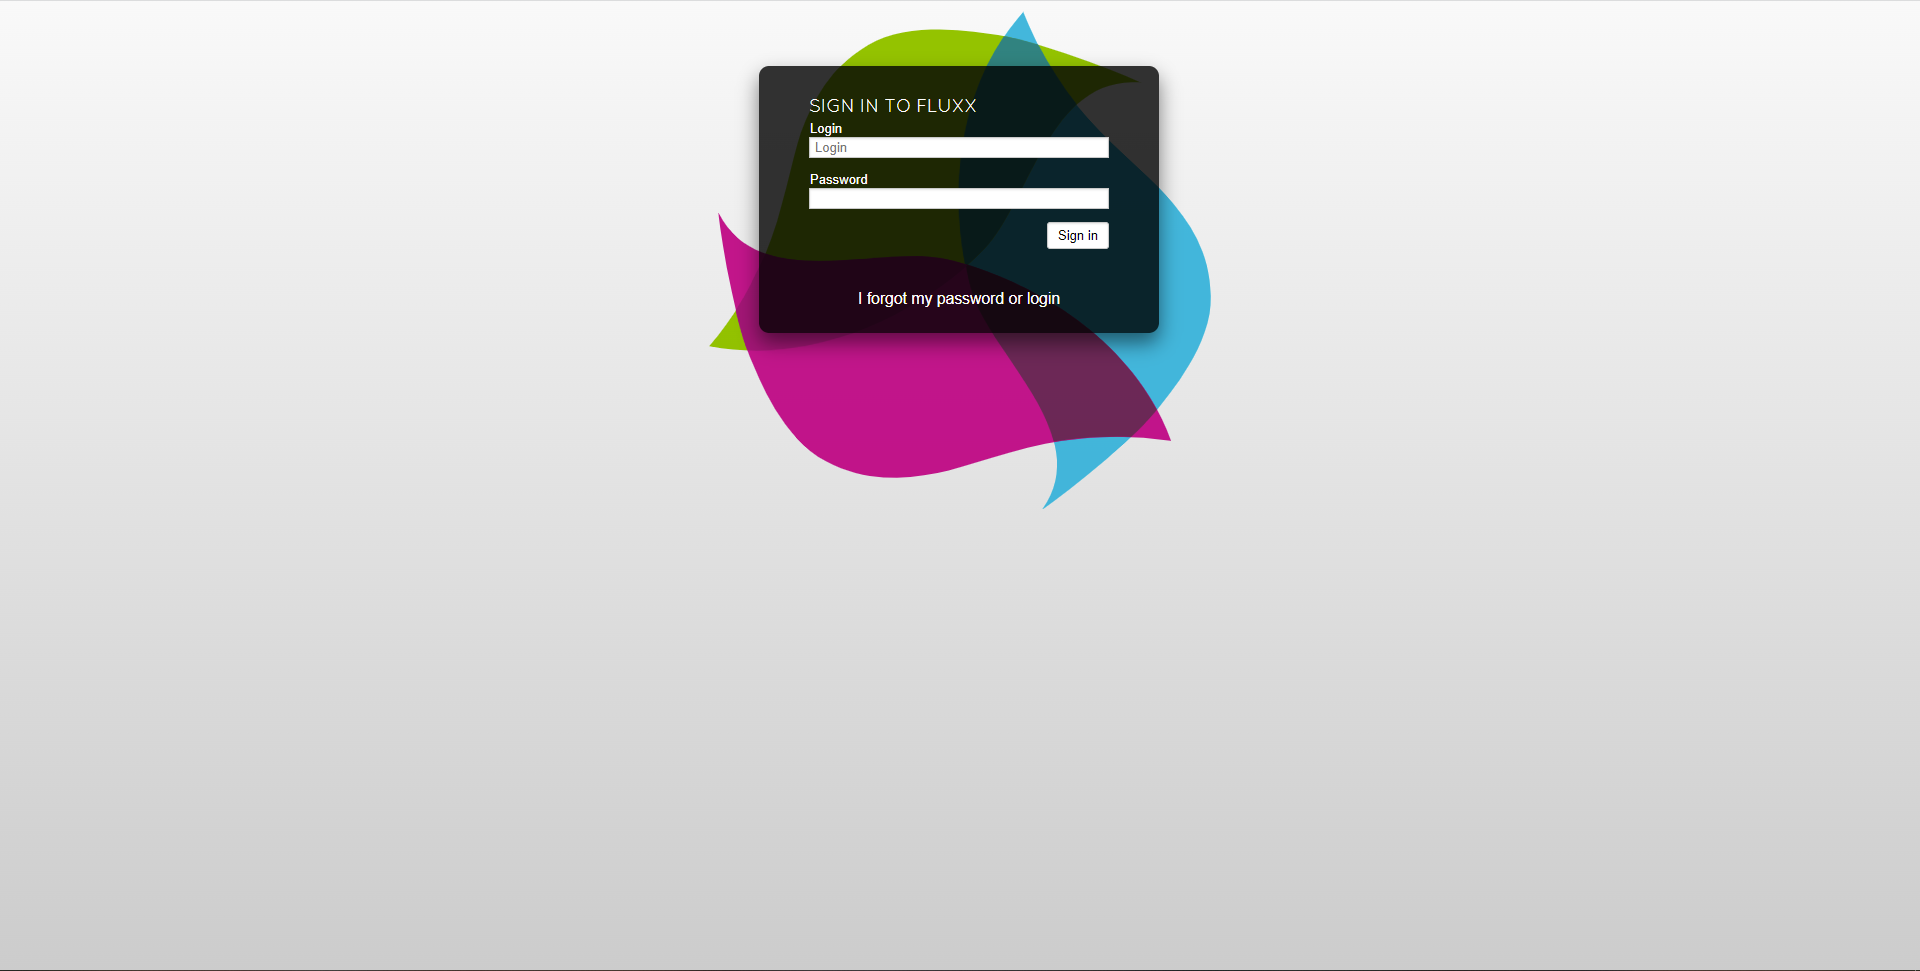
- Classic Non-Portal Login LAF: If this box IS checked, then the standard landing page will NOT display. Instead, the Landing Page will literally just consist of two fields: 1 asking for your login (i.e. your email address) and 1 asking for your password.
- Example image of what the Landing Page looks like with this checkbox checked:
- LOI signup information text (seen on create LOI page): Text entered into this box will be displayed at the top of the Registrations (also known as LOIs in Fluxx-speak) when grantees go to Register a New User.
- Example of what text of "Testing Text" would look like at the top of a new Registration:

- Classic Non-Portal Login LAF: If this box IS checked, then the standard landing page will NOT display. Instead, the Landing Page will literally just consist of two fields: 1 asking for your login (i.e. your email address) and 1 asking for your password.
- Box # 4: Shows the LOI information text (seen on create login page) text box. This text box contains the Registration help text and links to create the two different types of registrations (one for OAC grantees and one for PERC grantees).
- Screenshot of where this text appears on the Landing Page:

- Box # 5: Contains the text that will be displayed to users once they submit a new registration.
- Box # 6: Shows the Scroll Bar that can be used to find other attributes for the landing page. The WPP does NOT use any of attributes NOT shown in the first screenshot in this section.
- Box # 7: Shows the Cancel button. If clicked, the system will discard any unsaved changes to this Add On.
- Box # 8: Shows the Save button. If you want to keep any of the changes that you've made to this Add On, you must click the Save button to effectuate those changes. Otherwise, any unsaved changes will be discarded.
Grantee Portal Add On
Before you read through this section, Fluxx has a great article discussing this add on. See the article here: https://fluxxdev.atlassian.net/servicedesk/customer/portal/1/article/1795949874?src=659529432
The Grantee Portal Add On contains several settings that determine how the Grantee Portal appears; additionally, some settings control the the verify your email account and set your password email notifications. Please see the screenshot below for important items from this page, and then beneath the screenshot for descriptions of said items.

- Box # 1: Shows the Grantee Portal Add On as currently selected. You can tell which Add On you currently have selected from the slim green line that appears to the LEFT of the Add On name.
- Box # 2: Contains several checkboxes that toggle various pieces of functionality for the Grantee Portal.
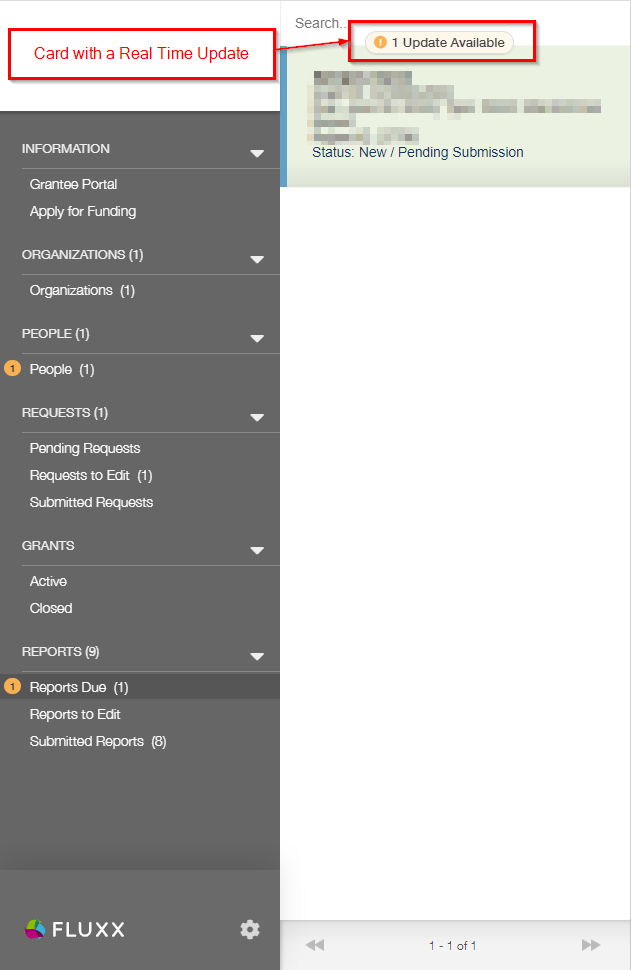
- Disable RTUs for Grantees: "RTUs" stands for "Real Time Updates." Real Time Updates notify users when a recent change has taken place. These updates give you notifications on the top of the card and on the card icon in the dock. After clicking the refresh option from the update it will highlight the updated records with an orange strip. If this checkbox IS selected, then real time updates will be turned off within the Grantee Portal. Therefore, they won't receive the orange "1 Update" or "X Updates" button at the top of their card in order to refresh their card/list.
- Example of what a Card with a Real Time Update looks like within the Grantee Portal:
- Allow Grantees to Edit Request Reports: Leave this selected. This checkbox should control whether or not Grantees can edit requirements via the Grantee Portal, but we already give additional permissions via the Grantee Profile's Rights tab.
- Show document type dropdown when attaching documents: When going to upload a document directly to the Documents section (and not via one of the pre-configured, required document upload options) and selecting a document to upload, the system will prompt the uploading user to specify what type of document they are uploading. If this is NOT checked, users will NOT be prompted with a document type will simply upload a "generic" document when they perform the workflow laid out below.
- To see this screen, start by finding a "Documents" section with the Green Plus ("+") button available:

- When you click on the Green Plus button, the system will prompt you with the screen to upload a document. If you select a document (by clicking "Add Files"), the document will appear as in the screenshot, below, with a dropdown menu next to it listing all of the available document types in the system for the particular record type that you are currently on (in this example, the Grant Request record type).

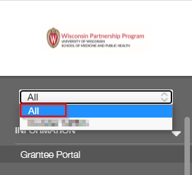
- Enable organization dropdown filter: If this IS selected, then a dropdown filter will appear in the top left-hand corner of the Grantee Portal. This is turned OFF for the WPP. When turned off, users will always be presented all records for all of the organizations they are connected to. Instead, if the Organization Dropdown Filter is turned on, Grantees will only see all records if they select "All" from the Organization dropdown filter. If select one individual organization over another from the dropdown filter, then they will ONLY be presented with records linked to the Organization that they selected from the dropdown menu.
- Example of what a turned on Organization Dropdown Filter looks like in the Grantee Portal:
- Enable Grantee Moderator Functionality: As the name implies, this enables Grantee Moderator functionality. Currently not in use by the WPP.
- Example: A random application (for this example, # 5008-2022), is being reviewed by myself and 1 other person. I'm about to submit my review for the application, but I can checked what other reviewers have said first so that I get a sense for other people's perspectives before I submit my review. I look in my Reviewer Portal and see another Pending Review sitting with a different reviewer. While I'm not able to edit it, I can see what the Reviewer has selected/written in their review. Here's an example of what looking at that other Reviewer's review looks like from the Reviewer Portal:

- Disable RTUs for Grantees: "RTUs" stands for "Real Time Updates." Real Time Updates notify users when a recent change has taken place. These updates give you notifications on the top of the card and on the card icon in the dock. After clicking the refresh option from the update it will highlight the updated records with an orange strip. If this checkbox IS selected, then real time updates will be turned off within the Grantee Portal. Therefore, they won't receive the orange "1 Update" or "X Updates" button at the top of their card in order to refresh their card/list.
- Box # 3: Shows the "Grantee Landing Page Text." This specific text box is NO LONGER IN USE and has been deprecated in favor of the Grantee Portal Generic Template (in the Forms menu). This used to control the landing page information on the Grantee Portal before the Grantee Portal was reformatted to use a Dashboard Template instead.
- Box # 4: Contains 3 fields which are NOT used. These should be left as is.
- Box # 5: Contains the Verify Email Account Text box. Within this box is stored the text for the message that will be sent to users connected using the LOI Autoconnect feature (NOT used by the WPP). To learn more about Fluxx’s Autoconnect feature, visit the article here. They are first asked to verify that their email address works via this email message that contains a verification link which, when clicked, establishes this email address as legitimate.
- Within the Text box, several variables can be used:
- {{ verification_url }} - The Verification URL; this is what the user will have to click in order to confirm their email address for the system.
- {{ fluxx_link }} - Link to Fluxx Application (i.e. link to WPP's Fluxx home page).
- Within the Text box, several variables can be used:
- Box # 6: Shows the Scroll Bar. The Grantee Portal Add On has a few options, some of which cannot be seen from this screenshot. Use the scroll bar to scroll down on the page and see the other options available.
Grantee Portal Add On More Options
Continuing to scroll down on the Grantee Portal Add On (using the Scroll bar called out in Box # 6 of the previous screenshot), you'll see a few more settings. See the screenshot below to see additional settings highlighted and beneath the screenshot for descriptions of the items highlighted.
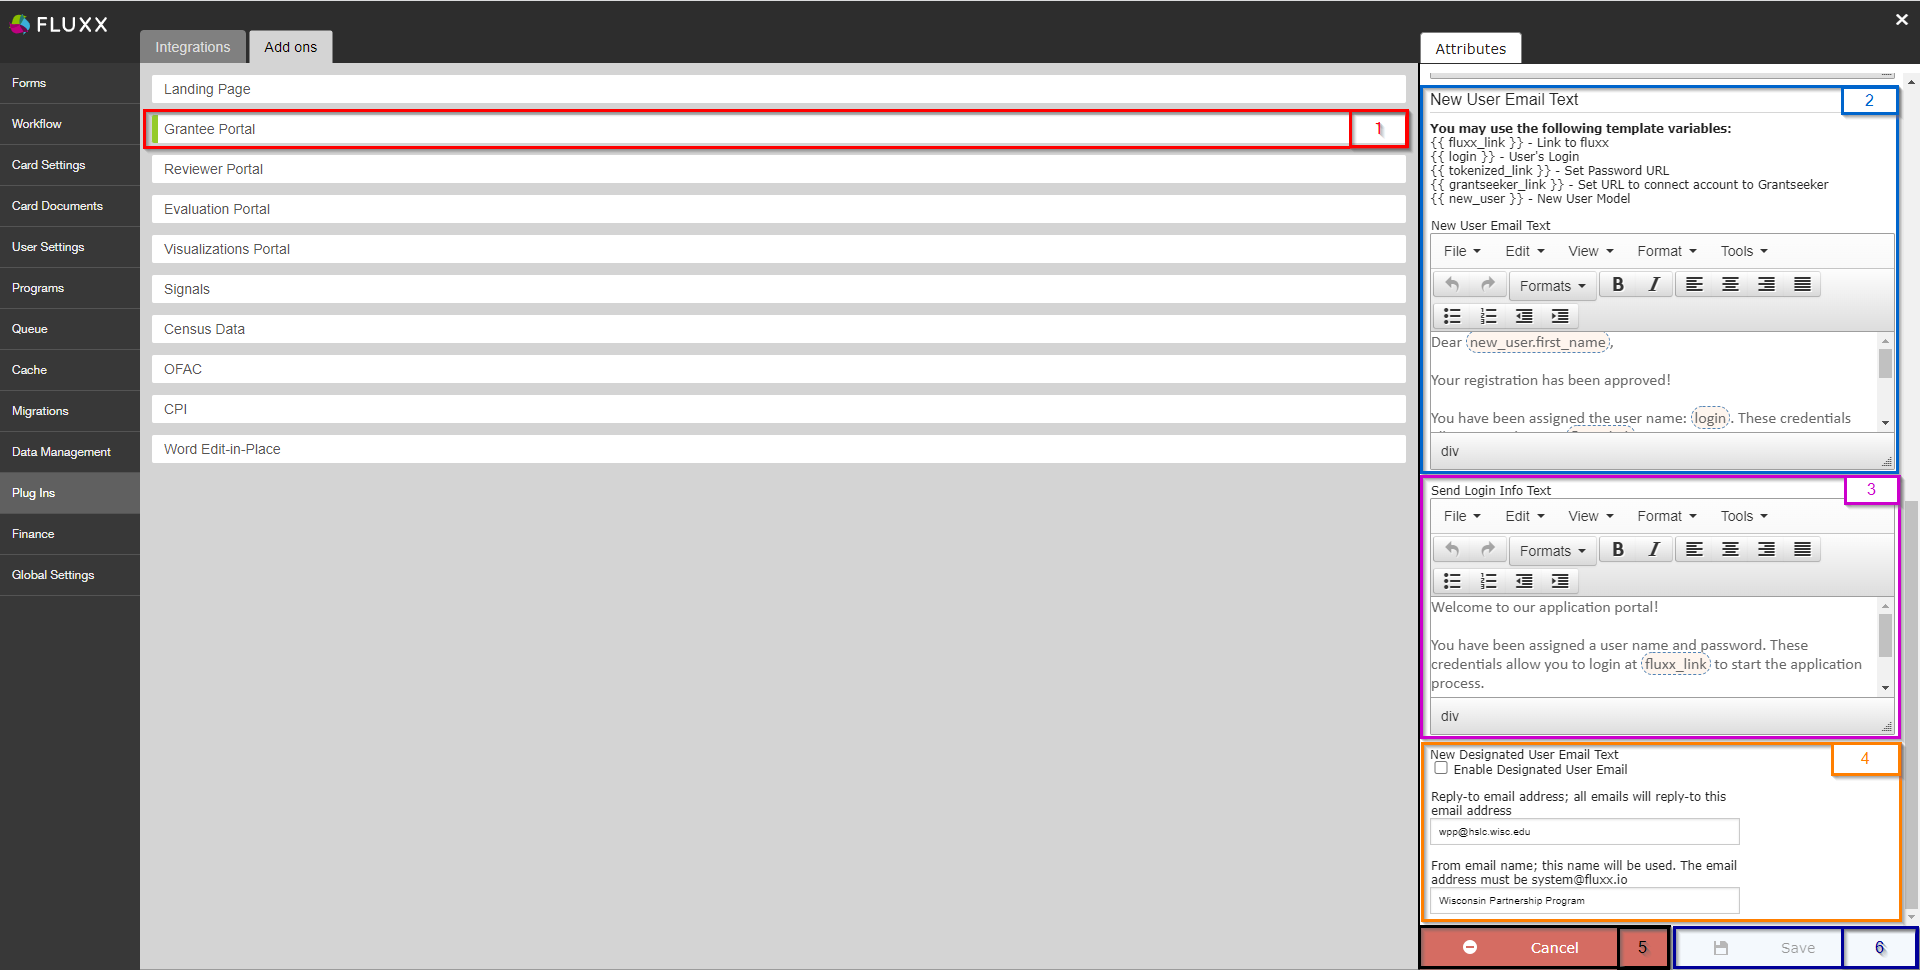
- Box # 1: Shows the Grantee Portal Add On as currently selected. You can tell which Add On you currently have selected from the slim green line that appears to the LEFT of the Add On name.
- Box # 2: Shows the New User Email Text. The New User Email is sent for new users connected, by an internal user. Once triggered, this email will send to the email address on the User Record and will populate with the text configured. This alert can be triggered in two ways:
Connecting a user to your Fluxx Instance via the 'connect' functionality on the LOI
Creating a new user manually, and populating the login (username) field.
- Note: Fluxx states that the New User Email will NOT trigger if the “Connect Functionality” is utilized to connect a registration with an existing user record, even if that record did not originally contain a login.
- Box # 3: Show the Send Login Info Text box. This feature is a legacy feature that was in place before Fluxx's Profile component has been utilized. Best practice is to NOT utilize this feature as it can cause issues with saving your user form.
- Box # 4: Shows three pieces of functionality:
- Enable Designated User Email Checkbox: When checked, a new text box, the New Designated User Email Text will appear. If this feature is being utilized, it will take the place of the New User Email, when a “Grantee” creates a user (this can occur when using the Grantee Moderator functionality). The trigger is when a grantee creates a user with a login and clicks “Save and Continue” or “Save and Close”. The user will receive an email populated with the text configured in this box. WPP has this turned off.
- Reply-to email address; all emails will reply-to this email address: As the name implies, this is the email address that will appear in the To: line when someone replies to a system email from Outlook (or a different email system). We want this to be wpp@hslc.wisc.edu so that reply emails go to the general WPP inbox.
- From email name; this name will be used. The email address must be system@fluxx.io: This will be the display name of the sender for any system emails. Example of what this looks like from Outlook below.
- Example of the From email name being "Wisconsin Partnership Program" in Outlook:

- Box # 5: Shows the Cancel button. If clicked, the system will discard any unsaved changes to this Add On.
- Box # 6: Shows the Save button. If you want to keep any of the changes that you've made to this Add On, you must click the Save button to effectuate those changes. Otherwise, any unsaved changes will be discarded.
Reviewer Portal Add On
The Reviewer Portal Add On controls various settings with the Reviewer Portal. It is important to understand how the Reviewer Portal works and what options are configurable. Please see this Fluxx article for an overview of the Reviewer Portal. Please see the screenshot below for highlighted items from the Add On and beneath the screenshot for descriptions of said items.

- Box # 1: Shows the Reviewer Portal Add On as currently selected. You can tell which Add On you currently have selected from the slim green line that appears to the LEFT of the Add On name.
- Box # 2: Shows three checkboxes that toggle pieces of functionality for the Reviewer Portal:
- Enable New Reviewer Portal: Checking this box will turn on the current Reviewer Portal functionality (ensuring that what users see in the Reviewer Portal is based off of the Dashboard Template that you have set to be the Review Portal's view). Leave this checked as the WPP exclusively uses the New Reviewer Portal (and has trained staff and end-users on the new portal, not the old one). The New Reviewer Portal is the one that allows for dual-screen reviews (i.e. those where the application appears on the right-hand side and the Review Form appears on the left-hand side).
- Enable Conflict of Interest Flow: This allows for use of the Conflict of Interest component and will send the review to a status of "Conflict of Interest (COI)" if the review checks the checkbox that they do have a Conflict of Interest reviewing the grant application in question. Leave this checked as the WPP does use the Conflict of Interest (COI) workflow.
- Show PRI Requests in Reviewal Portal: If you would like to have Review forms for Program Related Investments (PRIs) seen within the Reviewer Portal, you should check this checkbox. The WPP currently does NOT use Program Related Investments at this time, so this checkbox can be left unchecked.
- Box # 3: Shows the Display related review records that are in the following workflow states selector. Check the boxes for the statuses (in Fluxx speak, states) you would like the related review records to show (i.e. 'New', 'Submitted', etc.). This means that if 'New' and 'Submitted' are checked, and your own review is in 'New' or 'Submitted' you will be able to see 'Other Reviews' that are in the states selected in the checkboxes seen in this box.
- Box # 4: Shows the Display "Other reviews" tab for review records that are in the following workflow states selector. Just as with the previous selector, check the boxes for the statuses (in Fluxx speak, states) you would like the related review records to show (i.e. 'New', 'Submitted', etc.). This means that if you check 'New' and 'Submitted', reviewers will be able to see other reviewers' reviews for that request that are currently in the 'Draft' and 'Submitted' state of the workflow.
- Example of what this can look like if any of these status boxes are selected:

- Box # 5: Shows the Bulk PDF Download - Snapshot Document Type (only when using ZIP format) dropdown menu. The Bulk PDF Download feature gives Internal Users and Reviewers the ability to download previously generated PDF Snapshots from multiple Grant Requests at once as a ZIP file. Each PDF Snapshot will be contained in its own related Grant Request folder. The WPP currently does NOT use this functionality; if you're interested in learning more about this, see this Fluxx article about how to set this up: https://fluxxdev.atlassian.net/servicedesk/customer/portal/1/article/1796113975?src=1379994231
- Box # 6: Shows the Cancel button. If clicked, the system will discard any unsaved changes to this Add On.
- Box # 7: Shows the Save button. If you want to keep any of the changes that you've made to this Add On, you must click the Save button to effectuate those changes. Otherwise, any unsaved changes will be discarded.
Other Add Ons
All of the other Add On menus have very short, relatively straightforward configuration options (and for the most part, the WPP doesn't use any of the other add ons). If you have questions about other Add On settings, you can try searching for information in the Fluxx Knowledge Base.