...
Continuing to scroll down, more settings appear for the email recipients and for the trigger mechanism of the alert. See the screenshot below for more highlighted items and beneath it for descriptions of those items.
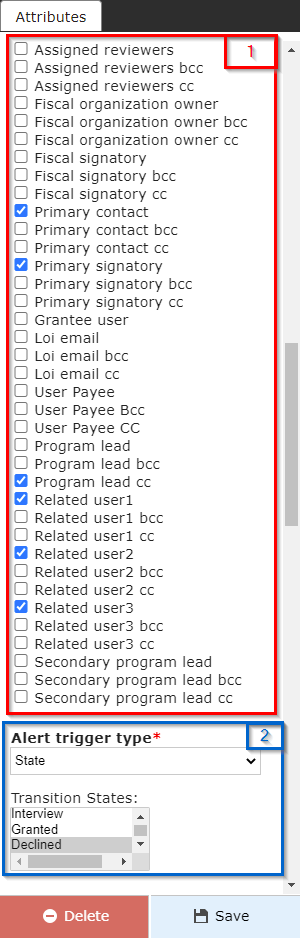
- Box # 1: Shows more user relationship fields that can be used to determine to whom the email alert should be sent. At the WPP, we generally use these checkboxes to determine who the email should go to. The User relationship fields here relate back to the Grant Request record, even if the email is NOT in the Grant Request record type. For example, if I'm creating an email in the Request Report (AKA Requirements) record type, selecting the "Primary Contact" and "Primary Signatory" to send the email to will make the system link back from the Requirement to the related Grant record and pull in the email address's from the Grant's Primary Contact and Primary Signatory.
- Additionally, other users linked to the Grant that AREN'T grantees can be selected as well; you can see from the list that "Program Lead" (as well as Program Lead CC and Program Lead BCC) are all options in the list in case you always want to include the Program Officer in any email alert to the Grantees.
- Box # 2: Shows the first part of the email alert page where you can configure how the email alert is triggered. The main way that the WPP triggers email alerts is based off of status changes.
- The Alert Trigger Type has four different options for selection:
- Filter: email alerts with this option selected will send anytime a record meets the filter criteria and has a value change on the record. This alert will trigger over and over every time the condition is met. For this reason, One Time Filter is generally recommended over the simple Filter option.
- One Time Filter: email alerts with this option selected will trigger the same as filtered alerts with one important distinction: this email will only trigger once and will NOT send again. For this reason, it's generally preferred to use One Time Filter rather than Filter.
- Field: Any change in any of the fields that are selected will trigger the email alert to be sent. You can select multiple fields to be the triggered, and one email will trigger for changes to ALL the fields selected.
- Once Field is selected, a list of all available fields for that model will appear. Select the field(s) you want to trigger the alert to be based on from the list.
- State: triggers an email alert when a record enters (i.e. first moves to) the workflow status (AKA state) configured for the specific email alert. This is the most used Alert Trigger Type by the WPP.
- Once this option is selected, a workflow state or states will need to be selected in the box that appears.
- The Alert Trigger Type has four different options for selection:
Continuing to scroll down on the attributes screen, several more options appear. See the screenshot below for highlighted items and beneath the screenshot for descriptions of said items.
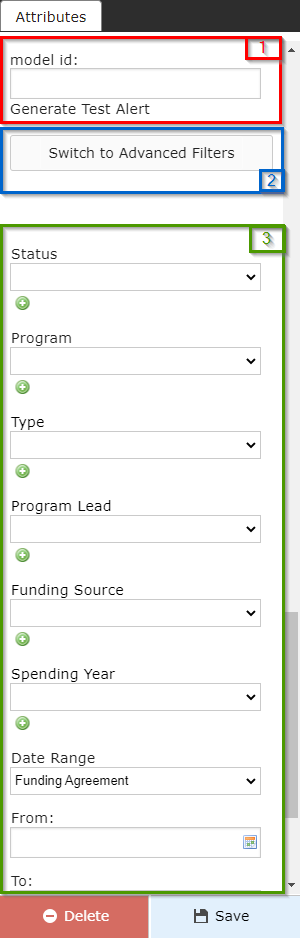
- Box # 1: Show the Test Alert box. This allows you to enter in an internal ID for a record of the same Record Type as the email alert.
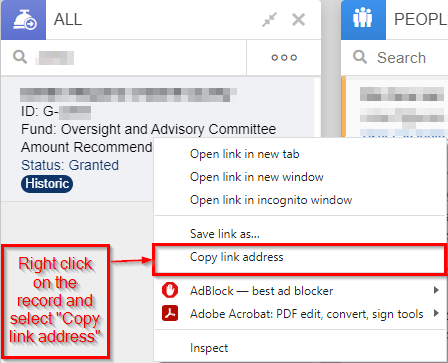
- To obtain the ID, right-click on a record in the system that has the same Record Type as the email alert (in this example, we're looking at Grant Request emails so the record here is a Grant Request – in this specific case a full Grant). When you right-click a record, a small menu comes up with options such as "Open link in new tab." Select the option "Copy link address:"
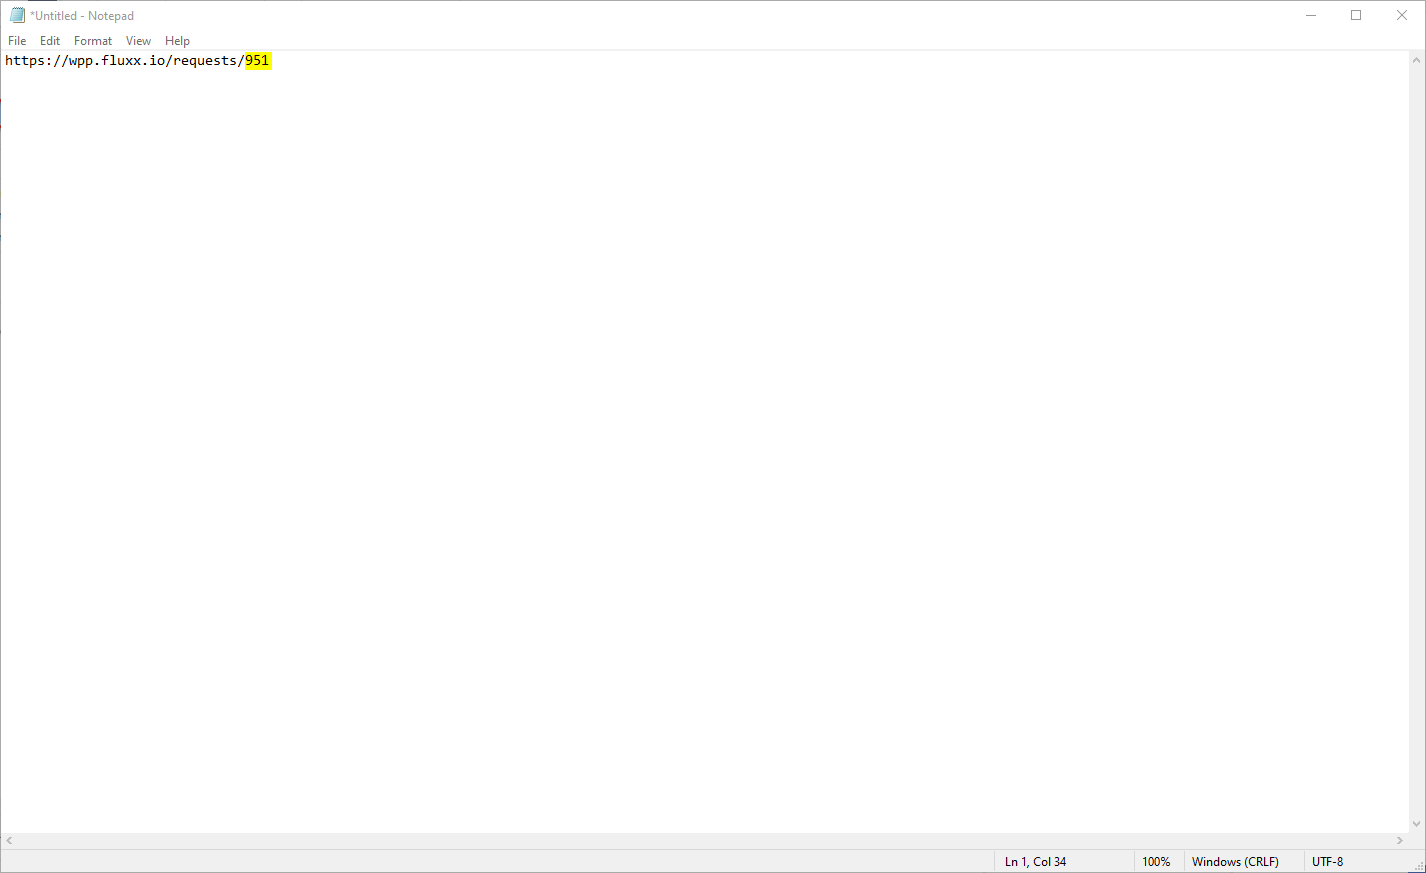
- Once you've done so, open up a Notepad page (or a Notepad++ page if you use that application). In your Notepad page, paste the link that you just copied:
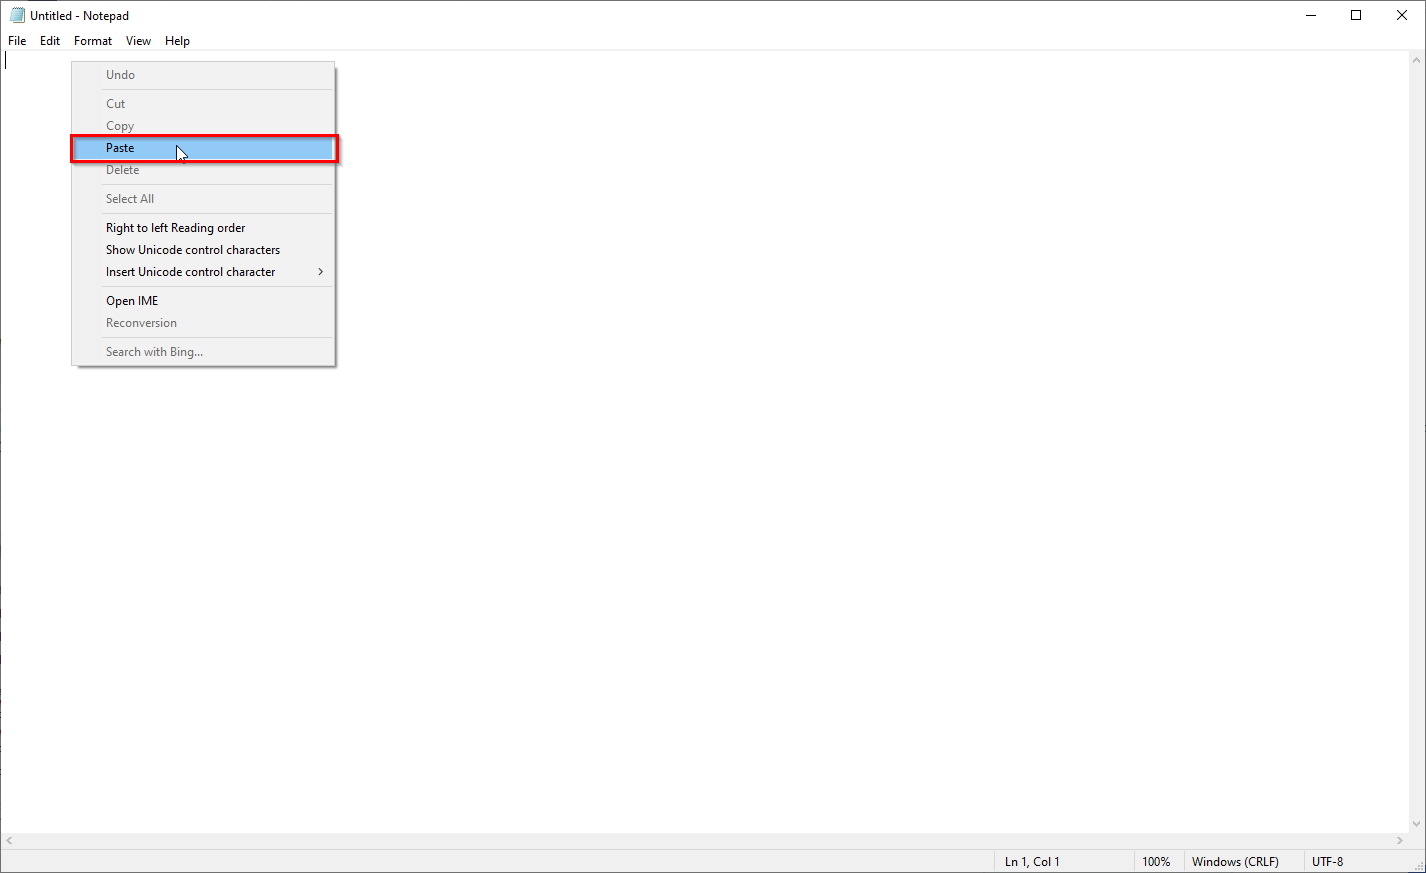
- The link should look something like the screenshot found below. The number after the last forward slash ("/") (also highlighted in the screenshot below) represent the Internal ID that you can post into this window to test the alert. Copy the numbers after the last forward slash.
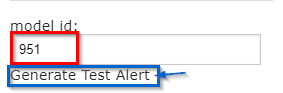
- Now to generate the text alert. Paste the numbers obtained from the last step in the "model id:" field, then click on the button that says "Generate Test Alert."
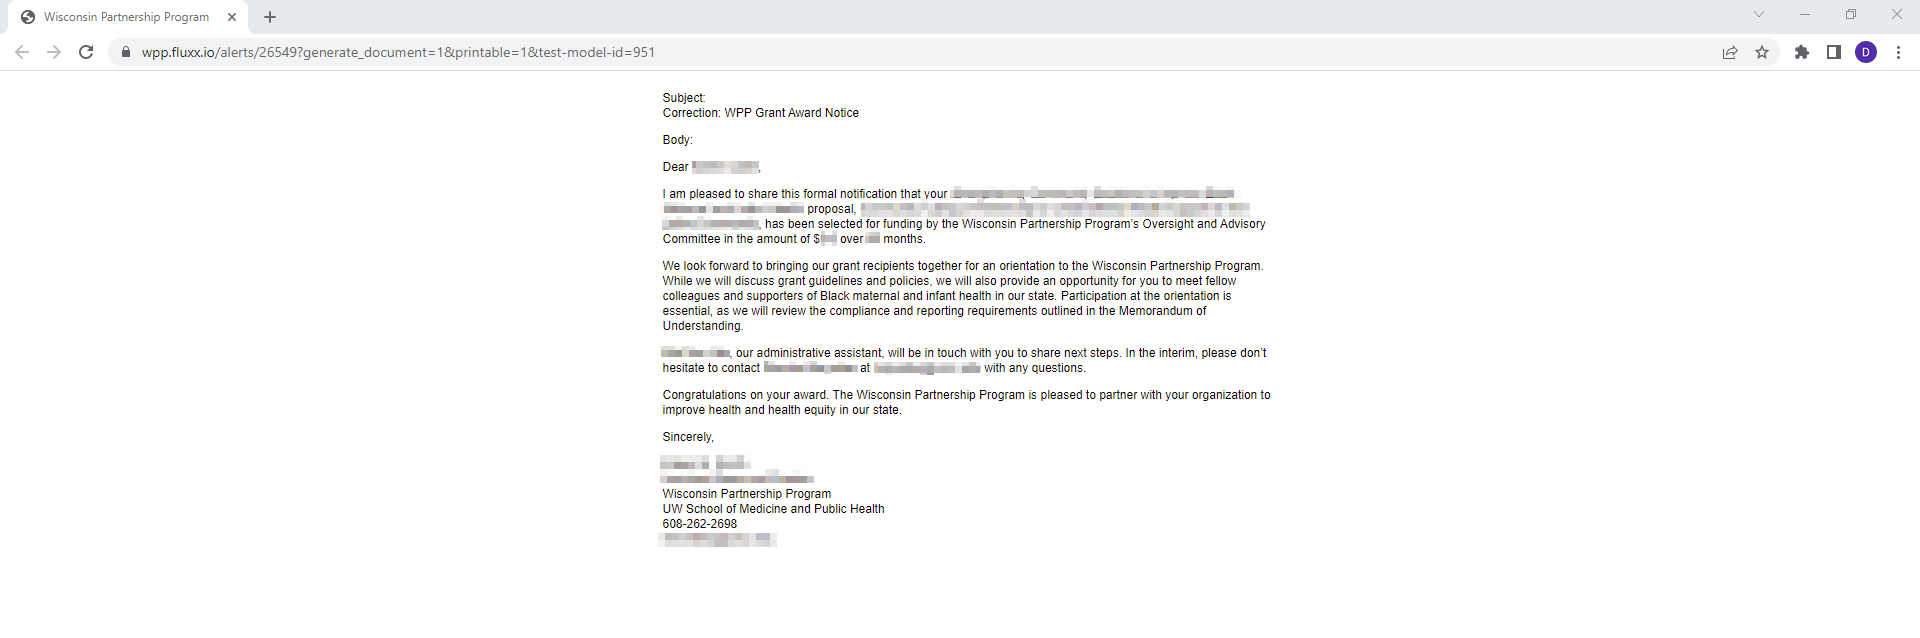
- Clicking "Generate Test Alert" will result in a new tab opening up on your internet browser with the text of the email as it would be configured for the record supplied in "model id:" – see the screenshot below to see what that test alert looks like:
- To obtain the ID, right-click on a record in the system that has the same Record Type as the email alert (in this example, we're looking at Grant Request emails so the record here is a Grant Request – in this specific case a full Grant). When you right-click a record, a small menu comes up with options such as "Open link in new tab." Select the option "Copy link address:"
- Box # 2: Shows the "Switch to Advanced Filters" toggle option. Like with Cards, emails can be set up with Filters. These Filters work in conjunction with the Trigger settings to determine if the record in question merits the Email Alert. Basically, in order for a record to qualify for the email alert, it has to qualify for both the trigger settings AS WELL AS the filters. Switching to Advanced filters allows for the "Advanced Search" window to appear and then allows you to use Advanced Filters criteria and logic (i.e. using nested groupings, switching between "AND"/"OR" logic, and toggling "NOT" clauses).
- Box # 3: Shows the Basic Filters that are available for selection. These filters will still appear when advanced filters are being used, but both should NOT be used in conjunction. Use EITHER the basic filters OR the advanced filters, not both.