...
- Box # 1: Shows the Finance Settings tab as currently selected.
- Box # 2: Shows the group of settings currently selected. You can tell which bank account is currently selected based off of the slim green line that displays on the left-hand side of the group of settings selected. In this example, we're looking at the Spending and Payments Report Settings.
- Box # 3: Shows several of the settings that allow you to control how the Spending and Payments Report will appear when run.
- The Spending and Payments Report Style gives several options for the style of the report.
- The options for the style are shown below:
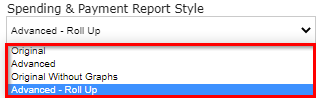
- Original: Explanation of the Original Budgeting Style can be found here: https://fluxxdev.atlassian.net/servicedesk/customer/portal/1/article/1795916915?src=602107089. Note: If Original style is selected, none of the rest of the options from Box # 3 will appear (i.e. b - g below) NOR will the options in Box # 4 appear.
- Advanced: Explanation of the Advanced Budgeting Style can be found here: https://fluxxdev.atlassian.net/servicedesk/customer/portal/1/article/1795917463?src=748060891
- Original Without Graphs: See the Original style link for further explanation; essentially equivalent to that style, but without the graphs. Note: As with the Original style, if Original Without Graphs is selected, none of the rest of the options from Box # 3 will appear (i.e. b - g below) NOR will the options in Box # 4 appear.
- Advanced - Roll Up: Explanation of the Advanced Budgeting with Roll Up Style can be found here: https://fluxxdev.atlassian.net/servicedesk/customer/portal/1/article/1795949725?src=730543791
Under the Approved Label, enter the naming convention desired for Approved grants (optional).
Under the Pipeline Label, enter the naming convention desired for Grants in Pipeline (optional).
Under the Paid Label, enter the naming convention desired for Paid payments (optional).
Under the Contingent Label, enter the naming convention desired for Contingent payments (optional).
Under the Scheduled Label, enter the naming convention desired for Scheduled payments (optional).
Under the Pending Label, enter the naming convention desired for Pending payments (optional).
- The Spending and Payments Report Style gives several options for the style of the report.
- Box # 4: Shows further options for categorizing various grants based off of their statuses.
Under “States Considered Pipeline”, select the workflow states on the grant that represent Requests in the Pipeline
Under “States Considered Pending”, select the workflow states on the grant that represent Pending requests
Under “States Considered Approved”, select the workflow states on the grant that represent Approved Grants
- Box # 5: Shows the scroll bar as there are two more settings options on this page (that won't, however, be covered here as the WPP does NOT use these options).
- Box # 6: Shows the Cancel button. If you have made changes that you do NOT want to be effectuated, you can simply click the Cancel button and the settings on this screen will return to how they were set prior to your most recent, unsaved changes.
- Box # 7: Shows the Save button. If you made any changes to this record that you want to be effectuated, you MUST click the Save button. Otherwise, any unsaved changes will be discarded.