...
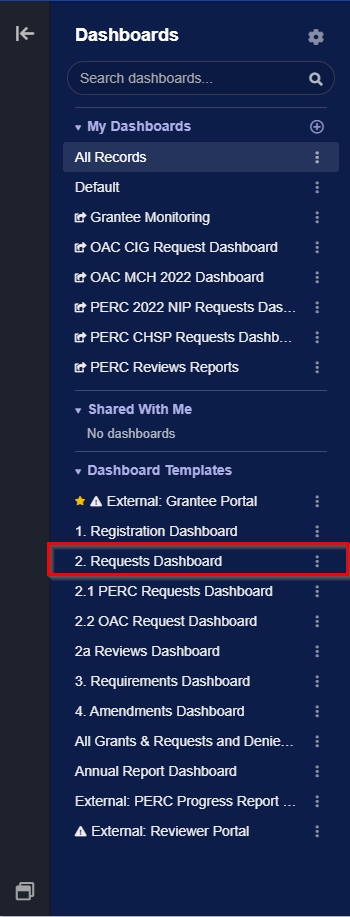
- Step # 1 – Can YOU see their application (from the employee portal)? You can go to the Dashboard manager and check out the Shared Dashboard "2. Requests Dashboard" which shows all current application records.
- Dashboard manager showing where you can find the "2. Requests Dashboard":
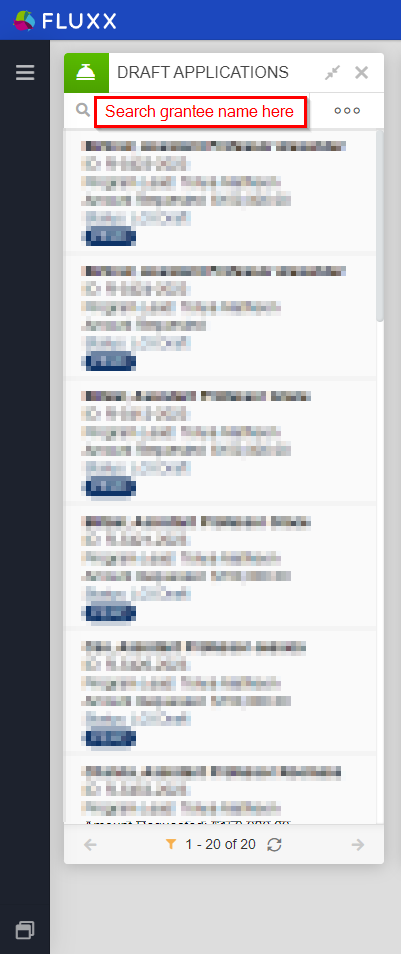
- From "2. Requests Dashboard," look at the card farthest to the left called "Draft Applications" (draft applications are ALL applications that have been initially begun by grantees but have NOT yet been submitted for the first time). In the search bar at the top of the card, type in or paste the Grantee's name to see if you can find their application in drafts. If you CAN find the application, proceed to step # 2.
- If you are UNABLE to find their application within the Draft Applications card, start checking the cards to the the right of Draft Applications one-by-one. Next in order is Eligibility Review (where applications go immediately AFTER they have been submitted), so type in or paste the Grantee's name in that search bar next to see if you can find their application; repeat this step for each subsequent card to the right on the dashboard to see if you can find their application.
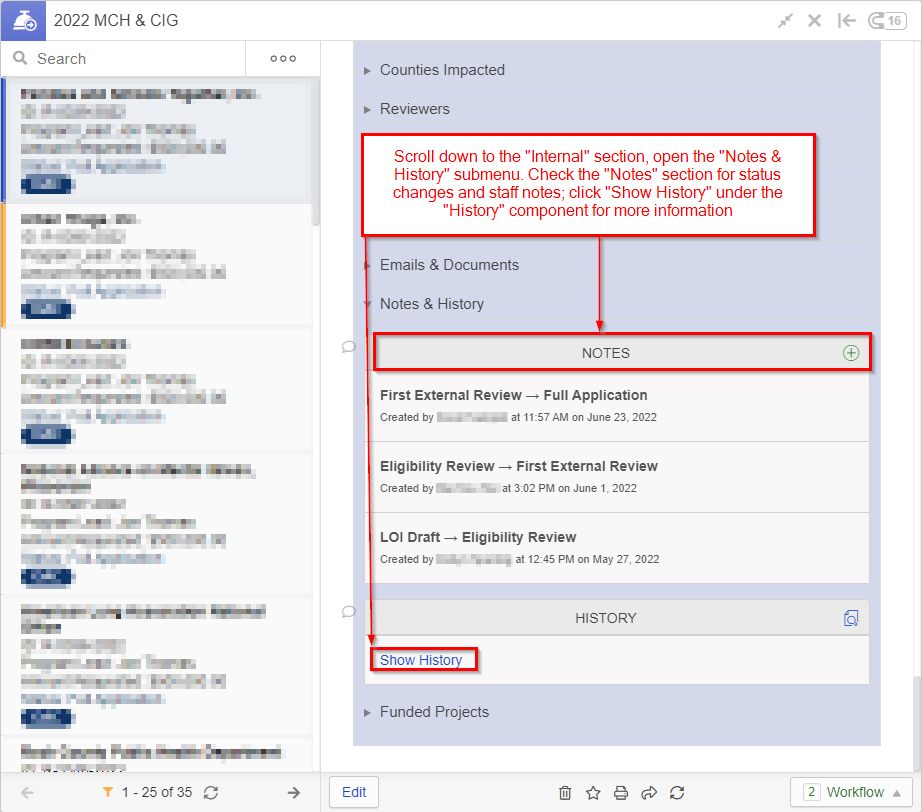
- If you DO find the application in one of these other cards, go ahead and check the Audit Trail (AKA History in Fluxx). You can do so by scroll down on the application until you reach the Internal section. Within the Internal section, there's a submenu called Notes & History; open it. The first place to check is the "Notes" component. This will give you high-level information about the application, such as status changes (including who performed the status change) and any staff notes. Likely, you can "tell the story" of what happened to this application just by using the notes section. However, if you need more details there is also the full History. Below the Notes component, find the History component and click on the blue link that says "Show History" (see also the screenshot below). This will allow you to see exactly who changed what and when in case you had any lingering questions.
- If you still CANNOT find the application, you can always check if there's any linked Request records to the Grantee's User record by pulling up their User record in a User card.
- If you are unable to find the application via any of these means, it's possible this user canceled their application after creating it but before saving it (basically, deleting the application – the positive thing is that this however can only happen on initial or round 1 applications as anything in round 2 will already have been saved), in which case there isn't anything to do other than:
- Have them start a new application (recommended)
- Create a new application for them (if they are unable to for some reason) and assign the organization and primary contact of that application to their organization and user respectively.
- Step # 2 – Check that the application is set up correctly and visible by the Grantee: Once you've confirmed that the application exists, now we need to make sure that it's set up for the Grantee to be able to see it. Pieces to check:
- Is their organization/user attached to the Grant? It would have been difficult to find the grant if this the user/their organization isn't linked to the grant, but still always important to check.
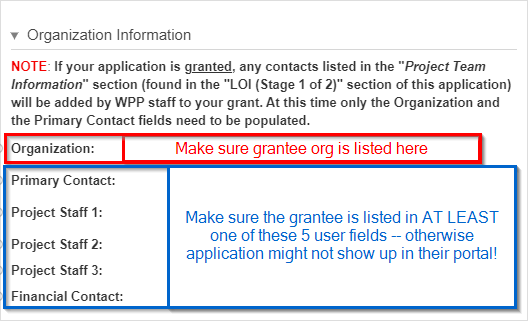
- Check the "Organization Information" section of the application (always near the top). Next to "Organization:" there should be listed the primary organization applying for this grant. Under that, there are 5 user fields; the Grantee's name should be filled out in at least one of those 5 user fields. This will ensure that they have access to the application from their user portal.
- If the user needs to be added to the application, but the Grantee's name does NOT appear in one of the dropdown menu when selecting one of those users, then the organization is NOT linked to the user (and vice versa). Go ahead and create the relationship between the user and the organization record. Once you've done so, the user will be selectable from those dropdown menus. Select the user in one of those 5 user fields and save the record.
- Is their organization/user attached to the Grant? It would have been difficult to find the grant if this the user/their organization isn't linked to the grant, but still always important to check.
- Step # 3 – After verifying that the application is set up correctly, see the portal through the Grantee's eyes: After completing steps # 1 and 2, we can be sure that the application is set up correctly so that the Grantee should be able to see it within their portal. Now, we should attempt to log in as the grantee to see things as they would in their portal.
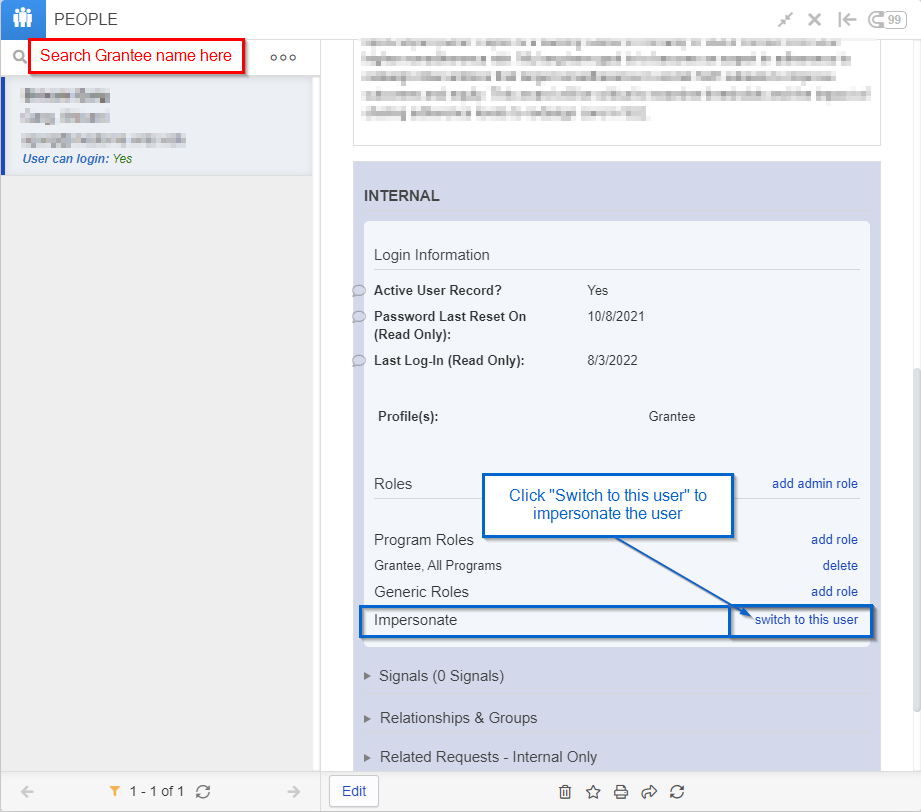
- In order to do so, go to a User card. Search for the Grantee in the card's search bar and click on the grantee's name when you find them. On their record, scroll down until you see the internal "Login Information" section. From within there, there is a link called "switch to this user" which will allow you to sign in as if you were the grantee. Click on "switch to this user" and check out their portal. See also the screenshot below for more details.
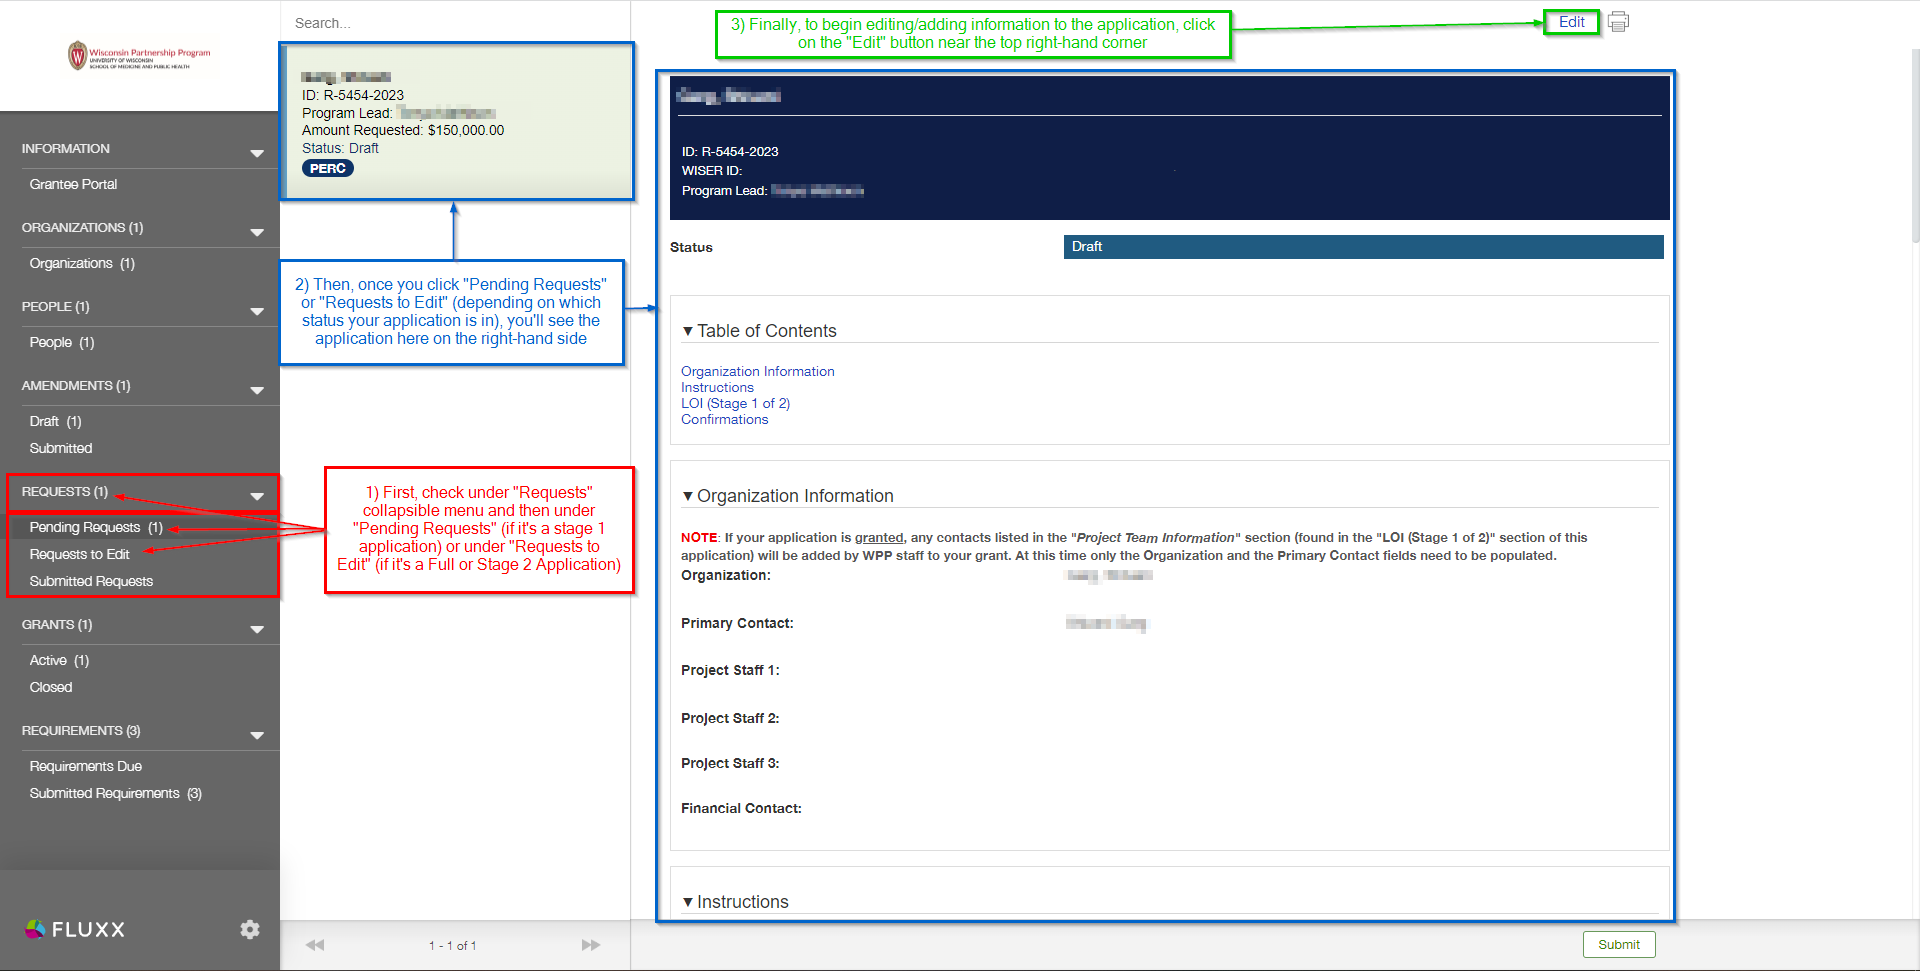
- From within their portal, use the left-hand dark grey Navigation Bar and find the collapsible "Requests (#)" menu (where # represents the number of applications found linked to the grantee's user). Under that menu, there are two tabs to check: Pending Requests (for applications that have NOT ever been submitted and are in draft status) and Requests to Edit (for applications who are in Round 2/Full Application status). You can more easily tell where to find the application by seeing if either Pending Requests or Requests to Edit have a "(#)" next to the title; if so, the # represents the number of applications that can be found in that tab. For the example shown in the screenshot below, you'd click on Pending Requests to find the Grantee's application since that tab has "(1)" at the end of its name. If you can find it here in their portal, take a screenshot to send to the Grantee to explain where they need to look in order to find their application.
- Step # 4 – what if they don't know how to edit the application? As in the screenshot above, they'll need to click the "Edit" button in order to start editing/adding information the application.
- What if the user can't see the edit button? If they cannot see the edit button, the answer is almost assuredly that they do NOT have the required Grantee Role in order to be able to edit this application. Add the Grantee Role to their user record and the edit button will appear for them as it shows in the screenshot above this.
...
