Connecting to your work Mac from a Windows PC or Mac at home
Connecting to your work Mac from a Windows PC or Mac at home is a little different. You’re not going to be able to use Remote Desktop, but that’s okay because there’s a free client called RealVNC viewer that will allow for access. You need to download and install this client on the home PC or home Mac you will be accessing your work Mac from.
It has pushed settings out to your work computer use the following to verify they are set.
Just like with Windows, you first have to set up your work Mac for screen sharing. Press on the Apple Menu, and then press "System Preferences".

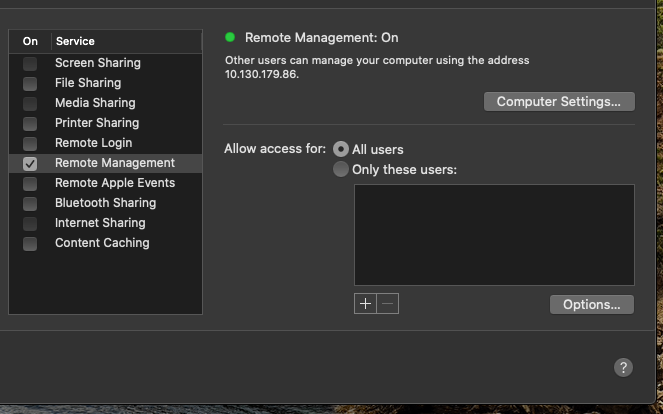
Open the “Sharing” preference panel.

Uncheck all boxes except for Remote Management. Press the Remote Management box to check it (if it is not already). It may ask you to give access controls, if it does, check all the boxes in that pop-up window and hit OK.
Setting up the PC you will use to connect to your work Mac
Your Mac’s screen can be accessed by its numbered address or COMPUTERNAME.domainlocation.
For AD users: COMPUTERNAME.ad.wisc.edu
For MSAD users: COMPUTERNAME.msad.hslc.wisc.edu
If you’re unsure how to access your Mac, go back to your Sharing preferences and double-check the information on the Screen Sharing settings.
For this example, we entered the numbered address in our VNC client and leave the encryption as it is.

After entering in the address of the work computer, hit Enter.
You will get a security warning, check the box to not warn about the connection again, and click Continue.

An authentication box will appear where you will need to enter the password you created in the Sharing preferences on your Mac.
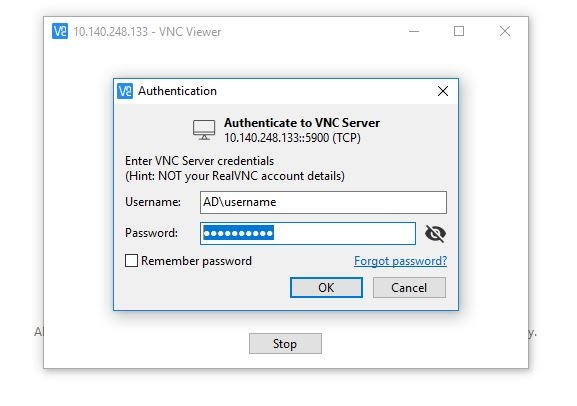
When you connect to the target Mac, you will also need to log into your user account for that computer. If your computer name had AD in front of it, you will need to include this, or MSAD if it had that. Once logged in, your Mac desktop will now appear in the VNC Viewer window in the same state as you left it.

If you mouse to the top-middle of the window, you can spawn extra controls, which when you hover will give you a tooltip explaining what each one does.

This little toolbar will let you take actions such as close the connection, go to full-screen, and more. Hover over each button to learn what it does.
You’ll find handy shortcuts to close and save the connection, as well as to change options, and a full-screen button so your shared desktop fills the screen.
On the work Mac side of things, a Screen Sharing icon will appear in the menu bar. This lets you quickly and easily access the Screen Sharing preferences or disconnect clients.
