Before you go on...
Much of this article assumes an understanding of the workings of and the differences between Profiles, Roles, and Programs in Fluxx.
For background materials to understand these differences, please see our Roles, Program, and Profiles (or Portals) Definitions Page.
Additionally, Fluxx has two great articles discussing many of the things found in this article. This article deals with explaining Profiles, Roles, and Permissions explicitly.
A second article discusses Editing Profile Permissions, which should be a key takeaway from this page.
Profiles Tab
The Profiles tab contains the several different Profiles available for selection from within our system, allowing you to Edit/Create/Delete Profiles. When you select a Profile from this screen, there are four different subtabs that allow you to edit specific pieces of functionality for each given profile.
The four subtabs are:
- The Attributes Tab – Controls high-level attributes, such as the Profile name and the exact Portal that will be presented to users who sign in with this Profile.
- The Rights Tab – Controls what Rights users with this Profile have within the system, i.e. being able to view or edit or create records of a specific type.
- The Delegate Rights Tab – Not currently used by the WPP; allows extended functionality by allowing the embedding of a dynamic card in the Grantee Portal with permissions based off of the parent record this embedded child card is related to.
- The Permissions+ Tab – Extended Profile settings with a series of checkboxes that control other user Permissions not covered in the Rights tab.
Attributes Tab
The Attributed Tab allows you to edit high-level information about the Profiles available for users. See the screenshot below for highlighted items from the Attributes Tab and see beneath the screenshot for descriptions of said items.
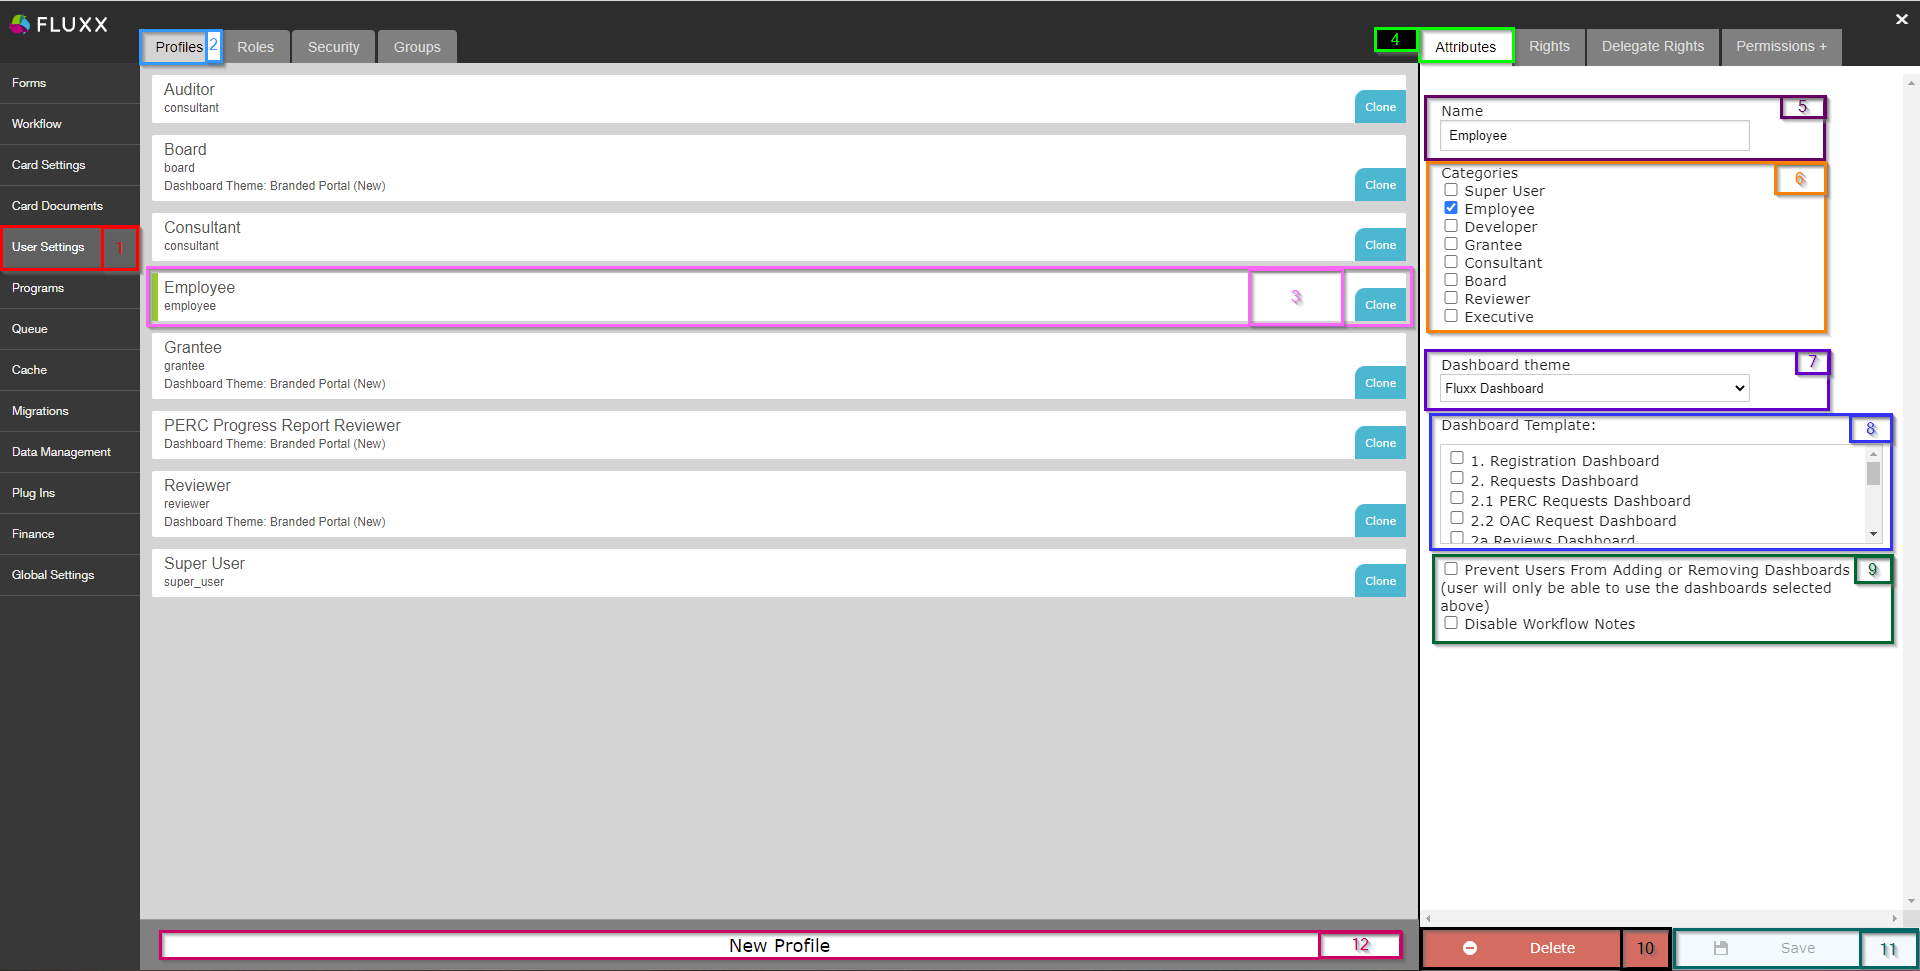
- Box # 1: Shows the User Settings Admin Panel menu currently selected.
- Box # 2: Shows the Profiles tab currently selected.
- Box # 3: Shows the Profile that you currently have selected. You can tell which Profile is currently selected NOT ONLY based off of the name (match name of Profile with "Description" from box # 5), BUT ALSO from the slim green line that appears to the LEFT of the Profile name.
- Box # 4: Shows the multiple tabs of user settings available from within the single Profile selected. Currently selected is the Attributes tab. This lets you change high-level information about the profile selected, such as the profile name and the profile category. Other tabs allow for other changes to be made (see below for explanations of the other tabs).
- Box # 5: Shows the name of the Profile selected. This can be edited and will not break the system; however, please avoid doing so unless absolutely necessary as we've training staff on the current Profile names.
- Box # 6: Shows the Category that the profile falls into. This partially dictates functionality; selecting the Employee category will force the profile to behave like an Employee-type profile, whereas selecting the Reviewer category will force the profile to behave like a Reviewer-type profile. For newly created, non-default profiles (such as our PERC Progress Report Reviewer), a category is not necessarily needed (as they need their own special functionality).
- Box # 7: Shows the Dashboard theme selector.
- There are three options for selection here:
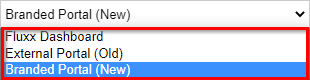
- Fluxx Dashboard: The default option, Fluxx dashboard is essentially the Employee view of the system (where the user has a Default dashboard, plus shared dashboards and the Organization-specific Dashboard Templates).
- External Portal (Old): No longer used; used to be used for external portals (i.e. Grantee and Reviewer Portals).
- Branded Portal (New): The new version of the External Portal; this will force the user to have 1 portal view based on the Dashboard Template selected for Box # 8. This prevents the user from creating their own dashboard/adding new cards that they shouldn't have access to (as is desired for external users like Grantees, Reviewers, and PERC Progress Report Reviewers).
- Box # 8: Shows where you can select the Dashboard Template. You only need to select a Dashboard Template IF you selected "Branded Portal (New)" as the Dashboard theme selector from Box # 7. Otherwise, if you selected "Fluxx Dashboard" this field can be left unaltered.
- Box # 9: Shows two checkboxes that determine some functionality for this Profile.
- Prevent Users from Adding or Removing Dashboards (users will only be able to use the dashboards selected above): If checked, will prevent the user from being able to add or remove Dashboards; they will be restricted to only having the Dashboards checked in Box # 8. This is mainly used when the Dashboard Theme selector is set to Fluxx Dashboard, as those with the Branded Portal (new) are always prevented from being able to add/remove dashboards. Still, you can check this box for new portals built for external users (non-employees) to make absolutely sure they are prevented from adding new dashboards.
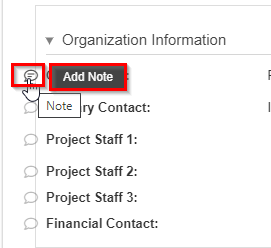
- Disable Workflow Notes: When clicked, users will be unable to add Workflow Notes, i.e. notes directly on the record that can be left as you're completing your workflow.
- Example of what being able to leave a workflow note looks like in the system. If this checkbox is checked, then the Add Note button found below will be completely removed and users will not be able to see/leave these notes.
- Box # 10: Shows where you can Delete this User Profile. This is highly dangerous! Please only delete profiles that were created in error and are not attached to any user accounts; deleting any User Profiles that are in use will result in users immediately losing the Portal Access and permissions that they need to complete their work.
- Box # 11: Shows where you can Save your changes to this profile. If you've made any changes, you must hit the save button in order for your changes to be effectuated. Otherwise, your changes will be discarded.
- Box # 12: Shows where you can create a New Profile. This is useful if you need to create a new Portal, as the WPP needed to do when we created the PERC Progress Report Reviewer Profile.
Rights Tab
See the screenshot below for highlighted, important items from the Rights Tab can be found in the screenshot below. See beneath the screenshot for descriptions of said items.
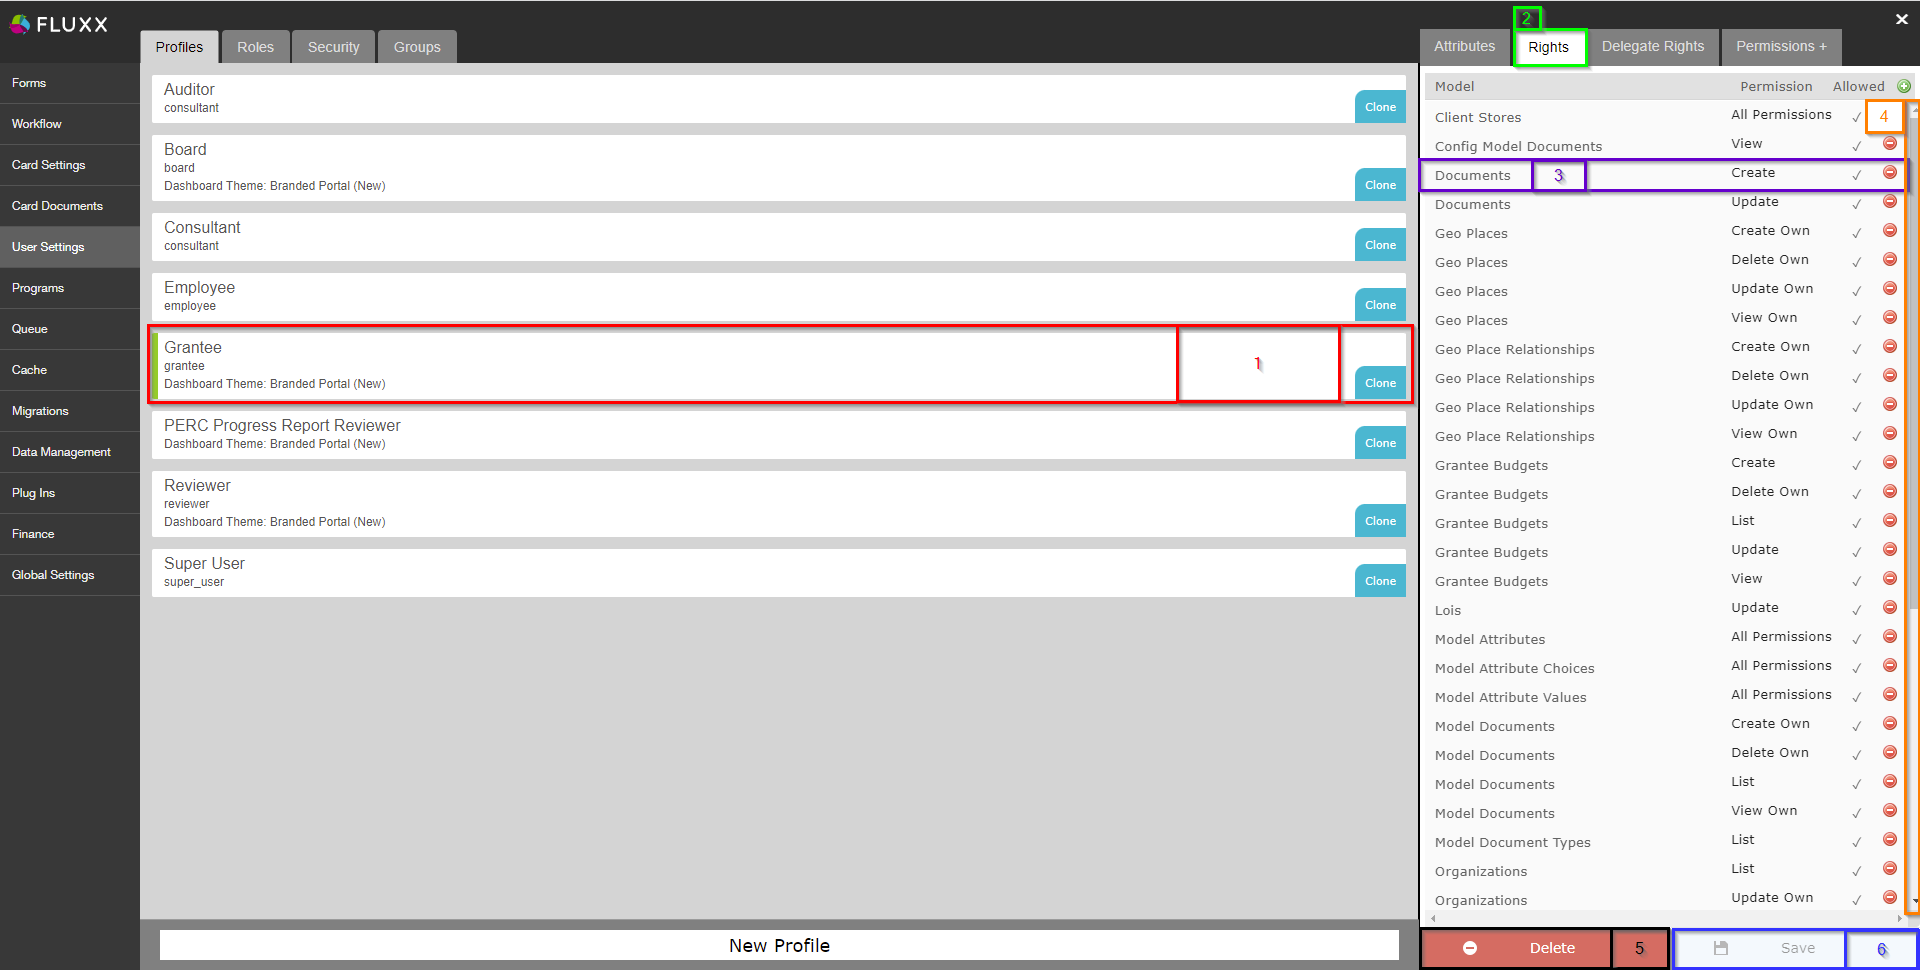
- Box # 1: Shows the Profile that's currently selected. You can tell which Profile is currently selected from the slim green line that appears to the LEFT of the Profile name.
- Box # 2: Shows the Rights tab that's currently selected.
- Box # 3: Shows a single Rights line; each line represents a set of permissions that are either Allowed or Not-Allowed.
- The Word on the left-hand side of Box # 3 under the column "Model" represents the Record Type that the permissions are applied for (e.g. Grant Requests, Reviews, Requirements, Documents, etc.).
- The word in the middle under the column "Permission" describes what type of permission is granted for this record type. In this example, the permission given is Create, which means that this profile can Create records in the Record Type specified under the Model column.
- The Symbol under the "Allowed" column specifies whether the action described for the given Record Type is Allowed (represented by the
 checkmark) or Not-Allowed (represented by the
  symbol that looks like the number 0).
 - Any permissions line can be deleted by clicking on the
 symbol on right-hand side of Box # 3.
- Box # 4: Shows where the Scroll Bar lives on this screen. You'll need to make use of the scroll bar here, as there are often more permissions lines than can fit in one screen, so users will typically have to scroll down this screen to see all of the permission lines.
- Box # 5: Shows the Delete button where you can delete the Profile you currently have selected. This is highly dangerous! Please only delete profiles that were created in error and are not attached to any user accounts; deleting any User Profiles that are in use will result in users immediately losing the Portal Access and permissions that they need to complete their work.
- Box # 6: Shows where you can Save your changes to this profile. If you've made any changes, you must hit the save button in order for your changes to be effectuated. Otherwise, your changes will be discarded.
Delegate Rights Tab
Not currently used by the WPP. See this Fluxx article if you need information on the Delegate Rights tab: https://fluxxdev.atlassian.net/servicedesk/customer/portal/1/article/1692303561?src=14367399