| HTML |
|---|
<div style="background-color: yellow; border: 2px solid red; margin: 4px; padding: 2px; font-weight: bold; text-align: center;">
This page was moved to <a href="https://kb.wisc.edu/134255">kb.wisc.edu/134255</a>
<br>
Click in the link above if you are not automatically redirected in 10 seconds.
</br>
</div>
<meta http-equiv="refresh" content="5; URL='https://kb.wisc.edu/134255'" /> |
Before beginning the configuration steps below, please verify that the Global Protect VPN Client software is installed on your computer. See links to the instructions below:
WiscVPN - Installing the Palo Alto GlobalProtect Client (WINDOWS)
https://kb.wisc.edu/page.php?id=91915
WiscVPN - Installing the Palo Alto GlobalProtect Client (MAC)
https://kb.wisc.edu/page.php?id=73116
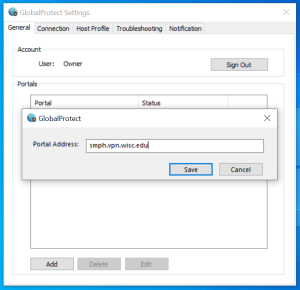
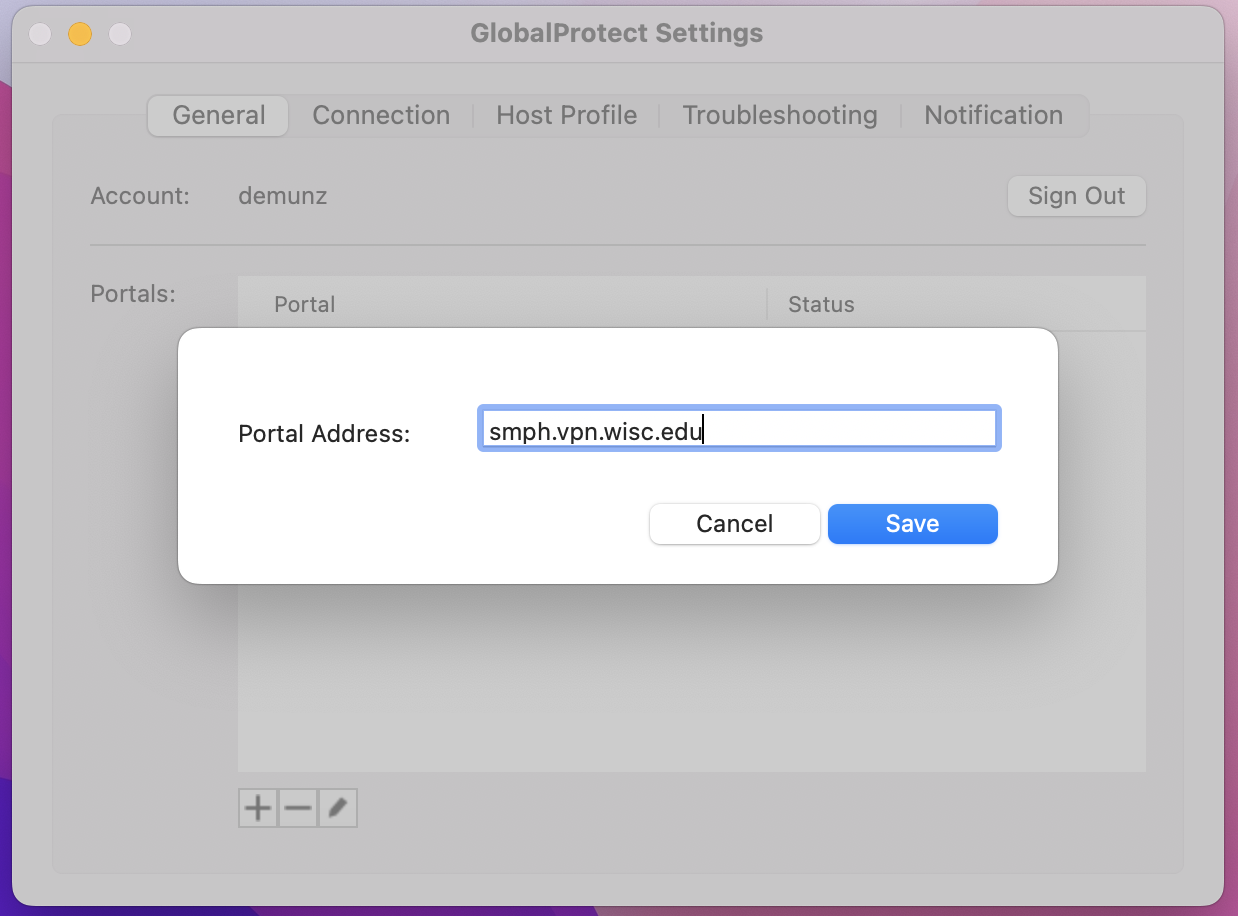
Configure (add) the SMPH VPN portal address within GlobalProtect
NOTE: This portal address step only needs to be done one time. Once added, the Portal address should be remembered (in a drop down menu) for subsequent connections. Once you have performed the steps below, and have added the portal address
| WINDOWS - Screen Shots | MAC - Screen Shots | |
|---|---|---|---|
| A | Open GlobalProtect.
| |
|
| B | At the top right of the GlobalProtect window, |
After enrolling in Work Space on following these steps: SMPH Medical Student Health Link Remote Access
- Verify you installed the Global Protect VPN Client Instructions found here: Windows Mac OSX
- Connect to portal: smph.vpn.wisc.edu See Below for instructions
- Go to https://remoteapps.uwhealth.org
- login in with UWHealth credentials
- Accept the Multi-Factor Authentication from UWHealth
- select the Citrix portal
- Note the first time you will need to install the Citrix client on your computer
VPN portal configure
*note this setup can be skip after the first setup
Window Screen Shots | Mac Screen Shots | 1 | Open Global Protect from the system try or start menu |
| 2 | At the top left You can click on the three bars to open setting Settings. |
|  |
|---|---|---|---|---|---|---|---|---|
| C |
| 3 | Click on Add in
close
|
|
|

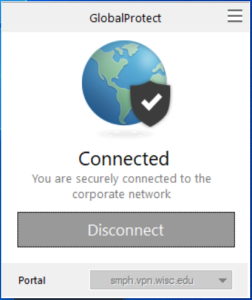
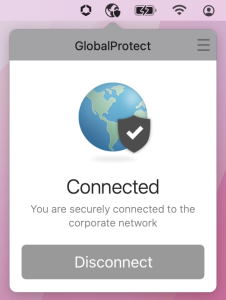
Connecting to SMPH VPN portal
...
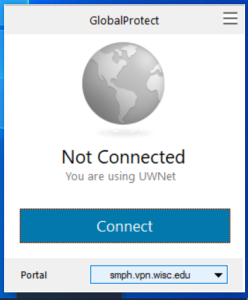
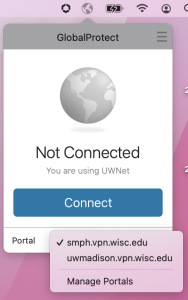
A Open GlobalProtect.
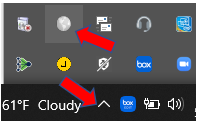
- WINDOWS - Click the (up arrow) icon in the System Tray of the taskbar and select the GlobalProtect icon,
- or, search the StartMenu for GlobalProtect and open it from there.
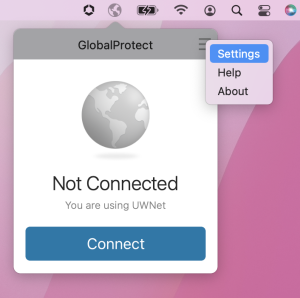
- MAC - Click the GlobalProtect icon (top right) of the Apple Menu bar.
B Verify the smph.vpn.wisc.edu
- WINDOWS - Click the (up arrow) icon in the System Tray of the taskbar and select the GlobalProtect icon,
...
Portal is selected and
...
click Connect
- NOTE:
...
- if only one portal is
...
- configured, then the portal down arrow option
...
- does not show.
...
C Enter your
...
NetID username and password
...
, then click the Sign In button. 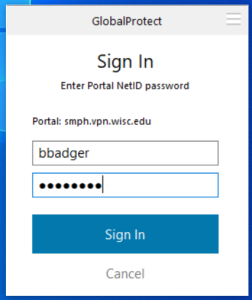
...
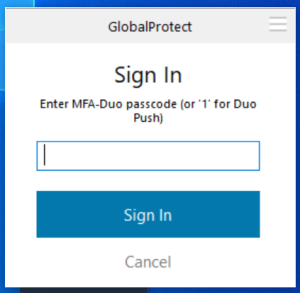
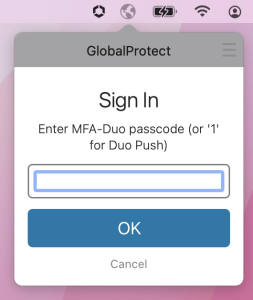
D Enter '1' to send
...
a Duo Push to device, or enter
...
a MFA-DUO passcode generated from your device app.
...
E
...
GlobalProtect VPN should indicate that it is now Connected to the VPN portal.