...
- The "Alert Enabled?" checkbox must be checked (otherwise the email will not generate)
- An internal name for the email must be supplied (needed just to save the email alert)
- A subject line for the email must be entered (otherwise email will have 'No Subject'; emails that lack subjects sometimes gets automatically moved to the Spam folder, so this is not desired)
- Text for the body of the email must be entered (otherwise what is the point of this email alert)
- At least one recipient must be specified (otherwise no one will receive the email)
- A trigger mechanism has to be supplied (otherwise the email will never be sent)
...
- Box # 1: Shows the Emails tab selected.
- Box # 2: Shows the Email that you currently have selected. You can tell which Email is currently selected NOT ONLY based off of the name (match name of Email with "Name" from box # 4), BUT ALSO from the slim green line that appears to the LEFT of the Email name.
- Box # 3: Shows two very important checkboxes that control whether or not (1) the email is active and (2) the email will send automatically and bypass the email queue.
- Alert Enabled Checkbox: Determines whether or not the Email alert is Enabled. If checked, the email is considered Enabled and can be sent. If NOT checked, then the email will not send even if the criteria are met.
- Automatically Send Checkbox: Determines whether or not the Email will go to the Email Queue when it 'triggers' (see the section below for email triggering). If NOT checked, when the email is triggered it will go to the Email Queue and will need to be manually pushed out of the queue by a user. If the checkbox IS checked, then, when triggered, the email will completely skip the email queue and be sent directly to the selected recipients.
- Box # 4: Shows the internal Name of the email alert. This can be changed at any time without breaking/impacting anything in the system (except for the name of this email alert as it appears in the list of email alerts for the selected Record Type).
- Box # 5: Shows the Request Type. This is only an option on the Grant Requests Record Type; it allows you to choose from Requests (Applications), Granted Requests (Awarded Grants), or Both (Applications and Fully Awarded Grants).
- Box # 6: Shows where you can edit the Subject Line of the email message. Note: This is the ONLY part of the email message where you CANNOT pull in dynamic information (i.e. Project Title from a Grant Application). Therefore, subject lines should be as generic as possible.
- Box # 7: Shows where the text for the Body of the Email is configured. To edit the text here, click on the button "Edit Text." Editing Email body text is the same as editing text in Forms. See "Editing Text" for more information.
- Box # 8: Shows the Scroll Bar that you can and should use to view more email settings. One needs to scroll down in order to see the additional settings.
- Box # 9: Shows where you can delete this email alert.
- Box # 10: Shows where you can save your work on the email alert. Note: You need to Save this record after making any changes in order for those changes to be applied; if you close this page/switch to another after making changes without previously clicking on the Save button, all unsaved changes will be discarded.
- Box # 11: Shows where you can create a New Email Alert for this given Record Type (in this screenshot, Grant Requests).
...
- Box # 1: Show the Test Alert box. This allows you to enter in an internal ID for a record of the same Record Type as the email alert.
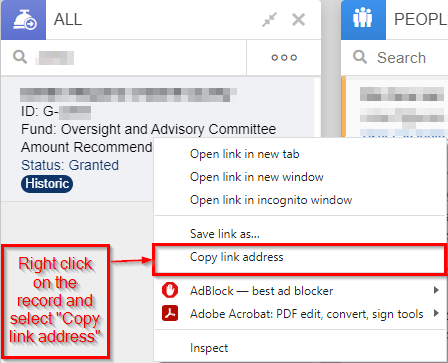
- To obtain an ID for testing, right-click on a record in the system that has the same Record Type as the email alert (in this example, we're looking at Grant Request emails so the record here is a Grant Request – in this specific case a full Grant). When you right-click a record, a small menu comes up with options such as "Open link in new tab." Select the option "Copy link address:"
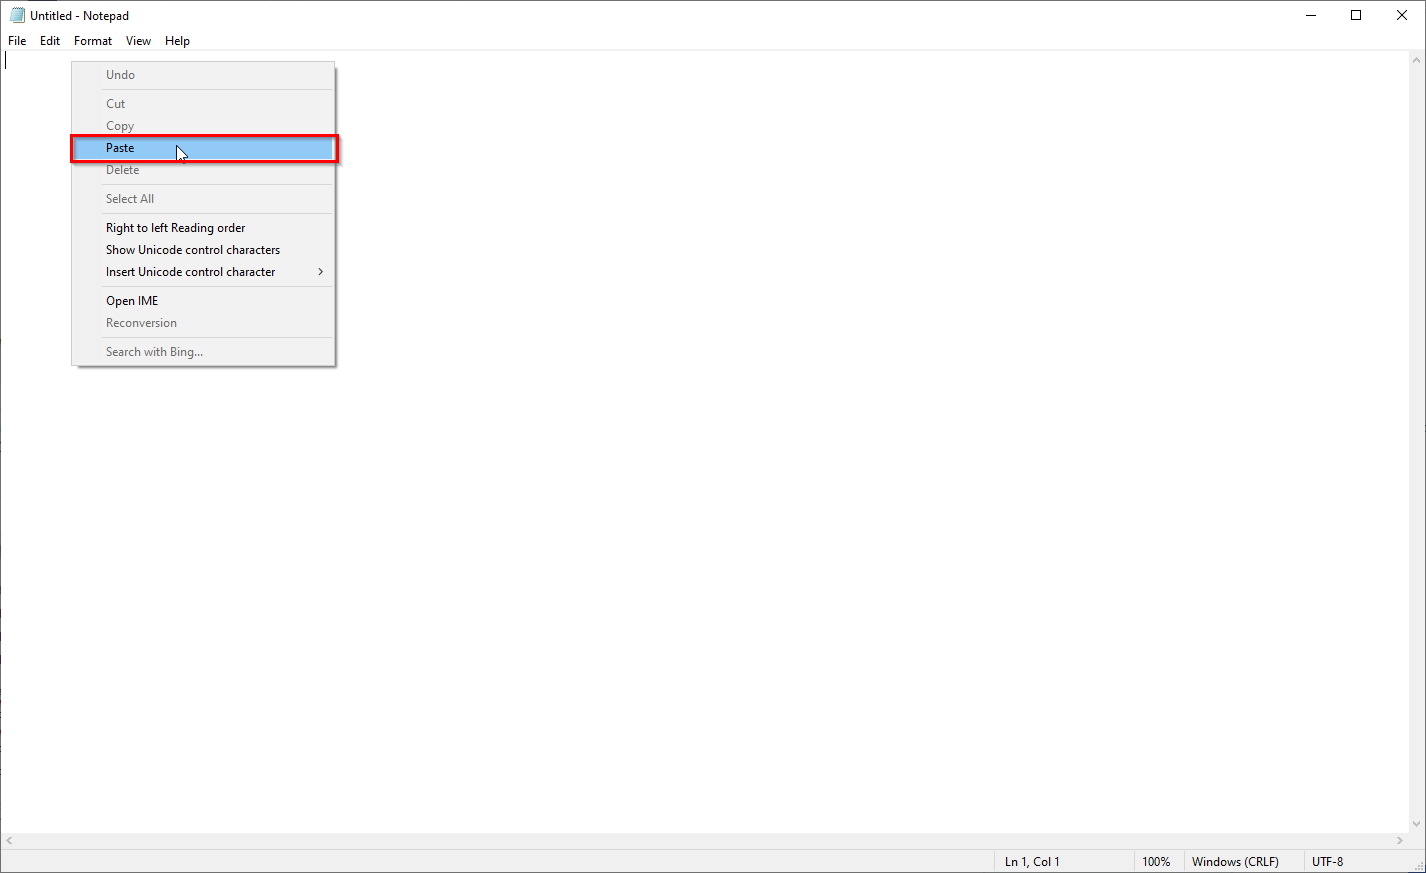
- Once you've done so, open up a Notepad page (or a Notepad++ page if you use that application). In your Notepad page, paste the link that you just copied:
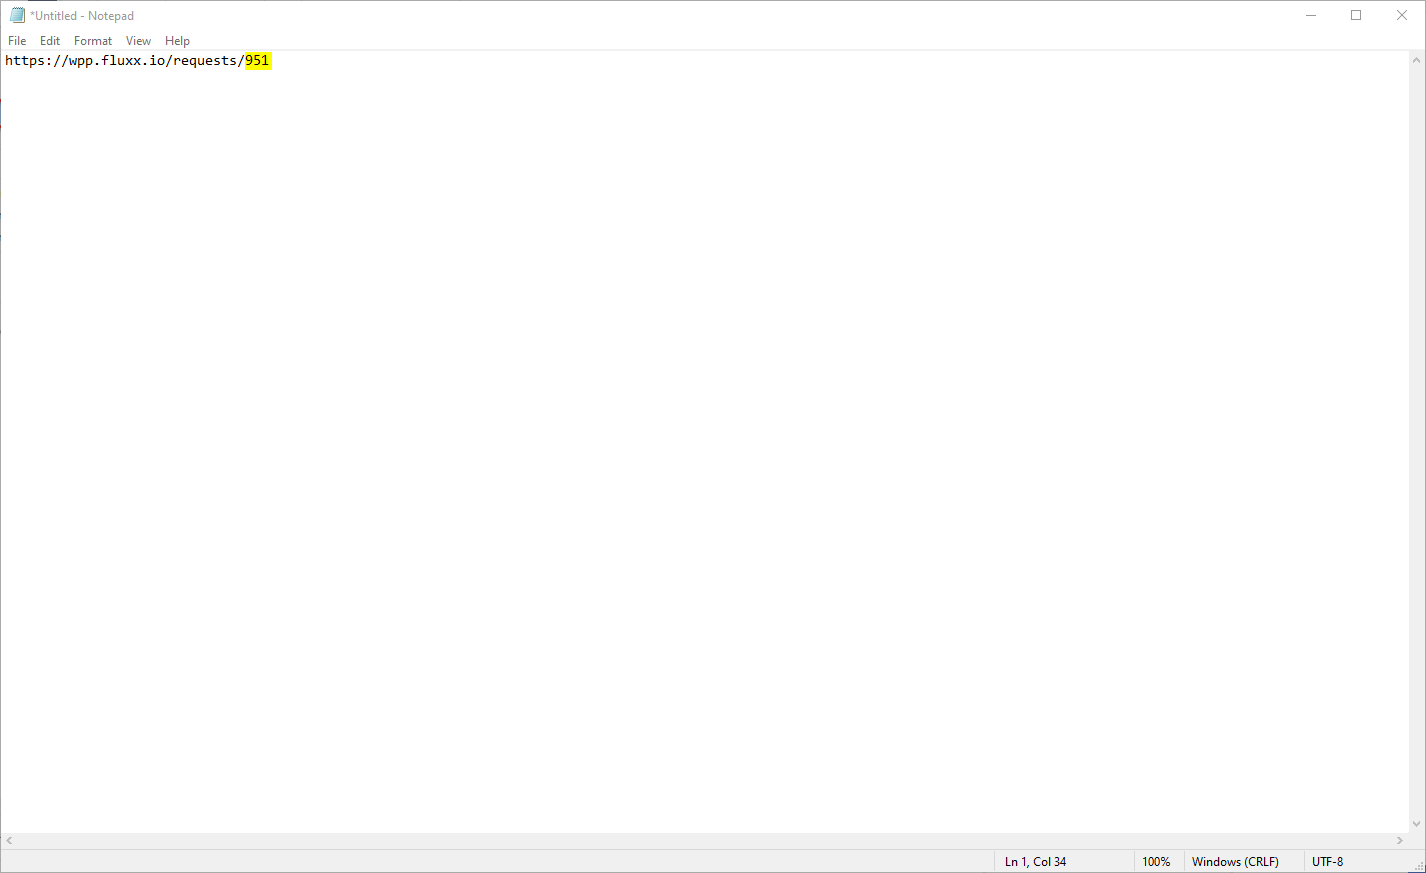
- The link should look something like the screenshot found below. The number after the last forward slash ("/") (also highlighted in the screenshot below) represent the Internal ID that you can post into this window to test the alert. Copy the numbers after the last forward slash.
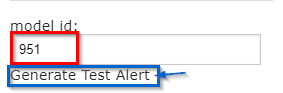
- Now to generate the text test alert. Paste the numbers obtained from the last step in the "model id:" field, then click on the button that says "Generate Test Alert."
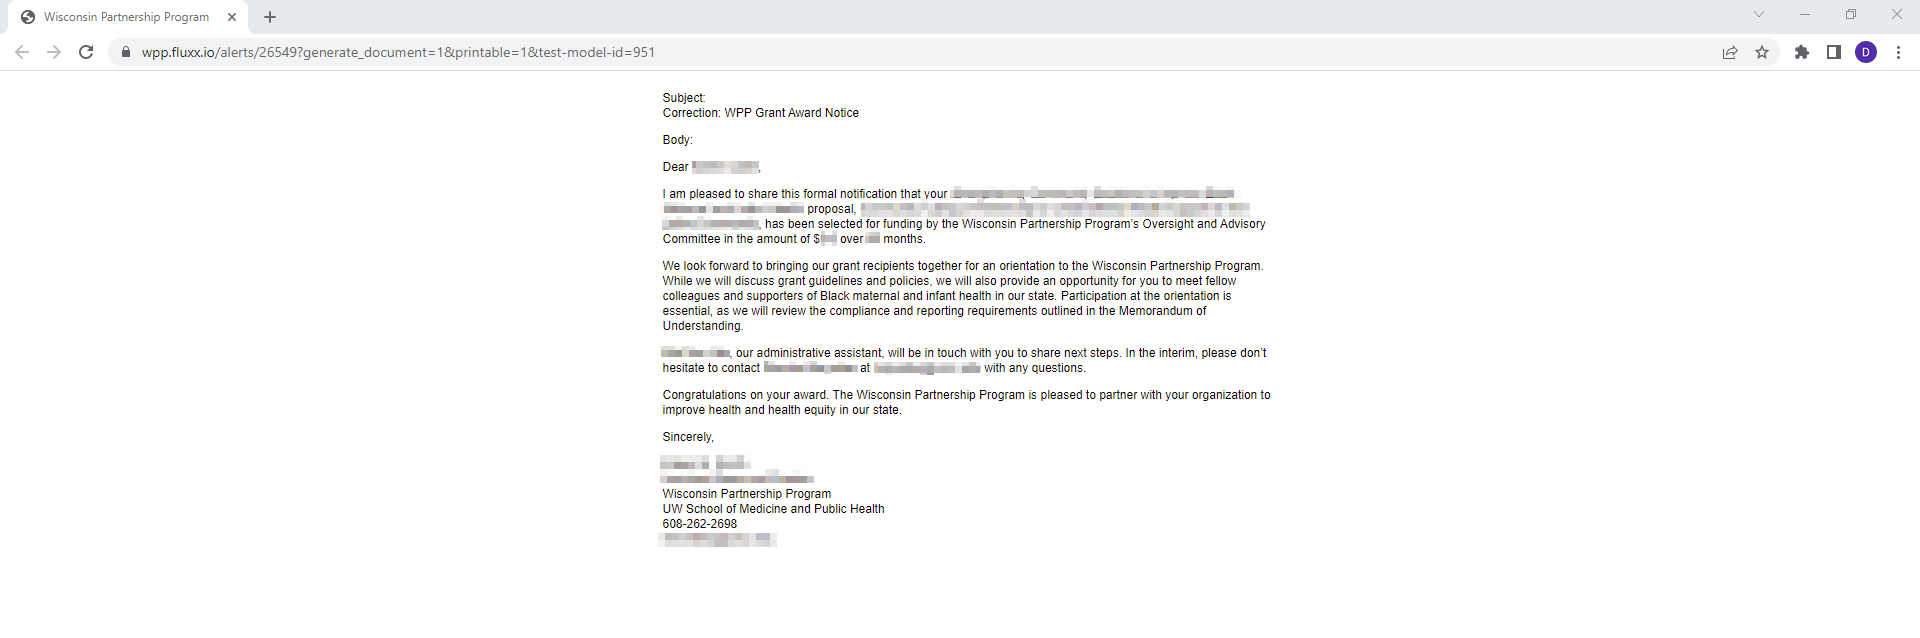
- Clicking "Generate Test Alert" will result in a new tab opening up on your internet browser with the text of the email as it would be configured for the record supplied in "model id:" – see the screenshot below to see what that test alert looks like:
- To obtain an ID for testing, right-click on a record in the system that has the same Record Type as the email alert (in this example, we're looking at Grant Request emails so the record here is a Grant Request – in this specific case a full Grant). When you right-click a record, a small menu comes up with options such as "Open link in new tab." Select the option "Copy link address:"
- Box # 2: Shows the "Switch to Advanced Filters" toggle option. Like with Cards, emails can be set up with Filters. These Filters work in conjunction with the Trigger settings to determine if the record in question merits the Email Alert. Basically, in order for a record to qualify for the email alert, it has to qualify for both the trigger settings AS WELL AS the filters. Switching to Advanced filters allows for the "Advanced Search" window to appear and then allows you to use Advanced Filters criteria and logic (i.e. using nested groupings, switching between "AND"/"OR" logic, and toggling "NOT" clauses).
- Box # 3: Shows the Basic Filters that are available for selection. These filters will still appear when advanced filters are being used, but both should NOT be used in conjunction. Use EITHER the basic filters OR the advanced filters, not both.
...